Fabric iPad Cover Tutorial
If you've splurged for the iPad, you need something to protect it! Why not dress it up with pretty fabric? You can even use leftover scraps to make this simple iPad notebook cover. Let the Fabric iPad Cover Tutorial show you how to make this crafty gadget case.

Materials:
- 2” piece of Velcro
- Fabric for outside pouch - you will need 2 pieces that are 10” x 12” (we will be cutting them down after we quilt them – I like to leave a little room for quilting shrinkage)
- Fabric for fold-over flap – you will need two pieces of your outside fabric that are 5” x 5”
- Fabric for lining – you will need 2 pieces that are 9.5” x 11.5”
- Batting – you will need 2 pieces that are 10” x 12” for the outside pouch, 2 pieces that are 9.5” x 11.5” for the lining, and one piece that is 5” x 5” for the fold-over flap.
- Lightweight to medium interfacing – 2 pieces that are 10” x 12”
- Matching thread (I used an off-white for the whole thing)
- 1/4” seam allowance unless otherwise specified.
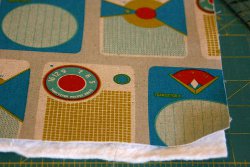
Fabrics:
I went with Ruby Star Rising’s Transistor Radio fabric and a matching Kona cotton. You could also also use a patchwork block for the front and a printed fabric for the back.
Steps:
- Cut out all your fabric pieces. If you are using a directional print as your outside fabric pay attention to which way the print is facing as you sew things together (especially the fold-over flap).
- Iron your interfacing to the wrong side of both pieces of your outside fabric.
- Take your batting pieces that are 10” x 12” and position them under your {interfaced} outside fabric pieces. Pin in a couple spots to ensure the fabric doesn’t slip.
- Take your 5" x 5" batting and do the same with one of the pieces of your fold-over flap.
- Using your walking foot (a regular foot would be fine – a walking foot just helps all layers glide through the machine more smoothly), quilt lines horizontally across the entire fabric piece.
- I just started at one end of the fabric and sewed lines across the entire width using my walking foot as a guide for the next line.
- Quilt both outside pieces as well as the one piece of the fold-over flap that you attached the batting to. * You could do any type of quilting here – stippling, loops, diagonal quilting – I just chose to go with lines)


- Trim quilted pieces to 9.5” x 11.5”.
- Pin quilted fabric pieces right sides together (taking care if you are using a directional print to make sure it’s facing the right way) and sew along the two sides and bottom - re-enforcing the starting and ending points.
- Leave top open.

- Turn right sides out through top opening and use a chopstick (or a turning tool) to gently push out the corners.
- Place one piece of your velcro about 2" from the bottom and in the center of your flap piece - the one that wasn't quilted.
- Topstitch velcro in place.

- Place flap pieces right sides together and stitch along both sides and bottom, leaving top open. Turn right side out and use chopstick to gently push corners out.

- Pin fold-over flap to the top edge of the quilted fabric pouch. You can choose either side to be the front at this point - Make sure flap is lined up with middle of the pouch. Baste/sew using a 1/4” seam allowance.

- Place lining pieces right sides together. Take 9.5” x 11.5” batting pieces and place one on the top and one on the bottom of the lining pieces (creating a batting sandwich with the lining in the middle).
- Sew along sides and bottom of sandwich BUT leave a 6”-7” opening along the bottom {for tuning cover right side out when it is all sewn together}.
- Do not turn lining right side out.
- Place quilted fabric pouch inside your newly sewn lining pouch – right sides together.

(** there should be batting on the outside but the first time I made this I didn’t use batting in the lining and felt it wasn’t padded enough so I ripped it out and added batting but forgot to take a picture)


- Match up side seams and pin and then pin along the top edge at regular intervals.
- Sew along the top edge with your walking foot using a 1/2” seam allowance. Go slowly since you are going through lots of layers...you may want to go around twice for added stability.


- Pull quilted pouch out through opening in lining bottom.

- Turn pouch right sides out and sew up hole in lining bottom.

- Push lining into outside pouch and iron along top opening.

- Topstitch around the entire top opening.


- Fold over your flap and decide how tight you want your pouch to close - mark where you want your velcro to be on the front of your pouch.
- Topstitch velcro.

Inside view:

You’re done! Enjoy your new iPad cover!


* I changed it just a little so that you don't sew your second piece of velcro until the very end - this seems to help you line it up better and make sure the closure is secure.
Read NextDinosaur Bag
Your Recently Viewed Projects
Thanks for your comment. Don't forget to share!
hillarythomas
Jul 03, 2013
I am planning to make my own ipad case exactly like this unique one. I will be using satin inside and printed cotton in the outside with the design exactly what is shown at http://www.kekacase.com/designer-cases/barbara-johansen-newman.html.
Report Inappropriate Comment
Are you sure you would like to report this comment? It will be flagged for our moderators to take action.
Thank you for taking the time to improve the content on our site.