Painted Wall Letters
Hi, I’m Wendy with Bobs and Bits. I create handpainted furniture, art and accessories for children and was asked to share a simple project with you. I decided upon painted wall letters because they are such a popular item for kids’ rooms (from infants to teens) and are surprisingly easy and economical to make. They also make thoughtful gifts – I even made one for my son’s preschool teacher (which he helped me paint). The good thing about making things yourself is that you can design exactly what you want.
Materials needed:
- wooden letters (style and size of your choice)
- sandpaper
- primer
- acrylic paint
- sealer
- round paint brush
- flat paint brush
- ruler
- pencil
- eraser

Before you begin
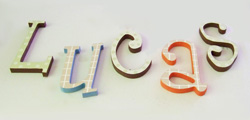
Purchase letters of your choice. They are available at craft stores and in a wider variety of fonts online. Either solid wood or MDF will work for this project. Choose a larger size letter (maybe 12”) for a single initial and smaller sizes for a full name (6”-9”). I like to get color inspiration from existing bedding and often will take swatches or photos with me to the store to purchase matching paints.
To begin
Begin by lightly sanding the letters, especially around the edges, to ensure they are smooth and splinter free. Next, brush on primer and let dry. Apply main color paint to letters – hint, they don’t have to all be the same – try mixing it up a bit. It will probably take two coats. If you’re feeling adventurous, try painting the sides of the letters a different color. This does require a little more skill, but don’t worry it you’re not up to it. A solid letter will still look great.
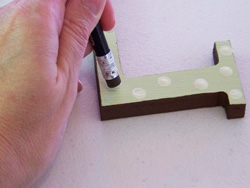
Once they are dry, the real fun begins! I have simple tricks for polka dots, dots, stripes or checks. Polka dots are the easiest, so let’s start with that. Dip a pencil eraser into the color of your choice, then press lightly onto the letter. Continue randomly applying polka dots. Don’t worry if it doesn’t come out perfectly – once it’s dry, you can touch them up. If you’d like smaller dots, try using the end of a knitting needle instead of the eraser. You could use both sizes on the same letter if you’d like.
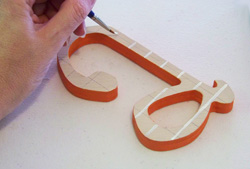
Stripes and checks require a little more patience but are still relatively easy to do. Pinstripes are much easier than a thicker stripe and are achieved by using a small round brush. The trick is not to make them too perfect – adding a slight wiggle to the lines will make it seem intentional (rather than a mistake). Stripes can be either vertical or horizontal and a checked pattern is just a combination of vertical and horizontal stripes. Always measure stripes and checks and draw onto letters with a pencil prior to painting to prevent goof ups.
Try mixing polka dots, dots, stripes and checks for a fun look with lots of variety. You can make each letter the same if you like simplicity, but a variety of colors and patterns usually adds more interest.
Once the letters are completely dry, seal them for protection (and a bit of shine) with a clear acrylic or polyurethane – either brushing it on or spraying it on will work. Depending on the size and style of letters, they can be hung with ribbons, sawtooth hangers or a simple dab of picture hanging gum.
Voila! You’re done. Now wasn’t that easy?
More Wall Letter Projects:
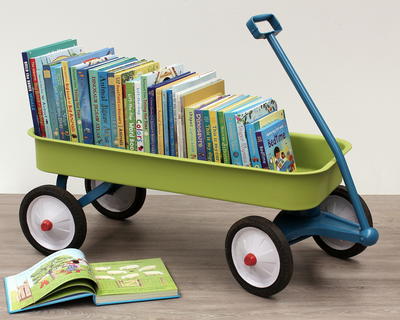
Read NextRadio Flyer Book Wagon