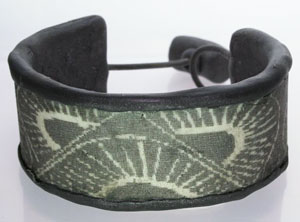
Polymer Clay Cuff and ExtravOrganza Bracelet
Create this great polymer bracelet from Jacquard Products using liquid polymer clay, rubber stamps and ink pads and some other materials. In nine steps you can have this chunky bracelet to call your own. Make your own jewelry and show it off.
Materials:
- Pattern of choice
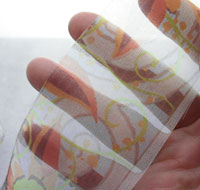
- Jacquard ExtravOrganza
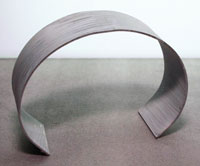
- Blank Cuff Bracelet
- Gesso
- Sobo Glue (or similar glue)
- Makins' Extractor small triangle disc
- Liquid Polymer Clay (Kato or Fimo)
- Rubber Stamps and Ink Pads
- Conditioned Cernit Polymer Clay, any color (I used white & brown)
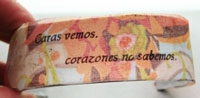
- Mirrored Photocopied (Inkjet) Words of your choice
- Work surface
- Blade or knife
- Rub n' Buff Antique Gold
Steps:
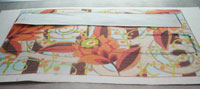
1. Copy onto the Jacquard ExtravOrganza a print of your choice.
2. Cover your cuff armature with a thin coat of gesso paint. Let dry.
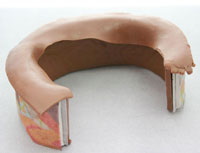
3. Cover the cuff armature with a thin coat Sobo glue, let dry a few minutes. Take a long strip of condition polymer clay: medium thickness, number 2 or 3 setting on pasta machine (one being thickest). Place on top of the cuff armature and cut sides and ends to fit top only, using a blade or sharp knife. Stamp and/or place photocopied words onto the clay and bake for 15 minutes to set inks. Let Cool.

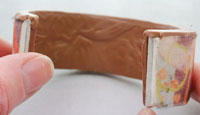
4. Use the template to mark the cuff measurement onto the ExtravOrganza print and cut out. Set aside.
5. After clay has cooled, place a thin layer of liquid clay over the cured clay. Then place the cut out strip of Extravorganza on top and add a very small amount of liquid clay over it. If you use too much liquid clay under or over it will bubble. Less is better. Bake for 10 minutes, let cool. If the temperature is too high it will also cause bubbling.
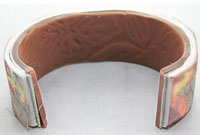
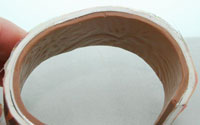
6. To fit the bottom, take another long strip of polymer clay and fit it into the inside cuff. Use small amount of liquid polymer clay or sobo glue to hold while baking. Cut to fit as the top. Bake 15 minutes, let cool. If clay separates from the cuff take it out of the oven while still warm, with an oven mit, and hold it in shape for a few minutes. Let cool. Optional: texture or initial inside of cuff before baking.
7. To fit the sides of the cuff, do one side at a time to avoid indentations from the armature while baking. Cover the side with a thin coat of liquid polymer clay. Take a long slim strip of clay, fit and cut it to the curvature of the armature. Blend the inside of the raw clay into the baked clay. If the clay is difficult to move place a little liquid polymer clay on your finger. The edges can be carefully formed to the sides or bring the clay up onto the top and shape with your fingers and cut off excess clay. The sides can be textured if desired. Repeat for other side, including another thin coat of liquid polymer clay. At each point, add a thin coat of liquid polymer clay over the top of the bracelet. Bake 10 minutes, let cool.
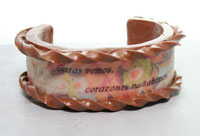
8. You will notice the ExtravOrganza fraying. There are two ways to avoid this: Bring the clay up and onto the top of the bracelet, as mentioned in Step 6, or place a rope or ornamental clay ribbon onto the top of the bracelet. Avoid pulling it off. For this project, a Makin's Extruder with a small triangle disc was used and then twisted. Blend into each end, on each side (four all together), to fit under cap in next step. Hold in place with liquid polymer clay.
9. To finish, cap off the ends following instructions for sides and tuck the decorative top under the caps to finish. Bake 45 minutes. (Photo10) Let cool before applying finish. The all over gold finish was done with Rub n' Buff Antique Gold.
Let dry over night.