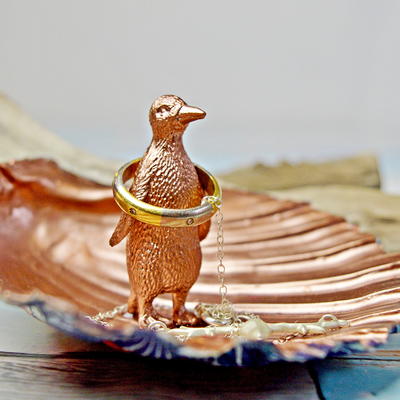
Filigree Brass Rod and Bracelet
This lovely brass and Friendly Plastic bracelet from AMACO looks like abalone shell but for a fraction of the price. Some experience with soldering is helpful but not required in making this bracelet. Just follow the step by step instructions.

Materials:
- WireForm® Thin Brass Rods (1 tube)
- 4 brass jump rings
- Friendly Plastic: Metallic Print Pearl, metallic gold, metallic silver, avocado
- Friendly Plastic Comb
- Brass craft wire 20 gauge
- 6 Clear crystal glass cubes
- Glossy Accents (Ranger Industries)
- Petroleum jelly
- Solder
- Flux
- Soldering Iron
- Hobby/Jewelry vise (purchased at Harbor Freight)
- Pliers
- Round nose jewelry pliers
- Metal file (purchased at a hardware store)
- Small circle cutters (Kemper cutters 1/8” and 1/4”)
- Griddle
- Non-stick craft sheet (Ranger Industries)
- Non-stick cookie sheet (fits inside griddle)
- Oven mits
- Bowl of cold water
Instructions:
NOTE: Because of working with hot surfaces this project is not recommended for young children. Use caution when working with materials to avoid burns or injury.
Basics of soldering: Soldering is easy once you get the hang of it. Lightly sand the contact points of the rods with the metal file. Add flux to soldering points.
You may want to practice with a few scrap pieces of metal rods first. Any lumpy solder points can be sanded smooth with metal file.
(See diagram) Create a loop in the middle of an 8” brass rod. Gently massage one side to make a leaf. Form a loop at the bottom. Repeat for other side.
Place in vise with loops facing up. Sand contact points with metal file. Add flux. Solder.
Create a coil from a brass rod. Do not trim off extra rod. Place the large focal piece into the vise, place the coil where desired and solder. Trim off excess rod and file smooth.
Repeat this with smaller coil. (note: rod is soldered to the back of the base leaf shape.)
For the side pieces, repeat these steps using a 4” long rods. No design in center. Create two.
Hints and tips for working with Friendly Plastic: Prepare the griddle by placing a non-stick baking sheet onto it. I also set a non-stick craft sheet on top of this. This makes it easy to pick up the piece with pliers and set it in the cold water without touching it. Coat fingers and tools with a light application of petroleum jelly to prevent the plastic from sticking. Repeat as necessary.
The warmer the plastic gets, the more gooey it gets. You will quickly learn how to use water and heat to control the softness of the plastic. You may want to practice first.
To touch up areas, simply heat with a heat gun for a few seconds to soften the plastic.
Keep discarded plastic as it can re-heated and used in several other projects. Nothing goes to waste.
Pre-heat griddle to 250-260 degrees
Lay 3/4” wide strip metallic swirl pearl on griddle and heat just long enough to make pliable. Gently remove softened plastic and press upwards into the desired area of focal piece. Don’t worry about some of the plastic going into unwanted areas. Cool in water.
Gently pop out and trim desired shape with scissors.
Cut 1/4” strips of all colors. Place a non-stick sheet onto griddle. Lay a piece of gold, followed by avocado, silver. Repeat the pattern 3 times.
Remove from heat. With the comb bristles flat on your work surface drag thru design to create desired pattern. Place back onto griddle to bind colors back together. Allow to cool in water just long enough for you to easily remove it from the craft sheet. Press this piece into the desired area of focal pendant. Cool entire piece in water and trim with scissors.
Pop both pieces back into place. Soften gold and press to back gold side up to finish back. Trim as desired.
Add patterned Friendly Plastic to smaller side designs.
When cooled, apply a coat of glossy accents to the top. Allow to dry and repeat adding several layers creating the bauble effect.
Attach pieces together with jump rings.
Add a coil to bottom and an “s” loop for the hook.
Insert a wire into crystal glass beads. Loop each end. Attach to either side of center focal piece.
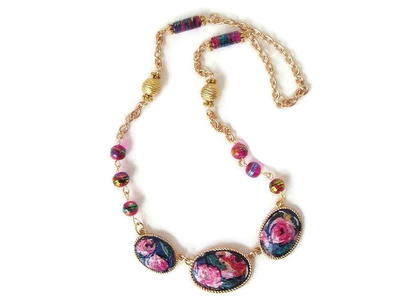
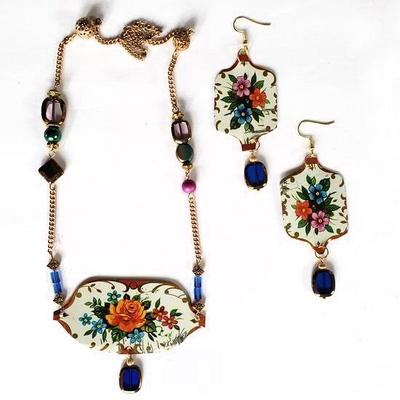
Read NextRepurposed Tin Necklace Set
Your Recently Viewed Projects
Thanks for your comment. Don't forget to share!
Report Inappropriate Comment
Are you sure you would like to report this comment? It will be flagged for our moderators to take action.
Thank you for taking the time to improve the content on our site.