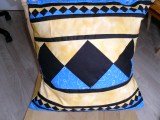
Seminole Patchwork Cushion Cover
Learn how to sew a pillow cover with these free patchwork sewing patterns from Rose Smith. The Seminole patchwork cushion cover comes from a traditional Native American design.

Materials:
- Blue fabric: 1 strip 1.1/2" by width of fabric (usually about 42"), 1 strip 2.1/2" by width of fabric, 2 squares 4.7/8"
- Yellow fabric: 1 strip 1.1/2" by width of fabric, 1 strip 2.1/2" by width of fabric, 1 strip 17.1/2" by width of fabric, 2 squares 4.7/8"
- Black fabric: 1 strip 1.1/4" by width of fabric, 3 strips 1" by width of fabric, 1 strip 2.1/2" by width of fabric, 3 squares 4.1/2"
- Thread to match (I used black)
- Rotary cutter, mat and ruler help a lot but are not essential
This makes an 18" cushion cover with an envelope opening at the back.
Instructions:
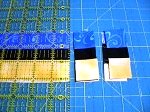
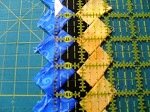
- Cut strips of fabric across the width of the fabric: they will be about 42" long. For this patchwork cushion I used a 1.1/2" strip of blue and yellow and a 1.1/4" strip of black fabric. Sew the 3 strips together along the length with the black in the middle. Press the seam allowances all in the same direction. This makes it easier to match seams when sewing the smaller strips together.

- Cut across the width of this strip at 1.1/4" intervals. These patchwork pieces will be sewn together offset so that the top of the black of one strip lies against the bottom of the black of the strip to the left of it.
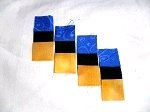
- With right sides together, place 2 pieces with the black/yellow seam of one matching against the black/blue seam of the other. To avoid bulky seams, make sure that the seam allowances are facing in opposite directions from each other. Using chain sewing (click on sewing tips if you've not come across this before) sew the seminole patchwork pieces in pairs, then sew the pairs together and so on until you have joined all the pieces together in one long strip. The strip should be about 39" long.Press.
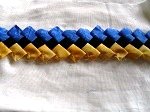
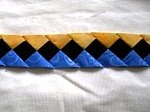
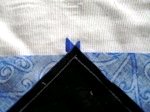
- You now need to trim the edges of this strip to 1/4" from the corners of the black squares. The easiest way that I have found is to line up your ruler with the black corners on the line 1/4" from the edge and then cut along the edge of the ruler. Do this on both sides of the strip.

- The seminole patchwork strip that you have created looks stunning on its own, but it is safest to add a border strip above and below to hold all the triangles in place. I used a 1" strip of black fabric which gives a 1/2" border to the seminole patchwork strip. When sewing the border to the strip, it is easiest to sew with the black strip underneath and the patchwork strip on top so that you can see that your stitching is going just outside the black squares as you sew the seam. That's the seminole patchwork part complete. You will need to cut this into two 17.1/2" strips for the cushion cover.

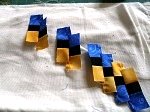
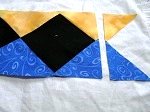
- The middle of the patchwork cushion cover is a larger strip of the same pattern. For this you will need three 4.1/2" black squares and two 4.7/8" squares each of blue and yellow. Cut the yellow and blue squares along the diagonal to create triangles and place them as shown with the black squares on point (placed diagonally) and the blue triangles above, yellow triangles below.
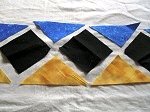

- Sew a triangle to each side of the black square as shown above right, add the triangles at each end. When adding the triangles, begin and end sewing 1/4" from the edge so that the stitching from 2 seams just meets at the corner of the square as shown in the photo on the right. Trim the tips.
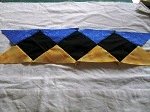
- Trim the edges of the strip and add a 1" strip of black above and below the patchwork strip as a border. This panel is about 17.1/2" wide so will give a good fit with an 18" cushion pad. Making the cushion cover slightly smaller than the cushion pad size gives a nice plump cushion when complete.
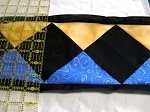
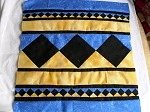
- Add a 2.1/2" strip (17.1/2" long) of yellow fabric above and below the patchwork strip and then add the seminole patchwork strips above and below the yellow strips.
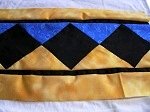
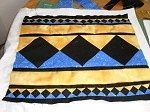
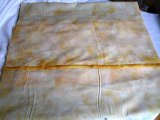
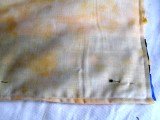
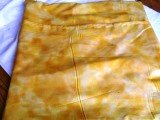
- Add a 2.1/2" strip of blue fabric at the top and bottom and that's the front of the cushion cover complete. For the cushion back cut a strip of yellow fabric 17.1/2" wide by the width of the fabric (about 42"). Turn under a double hem on each of the short edges so that the raw edges are hidden and slipstitch in place - or machine stitch if you prefer.

- Lay the cushion backing down with right side up and place the seminole patchwork panel on top, also with right side up. Fold up the backing over the top of the patchwork panel and then fold the other side of the backing down over the patchwork panel.
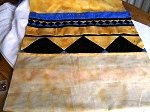
- There should be an overlap of about 8". This will create the envelope to turn the patchwork cover inside out and to insert the cushion pad. Pin carefully, making sure that you have all the layers of fabric together at the edges, and sew all round the edge of the square. I tend to use a 1/2" seam allowance to make sure that all the layers are sewn.
- Turn the patchwork cushion cover inside out through the envelope at the back, gently push out the corners and insert a cushion pad.
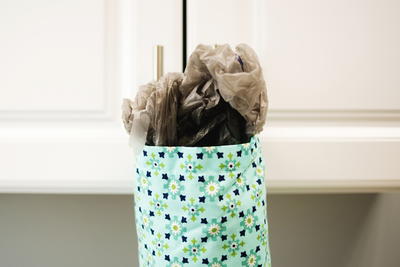
Read NextFat Quarter Plastic Bag Dispenser
Your Recently Viewed Projects
Thanks for your comment. Don't forget to share!
Report Inappropriate Comment
Are you sure you would like to report this comment? It will be flagged for our moderators to take action.
Thank you for taking the time to improve the content on our site.