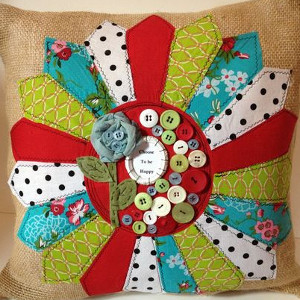
How to Make a Dresden Plate Pillow
Learn how to make a pillow stand out with a few fabric scraps and some buttons. This tutorial will show you How to Make a Dresden Plate Pillow. These pillows are quickly growing in popularity, so you might want to start now to really "wow" your friends. These simple sewing projects can be easily customizable. Choose your favorite color schemes and patterns, find cute "accessories" to embellish them with, and maybe pick out a few special words to make your pillow truly personal.

Instructions:
- Using Microsoft word and the shapes tool, choose a shape and print it out onto cardstock to use as a pattern for tracing shapes onto the fused fabrics. There are special rulers and other quilting tools you can use for this step as well.
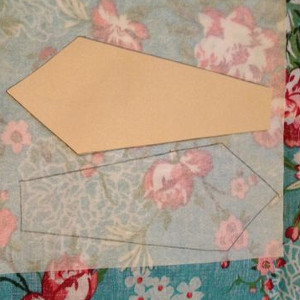
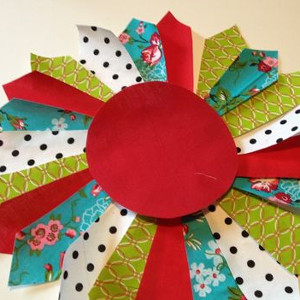
- After you have all your shapes traced, cut them out and arrange them in a repeating pattern, overlapping them slightly. A Dresden plate needs a center so trace a large circle onto some fused fabric and cut it out.
- Use a decorative pillow in a size 16" x 16" and cut two pieces measuring 17" x 17" which will give you 1/2" seam allowance. Now its time to begin peeling the paper backing away and arranging the pieces on the burlap.
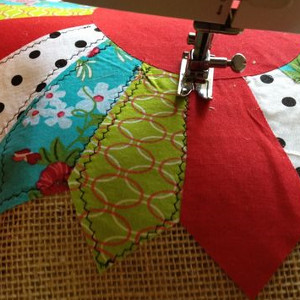
- Once the pattern is laid out, you can sew the edges down using your sewing machine, thread and a straight stitch. Note that most often, quilters finish raw edges with seams but you can leave yours raw for this particular pillow project.
- Once your pieces are sewn in place, the fun part begins... Embellishing!
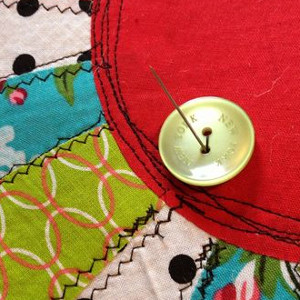
- Start with buttons.

- But don't stop there. Print a sentiment onto inkjet cotton fabric to showcase in a tiny resin frame.
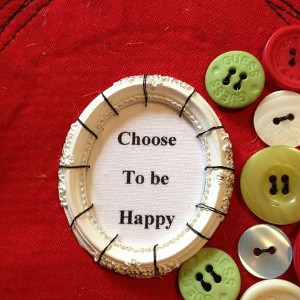
- Use a little tacky glue on the fabric and frame but use a hand sewing needle and thread to attach it as well. Take it just a little further with an organza ribbon flower and felted details.
- Once your details are in place, place the burlap pieces for the front and back of the pillow together and sew the left, top and right sides together, leaving the bottom open for turning. Turn the pillow right sides out and press the seams down with a steam iron.
- Insert the pillow form into the bottom opening and hand sew closed with a whipstitch.
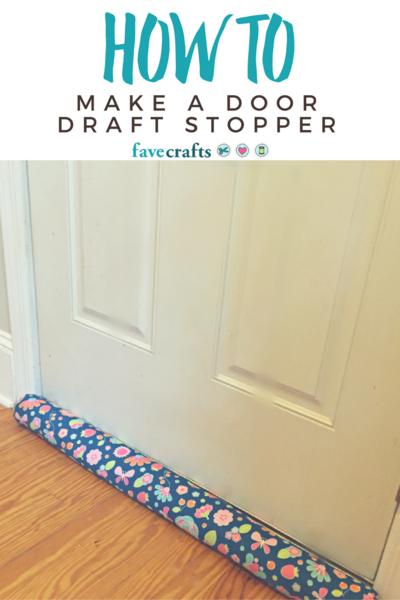
Read NextFat Quarter Plastic Bag Dispenser