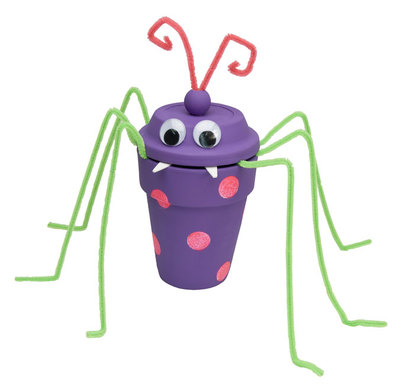
Molded Magic Spider and Pumpkins
This is a great Halloween craft project for kids to get their hands on. Let them help roll and shape the clay in this quick and easy Halloween craft idea. It's cute, festive, and fun for everyone!

Materials:
- Orange air-dry modeling compound
- Pencil
- Scissors
- Wire cutters
- Rolling pin
- White, thick craft glue
- STYROFOAM Brand Foam:
- Balls: 3", two; 2", one
- Air-dry modeling compound, Green
- Two chenille stems, brown
- Optional mini leaf-shaped cookie cutter
- STYROFOAM Brand Foam:
- Ball, 2"
- Air-dry modeling compound: black; white
- Four black chenille stems
- Black plastic-coated paper clip (Optional)
- Nylon fishing line (Optional)
Steps:
- Flatten one side of each foam ball against hard surface.
- When working with modeling compound ("clay"), use rolling pin to roll circles to 1/8" thickness and diameter indicated in individual instructions. Turn clay often to prevent sticking.
- Center and drape circles over flattened ends of foam balls. Press clay around balls, pressing out air bubbles; cut away excess.
- Gently roll balls against flat surface to smooth away fingerprints.
Pumpkins
- Use thumb to indent center of each foam ball, opposite flat end. Beginning and ending at indentation, wrap chenille stem around center of ball. Press stem into surface, creating segment lines; remove. Repeat twice more, dividing ball into six equal segments. Use fingertip or dull pencil point to enlarge and deepen lines.
- For 3" pumpkins, roll two 3" balls of orange clay to 6" diameter. For 2" pumpkin, roll one 2" ball to 4" diameter. Drape circles over balls as described in General Instructions, firmly pressing into indentations.
- Roll small amount green clay to 1/8" thickness. Use cookie cutter or kitchen knife to cut two leaves for each pumpkin. Use end of chenille stem to press vein lines into leaves. For vine, roll small amount green clay between fingers to create very thin 2" long rope; set aside.
- For each stem, use wire cutters to cut two 4" lengths from chenille stem. Fold one length in half. Beginning 1/2" from folded end, wrap stem with second length. Use pencil to poke small hole in top of pumpkin; glue stem into hole. Add leaves and vine as shown. Let pumpkins dry completely.
Spider
- Roll 2" ball of black clay to 4" diameter. Drape circle over ball as described in General Instructions.
- Use wire cutters to cut chenille stems in half. Using photo as placement guide, use pencil to poke four small holes into each side of body. Glue chenille stems into holes. Bend stems to create "knees" and "feet" as shown.
- Roll ten 1/2" balls of black clay. Press eight balls around "feet." Press remaining balls to head for eyes. Roll smaller balls of orange and white clay to create eyes as shown. Roll small amount orange clay between fingers to create thin 3/4"-long log; press to face for smile.
- To suspend spider above pumpkins, use wire cutters to cut paper clip in half. Insert cut ends into top of head to mark placement, then remove. Glue clip ends into holes. Let spider dry completely.
- Cut desired length from fishing line for hanger. Insert line into clip; knot ends to secure.
®™ Trademark of The Dow Chemical Company ("Dow") or an affiliated company of Dow.
For more project ideas, please see styrofoamstyle.com.
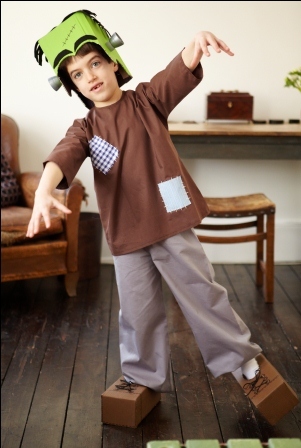
Read NextRetro Robot Costume