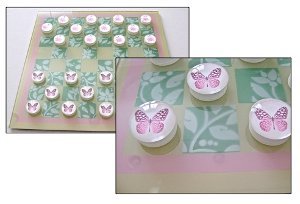
Dress to Impress Embossing Board Purse
This embossing board purse is a great multipurpose decorative craft simple enough for you to make with your child. You can use it as a decoration or put a gift card inside to make a sophisticated present!
Materials:
- Dress To Impress Embossing Board
- 6mm Embossing Tool
- 1 Sheet Of Letter Size Card
- 1 Sheet Of Background Paper
- Drier Sheet Or Candle
- Double Sided Tape Or Adhesive
- Various Pieces Of Card For Embellishments
- Embellishments
- Adhesive
Step 1
Position the base piece of cardstock over the embossing design face down and rub over the back with a dryer sheet. Begin with the tool off the paper in one of the leading channels and begin to follow the design. With this board, you need to first determine which handbag design to work with as there are 2 different ones and follow the relevant channels. You can use the pictures on the instruction sheet as a guide, or alternatively practice first on some scrap cardstock.
Step 2
Pull the ball tool towards you until you feel some resistance; when you do, it usually indicates that the channel has changed
direction. Continue with the embossing until you have completed the entire shape. Once you have completed the design, be
sure to emboss the vertical lines in the centre of the handbag as these form the fold lines and spine of the shape.
Step 3
Carefully cut around the bag shape remembering to cut on the outside of the embossing. You can see how the handbag
shape easily comes together. As well as a handbag, there is also a briefcase shape on the board which is suitabe for a
mens card. From here, you can either just leave the card as it is, or go on to create decorative embellishments.
Step 4
To embellish the front clasp on the bag, take a piece of printed cardstock and lie it face down over the clasp design and emboss. Cut this out and layer it over the original handbag design. Use paper flowers and stickers to finish the handbag off as desired. The small fasteners are embossed in the same colour card as the bag. Stick the clasps into place then take a piece of velcro hook & loop and use as a fastener.
Step 5
To make handles for the bag; Measure 1” in from each end of the fold line at the top of the bag taking a hole punch, punch a
hole big enough to thread some ribbon or cord through and hold in place with brads or washers. Thread through the ribbon, and tie a secure large knot underneath. This will hold the handle in place and create a beautiful finishing touch for the handbag.
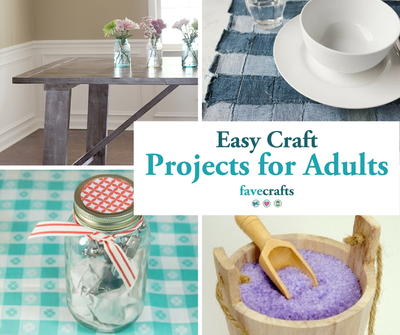
Read Next76 Easy Craft Projects for Adults
Your Recently Viewed Projects
Thanks for your comment. Don't forget to share!
Report Inappropriate Comment
Are you sure you would like to report this comment? It will be flagged for our moderators to take action.
Thank you for taking the time to improve the content on our site.