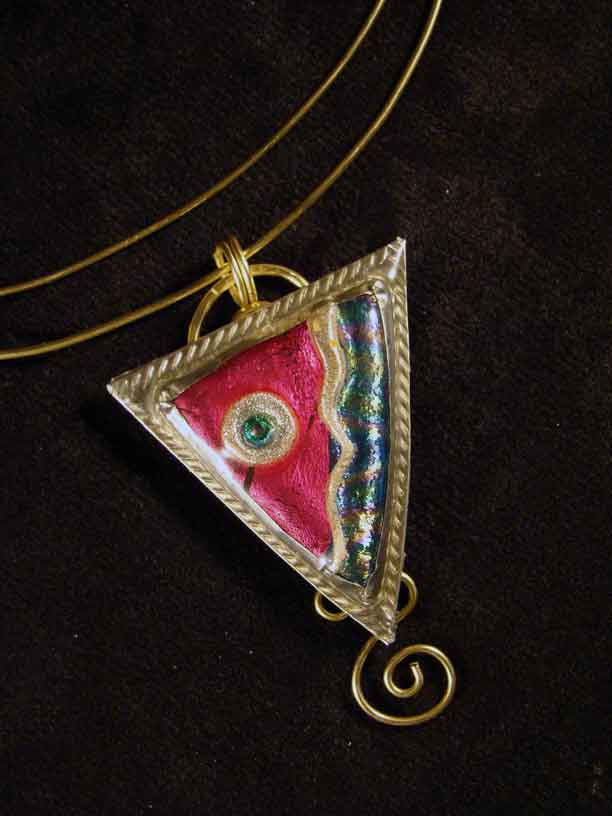
Triangle Brass and Friendly Plastic Pendant
Choose your favorite colors of moldable Friendly Plastic to create a unique triangle pendant set in brass from AMACO. This project teaches you how to do an easy bezel setting around your plastic inset.
Materials:
- Friendly Plastic in colors of choice: (Metallic Print Turquois/Blue, Metallic Solid Light Blue/Black, White, Silver, Fuchsia/Black, Purple/Black, Black
- Beveled Edge Cutters (optional) Set of 4 (part number 12537M)
- ArtEmboss® Pewter Medium
- Glossy Accents (from Ranger Industries)
- Non Stick Craft sheet (Ranger Industries)
- Double stick tape (flat sheet and ¼” wide roll) –ThermOWeb
- Heavy Cardstock
- Wooden Stylus (or use the one that comes with the ArtEmboss Pewter)
- Griddle or electric skillet (pre-heated to 250 degrees)
- Non-stick cookie sheet
- Plastic ruler
- Utility knife.
- Scissors
- Bowl of cold water
- Petroleum jelly
Hints and tips for working with Friendly Plastic
Prepare the griddle by placing a non-stick baking sheet onto it. I also set a non-stick craft sheet on top of this. This makes it easy to pick up the piece with pliers and set it in the cold water without touching it. Coat fingers and tools with a light application of petroleum jelly to prevent the plastic from sticking. Repeat as necessary.
The warmer the plastic gets, the more gooey it gets. You will quickly learn how to use water and heat to control the softness of the plastic. You may want to practice first. To touch up areas, simply heat with a heat gun for a few seconds to soften the plastic. Keep discarded plastic as it can re-heated and used in several other projects. Nothing goes to waste.
Instructions:
Pre-heat griddle to 250-260 degrees
Center medallion:
Working on a 4” x 4” section of craft sheet, melt a square of white. Cut purple, silver, fuchsia into various widths and apply as desired to white. Coat circle cutter with petroleum jelly and press into design where desired. Remove sheet from heat. Place in water to cool. Remove cutter. If necessary trim with scissors.
Black/White stripe: Cut black and white strips in half width wise. Cut 1/4” strips of black and white using ruler and utility knife. Set black strip onto sheet to soften. Once softened add a white strip pushing against the black. Repeat this step alternating black and white. Finish with white. Cool in water. Cut a 1/4” wide strip 1” long width wise.
Soften a 1 1/2” x 1 3/4 piece of metallic light blue. Add circle medallion in center and black/white strip to bottom. Allow to set lightly but not totally melt into blue. Cool.
Soften an additional piece of metallic light blue as above. Lightly cool and apply to back for a double thickness. Cool both pieces.
Apply Glossy Accents in a thin layer to the top of piece. Allow to dry. Repeat adding several layers allowing to dry between layers.
Making the bezel: Cut a strip of pewter 1/4” wide. Wrap 1/4” strip of double stick tape around sides of pendant. Remove backing and wrap pewter strip around pendant. Use wooden stylus to set edges down smooth. Apply double stick tape to the entire back side.
Measure your pendant and add 1/4” to the width and height. Cut this rectangle from cardstock. Cover with double stick tape. Place face down onto metal and cut out leaving a 1/4” border. Clip corners diagonally. Fold metal to opposite side. Smooth with stylus.
Cut two strips of metal 2” x 1/2. Apply tape to one piece. Remove backing and place second piece on top, creating double thickness. Trace the pattern with wooden stylus and cut out. Apply tape to tabs at bottom. Fold bezel around stylus.
Apply tape to back of metal pendant. Press bezel to top back of pendant. Press to metal and cut out flush. Smooth edges with wooden stylus.
Remove backing from plastic focal piece. Press to metal pendant in center.
Add to metal choker or chain as desired.