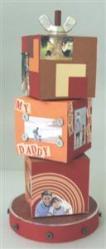
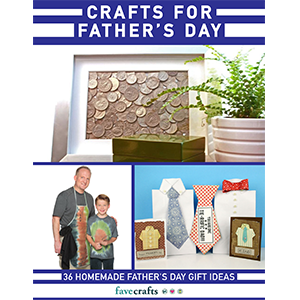
Photo Cube for Dad
Create a photo cube tower for Dad to show him how special he is. Mixing scrapbook paper, paint, and photos with a few supplies from the hardware store gives this photo tower a masculine feel. Dad will love this kid-friendly craft project from FloraCraft.

Materials:
- Three 3” STYROFOAM™ cubes
- 6” STYROFOAM™ disc
- Styro Glue®
- 12“ x 3/8” wooden dowel
- Coordinating scrapbooking papers (3 or 4 colors/styles)
- Letter stickers or stamps
- Paint (color to coordinate with papers)
- Flat wide-head screws or nails
- Metal wing nut (large enough to fit on dowel)
- Thick metal washers (to fit on dowel)
- Small paint brush
- Scissors
- Pencil
Steps:
- Measure to find the center of all three cubes and make a mark at the top and at the bottom of the cube. Using the wooden dowel slowly and carefully push the dowel through one cube at a time, making sure that the dowel is centered and is going straight through the cube. Remove the dowel from the cubes.
- To cover the cubes, glue on 3” x 3” squares of scrapbooking papers, mix and match the colors and styles on the cubes. Cover all six sides of all three cubes. Find the holes on each cube that you made with the dowel and pierce with a pencil, these sides will be left blank as you will not see them once the cubes are stacked.
- Find the center of the disc and make a mark, with the disc laying on the table push the dowel into the disc making sure not to go all the way through, but stop when the dowel hits the table. Glue scrapbooking papers to cover the top and bottom of the disc. Cut a strip of paper to cover the side of the disc. Use a pencil to pierce the hole and glue a washer over the hole. Embellish around the sides of the disc with screws or nails.
- Cut out photos for each cube and glue in place. Embellish each photo by inserting screws or nails into the corners of the photos to look as if they have been attached with the hardware to the cube. Cut out smaller squares of scrapbooking papers and glue around the cubes to add color and dimension. Use the sticker letters or stamps to identify or add comments to your photos.
- Paint the dowel to coordinate with the cubes and let dry. Glue the dowel into the disc and let dry. Slide one cube on the dowel and then add a washer, slide another cube on and add a washer, slide on the last cube and add a washer and the wing nut.
Read Next16 Necktie Crafts Ideas