Easter Party Bags
Why use a cumbersome basket for Easter goodies? Create these simple, lightweight Easter Party Bags with this tutorial from Melony Bradley. Fill these goody bags with candies and treats and use them as cute table decorations!

Materials:
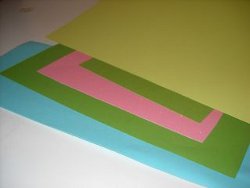
- Pastel and Easter cardstock (scraps or whole sheets)
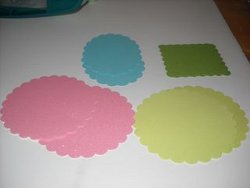
- Large and small decorative whole punches
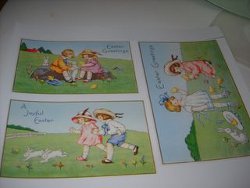
- Vintage or Easter images (download from the internet, such as The Vintage Workshop)
- Glue
- Sewing machine or needle and thread
- Scrap paper
- Sentiment stamp and stamp pad
- Sheet moss, faux pears, faux rhinestones
- Light gauge wire
Instructions:
-
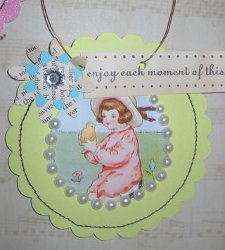
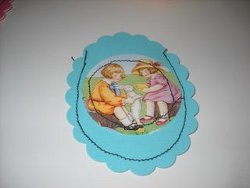
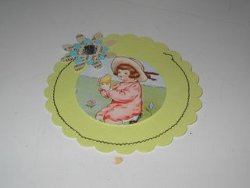
Gather some pastel and eastery looking cardstock. They can be scraps or whole sheets.
-
You will need to punch two shapes, so you have a back and front or each bag.
-
Download some vintage or other easter images from the internet. I purchased these from The Vintage Workshop but there are plenty of options available elsewhere on the internet such as etsy.
-
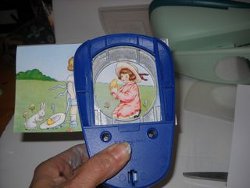
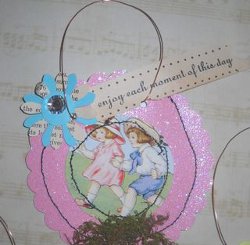
Use Marvy's Super Jumbo Clever Lever Craft Punch to punch certain parts of the images.
-
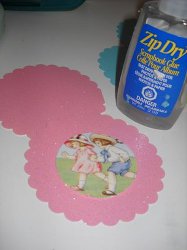
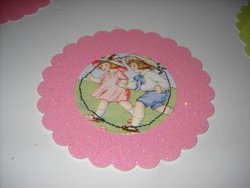
Glue the image to the center of one of the shapes.
-
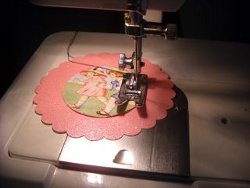
Using a sewing machine, contrasting (I used black) OR matching thread, straight stitch the image about 1/4" from the edges.
-
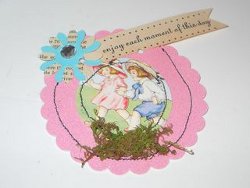
Stack two matching shapes together and, starting at one side, sew together approx 1/4 from edges. Don't fret if your lines seem uneven at the top, we will be covering that up with embellishments! Make sure you don't stitch all edges together, you need a 2-3" opening at the top to place goodies inside.
-
Now gather together your flower punches. These are the Marvy Uchida punches I chose.

-
Punch some flowers from various cardstock scraps and patterned paper scraps. Layer and glue together and glue to one side of the favor bag. I glued a flat backed rhinestone in the center of each flower as well.
-
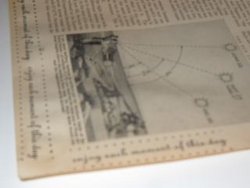
Stamp a sentiment on some scrap paper. I used the margins of a vintage encyclopedia page for its wonderful aged effect.
-
I also glued a pinch of sheet moss to the bottom of the image to add a little more texture.
-
Finally, punch a couple of holes in the sides of the front shape and insert some light gauge wire into the holes to create a hanger.
Read Next43 Easter Chick Crafts