Yarn Storage Box

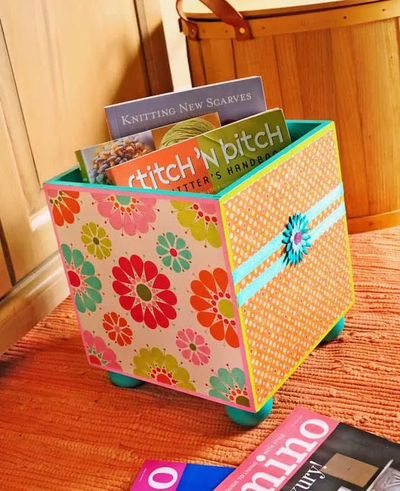
Decoupage enthusiast Amy Anderson uses fabric to cover a wood storage box for keeping yarn. She coordinates the cute pear fabric with acrylic paint on the borders and top. Create your own storage box for yarn or anything else. This fabulous project makes a DIY box that is absolutely perfect for any room in your home. By learning how to make a box and decoupage craft idea, you can easily create a multi-use organizer.
This smart, fabric-covered box comes with a top, meaning no matter how messy the clutter looks on the inside of this decoupage idea, the box will look neat and tidy so long as you have the top covered. It could even double as a small coffee table or end table.
Join Quick and Crafty For More Free Patterns, Tutorials, & Guides >>
Time to CompleteWeekend project

Materials List
- FolkArt® Acrylic Paint - Grass Green, Teal — 3 each
- Mod Podge® Fabric & Gloss
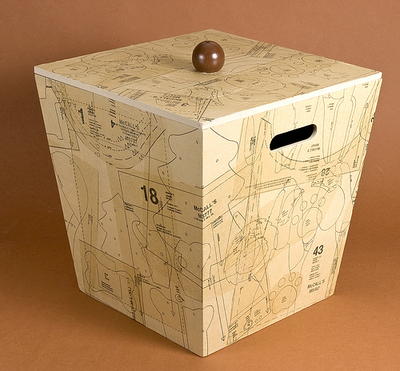
- MPI Wood Storage Bin
- 3” Wooden Ball
- Robert Kaufman “Fruit Basket” Fabric, Pear Brown – 1 yard
- 1” Flat Paint Brush
- Craft Glue
- Craft Knife and Mat
- Pencil
- Ruler
How to Decoupage a Yarn Storage Box
Instructions
-
You will first want to prepare the fabric before painting. To do this, wash and dry the fabric (do not use fabric softener). Iron and then lay out on a covered work surface. Wax paper is preferable for covering your table. Using a brush, paint a light coat of Fabric Mod Podge onto your fabric. Allow to dry. This will allow you to cut the fabric like paper without frayed edges.
-
While the fabric is drying, begin painting. Basecoat the inside of the bin and the lid with Teal. Allow to dry.
-
Basecoat the outside of the bin and the wooden ball with Grass Green. Allow to dry.
-
You are now going to cut the fabric. Lay the bin down on top of the fabric and trace one side four times. Cut these pieces out using the scissors.
-
Measure approximately ½” inside your cut line on all four pieces and trim them down using the craft knife.
-
Adhere these four pieces to the sides using the Gloss Mod Podge. Completely smooth out all air bubbles and allow to dry for 15 – 20 minutes.
Your Recently Viewed Projects

Thanks for your comment. Don't forget to share!
flowergirl
Jan 06, 2018
Living with kittens is the worst decision you can make if you regularly knit and leave your projects all over your house. Luckily with this storage box, i can still hoard a lot of yarn and keep them in this decorated box. Painting the box is the most fun part of this craft
mmeeks12
Jun 27, 2016
This is such a cute storage craft! My best friend loves to knit, and she just leaves her expensive yarns all over the place. I'll have to make this for her for her birthday or Christmas.
quanahs 5032097
Mar 10, 2016
Cute little box. Does anyone shop the ooops paints at the big box hardware stores. The paints are usually inexpensive and can be mixed with paint you already have to create a custom color. I also buy the samples paints which are usually about a 8 oz instead of the more expensive craft paints, plus they can be mixed at the store match specific paint chips.
paver2
Jul 17, 2018
I do. When I painted my office (also known as my craft room), I bought one of those samples and trimmed things with that. It was a lot less expensive than buying a pint and there was plenty for what I needed. I still have some left over. When I find white paint on sale, I buy it then I quite often mix my own paint for crafts like this.
Crafter 1610988
Mar 26, 2015
I like this one, because the box can be left out in the open as part of one's decor.
kjtup
Apr 18, 2010
This is a great project. I thought one extra thing that might be done is cut out a small hole for yarn to come through the top if you wanted to ever leave the yarn inside but it would still be availabel to use it. Kathy K.
Report Inappropriate Comment
Are you sure you would like to report this comment? It will be flagged for our moderators to take action.
Thank you for taking the time to improve the content on our site.