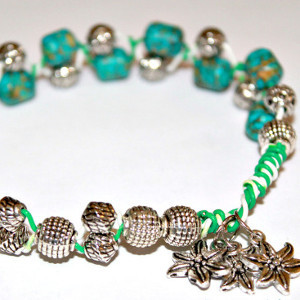
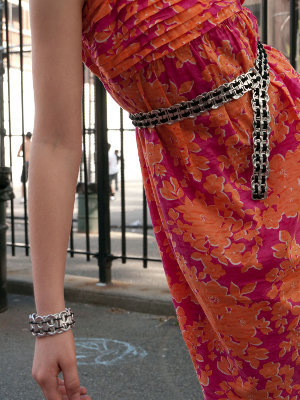
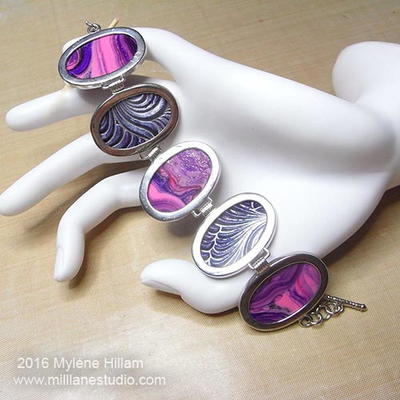
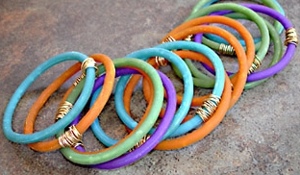
Colorful Clay Bangles
Check out these free jewelry making patterns from Polyform! Free polymer clay jewelry tutorials like this one are so simple to follow, and they make such pretty, colorful clay bangles.
Materials:
- Clays--1 block
- Clay Conditioning Machine
- Clay Extruder
- Jacquard® Pinata Colors, alcohol-based inks
- 20 gauge wire in color of your choice
- Round nose pliers
- Wire cutters
- 3-4 empty soda cans
- Cotton balls
- Rubber gloves
Instructions:
- Preheat oven to 275 °F. Test temperature with oven thermometer for perfectly cured clay. Condition all clay by kneading until it’s soft and smooth or running it through the Clay Conditioning Machine for several passes on the widest setting. Fold the clay in half after each pass and insert the fold side into the rollers first.
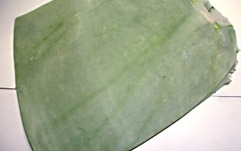
- Roll out 2 oz of the Translucent Premo! Sculpey on the widest setting of your clay conditioning machine.
- Use a cotton ball to swab some of your chosen color over the top surface of the clay, covering the entire surface of the clay. Make sure you wear gloves or you will be wearing the alcohol ink for several days on your hands and nails!
- Allow the ink to dry thoroughly before folding the clay with the ink side on the inside and run through your Clay Conditioning Machine repeatedly to blend the ink into the clay. You can chose to blend it completely, or just partially blend it. You can also add another swab of ink and repeat the blending process to get a deeper color if you wish. NOTE: The Pinata Purple is a very deep color, go lightly with this one!
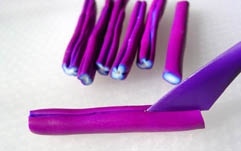
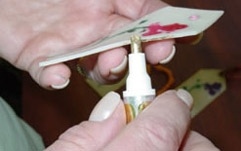
- Tear or cut off about 1/3 of your clay and roll it into a cylinder just large enough to fit into your Clay Extruder, filling the entire cylinder.
- Replace the plunger and invert so that the plunger is against your work surface and firmly press down to force the plunger up through the clay, extruding it through the large circle dye.
- Lay your extruded “rope” of clay on your work surface and inspect it for any tiny bubble along the surface. You will want to cut these out.
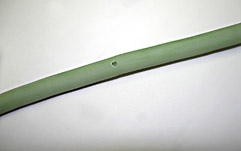
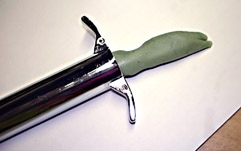
- Wrap your length of clay around the soda can, taking care not to stretch it, so that the extruded clay goes a little past the end of the clay to start a second row of clay. Use your Super Slicer to cut BOTH of these rows of clay at a 45 degree angle. Make this cut about ½” from the original end of the clay. It is smart to carefully inspect the clay cord before you cut to make sure that there are no air pockets or dings.
- Butt the two ends up against each other (they should match perfectly since they were cut at the same time) and use your finger to smooth the seam. This seam does not have to be perfect since you are going to wrap the wire around it after baking. Make sure that the sides and the back are fairly smooth also.

- Repeat steps 6-8 adding another bracelet to the same can. Careful not to disturb or mark the previous bracelet!! 3-4 bracelets comfortably fit on a can.
- Once you have all your bracelets on your can, place the can upright in your preheated clay oven and bake for 30 minutes. Carefully remove the cans with a hot mitt, trying not to touch the clay. After about 5 minutes, when the can is warm but comfortable to touch with bare hands, gently work the bracelets down and off the can. Allow them to thoroughly cool on a flat surface.
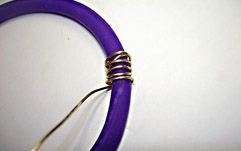
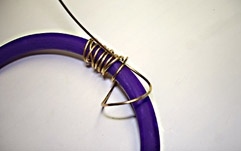
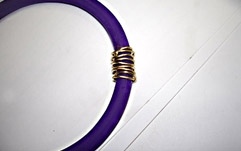
- Add a rough wire wrap around the area of the seam on the bracelet by cutting a 10 inch length of wire and wrapping it around the seam area. Tuck your starting end under the wraps as you go and trim. Keep the last couple of wraps loose and tuck your wire end through and pull to tighten. Trim. Don't stress about getting my wire wraps perfect, I like the more primitive look Make five wraps and then go back, wrapping to fill the blanks.
- If your bracelet happens to pop open at the seam while you are wrapping, put a small amount of quick drying Super Glue on it and press together. Allow it to dry thoroughly before continuing your wrap.
Tips:
If a soda can is too large/too small for your wrist check your pantry for other cans that might work!! Remove any paper labels before you add clay to them, as the ink on the paper can transfer to the clay.
Use any clay that you have added alcohol-based inks to as soon as possible, as it tends to dry out the clay.
Your Recently Viewed Projects
Thanks for your comment. Don't forget to share!
Report Inappropriate Comment
Are you sure you would like to report this comment? It will be flagged for our moderators to take action.
Thank you for taking the time to improve the content on our site.