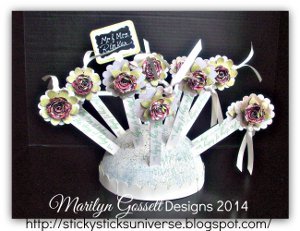
Vintage Floral Wedding Favors
 Visit Marilyn at Marilyn Gossett Designs.
If you're looking for inexpensive wedding favors for your vintage-themed wedding, these Vintage Floral Wedding Favors are for you! These floral favors can be used as bookmarks or plant stakes...and they make perfect favors for a wedding, shower, or baby shower. Mix up the colors to match your party decor and send everyone home with one of these beautiful handmade gifts.
You can find this project, as well as many other fabulous blogger projects, in our new eBook, The Best Blogger Craft Ideas 2014: Decoupage, Sewing, Jewelry Making, and More free eBook. Download your own free copy today!

Materials:
- David Tutera Chipboard Tags with ribbon embellishment by Darice
- Chalkboard Labels by Darice
- Fiskars Craft Scissors
- Glue
- Sticky sticks
- Smoothfoam hollow dome
- DecoArt Paints: American Decor: Chalky finish: Lace, New Life, Crackle Medium
- 1-1/4" paper Flowers: one for each stick, cut with Cricut machine or puorchased
- 2" flower cut-out (for contrast) one for each paper flower
- Rubber stamp with saying
- Ink pad
- Clear stamp block
- Cardstock: Colonial White (for 1" scalloped edge), two sided floral pattern
- White x-tra fine-point permanent marker
- Paper punch for corners
- Cricut Expression machine (optional)
Instructions:
- Invert the dome and poke slots in it using a Sticky Stick - poke one in the top middle, then make even rows for the number of favors you will have. Paint the outside of the dome Green; let dry. Apply the Crackle Medium following the manufacturer's directions Apply a top coat of the Lace chalk paint.
- Paint each of the Sticky Stick's with the Chalk paint, front and back. Let dry.
- Dry brush Lace chalk paint to each Chipboard Tag to give it a "vintage" look.
- Glue a flower to one contrasting background flower. Adhere to a chipboard tag. Remove the adhesive strip from one Sticky Sticks, adhere the tag. Repeat for each.
- Stamp the message/saying on the stick (with the flower end to the left.)
- For the sign: Adhere one Sticky Sticks to the flat edge of a second Sticky Sticks to make it about 10" long. Cut and layer the papers for the "sign". adhere the chalkboard label to the front of the sign and write the couples' name on the label with the white marker. Round the corners of the sign using the corner punch.
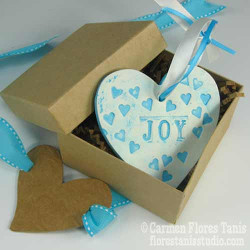
Read NextHave a Heart Keepsake