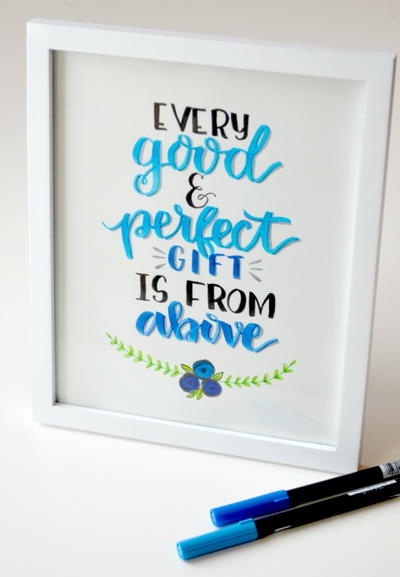
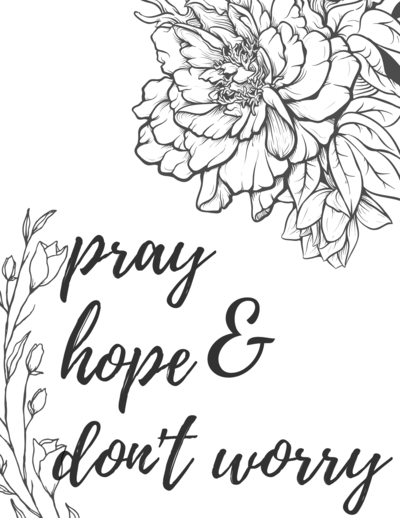
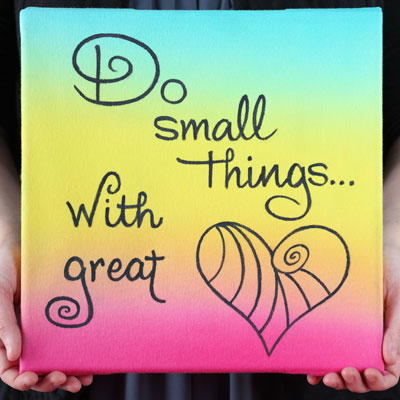
Quote Art Canvas
 Use a Tulip Tie Dye Kit to create this one of a kind Quote Art Canvas. Great for displaying in a kids bedroom or a walkway, this simple wall art project is fun to do for crafters of all ages. Since there are several colors available in the tie dye kits, it's easy to create a piece of art that matches any color scheme...and you can add any phrase, lyric, or quote on the canvas to create the perfect expression.
Find this project, and many more, in our new free eBook, The Ultimate Craft Guide: 25 Free Craft Projects for Every Crafter. Download your own free copy today!

Materials:
- Tulip® One-Step Tie-Dye Kit™ - Classic
- Tulip® Soft® Fabric Paint - Ebony
- Aleene’s® Crystal Clear Tacky Spray™
- Stretched canvas – 12” x 12”
- White fabric – 100% cotton – approximately 14” x 14”
- Ruler
- Scissors
- Gray chalk pencil
- Pencil
- Liner brush – No. 4
- 3” Paintbrush
- Tracing paper
- 4 Plastic containers
- Foil or paint palette
- Plastic tablecloth
- Masking tape
- Iron
Instructions:
For best results, please read all instructions before beginning project. Refer to photo for color and design placement.
- Prepare work space by covering with plastic tablecloth. Tape down to keep smooth and free of wrinkles.
- Dampen fabric, smooth out on plastic sheet.
- Prepare the dyes as instructed; mix well and pour some of each color into three of the containers and water in the fourth container.
- Dip wide paintbrush into the Yellow dye. Brush across center of fabric, saturating the fabric. Rinse brush in the container with water, then blend out the edges of the Yellow into the white portions of the canvas.
- Rinse brush. Dip into the Fuchsia dye and brush a heavy coat on the bottom portion of canvas, brushing upward and blending into the Yellow.
- Repeat with the Turquoise dye, brushing onto the top portion of canvas and blending softly into the Yellow.
- Rinse out brush and use water to blend colors for an ombre effect.
- Let fabric sit 6 to 8 hours or overnight.
- Hand wash fabric carefully using cold water. When excess dye is removed and water runs clear, line dry.
- Press fabric. Spray Crystal Clear Tacky Spray on canvas. Position dyed fabric over sprayed canvas and press in place, smoothing with hands. Finish gluing corners and cut off any excess fabric.
- Enlarge pattern to fit canvas. Trace onto tracing paper then flip over and trace over the backside of letters with chalk pencil.
- Position tracing paper pattern right side up on canvas and pencil over the pattern lines to transfer chalk lines onto fabric.
- Use the liner brush to paint over wording and design with Ebony Soft Fabric Paint.
Your Recently Viewed Projects
Thanks for your comment. Don't forget to share!
jadeana42
May 26, 2016
My ALL-TIME fave craft would have to be lettering... Taking quotes and using the right lettering to express the EMOTION behind that ONE WORD is fun and challenging... NOW, with the help of this design, I can add the EMOTION of COLOR too!! FaveCraftsTieDie
tammywar2000 08142 31
Mar 14, 2013
Love this project !! Would love to try this !Thank you for the giveaway
sadunn 3859683
Mar 14, 2013
Love it! I'm inspired to try new things this spring to brighten my home!
Report Inappropriate Comment
Are you sure you would like to report this comment? It will be flagged for our moderators to take action.
Thank you for taking the time to improve the content on our site.