Summer Vacation DIY Photo Album
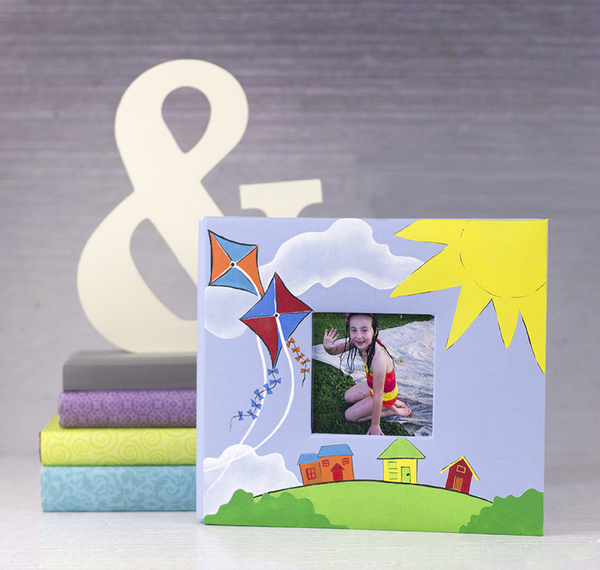
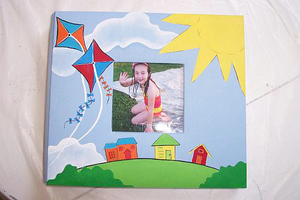
Summer never has to end when you have DIY craft projects to capture precious memories. This Summer Vacation DIY Photo Album is easy enough for a kid to make but still so fun and cute to look at. Give your favorite photos a permanent space and decorate the outside of your album a whole rainbow of paint colors. Have kids decorate the cover or add their own touches so it becomes a true keepsake. You'll love pulling it off of the shelf and showing it off to friends, family and houseguests.
Primary TechniquePainting

SeasonSummer
Materials:
- Americana Multi-Surface Acrylics
- Cotton Ball
- Lipstick
- Pumpkin Patch
- Canary
- Apple Green
- Turf Green
- Blue Lagoon
- Blue Bird
- Black Tie
- Water container
- Palette or plastic plate
- Paper towels
- Tracing paper
- Transfer paper
- #10 flat brush
- Chalk pencil
- #1 liner brush
- #1 round brush
- Pen
- 8" X 8" album
Instructions:
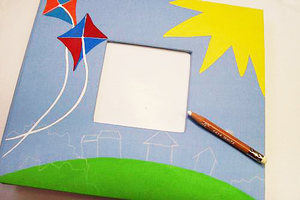
- Use a pen and the tracing and transfer papers to trace and transfer the pattern onto the front album cover. (Or free-hand the design with a chalk pencil.)
- Use a #10 flat brush and Canary to fill in the sun. Rinse brush.
- Use a #10 flat brush and Apple Green to paint the grass. Rinse brush.
- Use a #1 round brush and Pumpkin Patch to paint the two opposite sections of the kite in the background. (Refer to photo for placement.) Rinse brush.
- Use a #1 round brush and Blue Lagoon to paint the other sections of the background kite. Rinse brush.
- Use a #1 round brush and Lipstick to paint the two opposite sections of the kite in the foreground. Rinse brush.
- Use a #1 round brush and Blue Bird to paint the other sections of the foreground kite. Rinse brush. Use a #1 round brush and Cotton Ball to add details and string on both kites. Rinse brush.
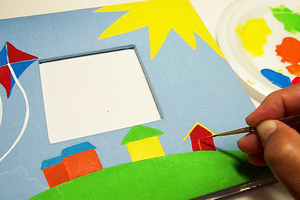
- Go over the houses with a chalk pencil to make the pattern lines more visible.
- Use a #1 round brush and load separately with Pumpkin Patch, Blue Lagoon, Canary, Lipstick, and Apple Green to paint the houses and roofs. Rinse brush before switching colors and at the end.
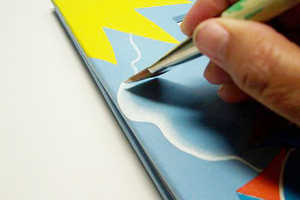
- Use a #1 liner brush and load separately with the same colors from the previous step to add roofs, doors, and windows to houses. (Just switch colors so as not to match the house.) Rinse brush between colors and at the end. Use a #1 liner brush and Cotton Ball to outline all the clouds. Rinse brush. Use a #10 flat brush and cornerload with Cotton Ball to lightly shade the insides of the clouds. Rinse brush.
- Use a #1 liner brush and load separately with Pumpkin Patch and Blue Lagoon to paint the string and bows of the background kite. Rinse brush between colors and at end.
- Use a #1 liner brush and load separately with Lipstick and Blue Bird to paint string and bows of the foreground kite. Rinse brush between colors and at the end.
- Use a #10 flat brush and Turf Green to paint the bushes in the bottom corners. Rinse brush. Use a #1 round brush and Black Tie to outline the foreground. Rinse brush.

For more great home decor projects and paint craft ideas, check out our eBook Painting the Seasons with Americana Multi-Surface Acrylics from DecoArt. You'll find DIY craft projects for all season.