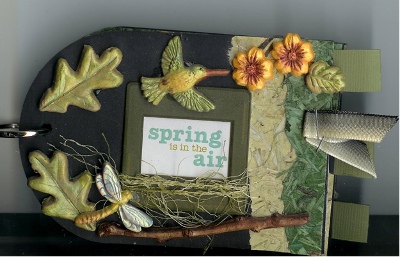
Spring Photo Book
Create a beautiful photo book for spring with a loose leaf ring, slide mounts and a variety of materials. Terri Sproul supplies many ideas for the pages within the spring book, decorated with various embellishments.
Materials:
- Sweetbrier Studio Molds: Mini Mold Hummingbird #1504, Oak Arbor #1020
- 10 black tags die cut using Sizzix® die cut machine. (Optional: purchase ten tags in your choice of color, approx 5" x 3 1/2", at an office supply store.)
- Primary Elements by LuminArte®: colors: Glitter Red, Sun Bust, Chestnut Brown, Iridescent
- Green, Moss Green, Stargazer, True Blue, Lemongrass,
- 2 Slide Mounts by Loersch.com: color Olive green
- Fibers: EK Success Adornments: Yellow/green
- Paper: Magic Scrap, or other appropriate paper.
- Loose leaf ring from an office supply store
- Green cardstock: Small piece approx. 1" X
- Stapler and staples
- Pencil
- White Pen – to journal on black cardstock tags
- Metal Embellishments: DCWV®
- Rub-ons: K & Company Spring
- Key Charm: EK Success
- Favorite adhesive: Crafter’s Pick™ Memory Mount is mine. (If using polymer clay embellishments, use a strong glue such as E-6000® or The Ultimate Glue® to attach baked parts.)
- Sharpie Marker: Black
- Brads: Little Black Dress
- Scissors and Personal Trimmer, Circle and Oval Cutter
Using Paper Clay mold the following using Oak Arbor mold #1020: (4) Dragonflies D-1, (1) Stick, (2) leaves L-2, (2) leaves L-1. Using Hummingbird mold #1504; (4) leaves, (8) flowers, and (2) Hummingbirds. Set aside to dry.
To demold, slightly flex the mold while using your thumbs to pull the part loose around all sides. Gently push up on the molded part from the bottom as you flex the mold to lift or tip the part from the mold.
Instructions:
- Cut, from black cardstock, 10 Super Crescent Tag from Sizzix® or use purchased tags. Put the Loose Leaf ring through the hole in all 10 tags. With all of the tags to the right of the loose-leaf ring, the top tag will be the cover.
- Open the cover page. There will be one page on left side of loose leaf ring and one page on right side of ring. These first two pages will be 1A & 1B, Put a large X on both of these pages (1A & 1B) – YOU WILL NOT BE DECORATING THESE PAGES.
- Turn the page – these two pages will be 2A & 2B and will be decorated.
- Turn the page again to pages 3A & 3B– Put a large X on both of these pages, turn the page again – these two pages will be decorated.
- Continue this until you get to the back cover. The pages with the large X’s on them are the backs of your finished pages. Do not create anything on X’d pages as these will be stapled or glued together when finishing and will not show.
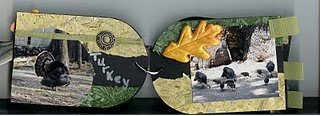
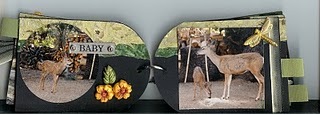
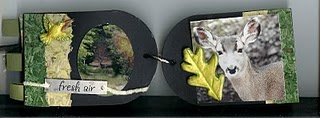
- Pages to be decorated: adhere the pattern papers. See pictures for placement.
- Paint the embellishments using the LuminArte® Primary Pigments with a tiny bit of water: Hummingbirds: Lemongrass, Glitter Red at chest, Iridescent green on all wings, and chestnut brown on beak and the black Sharpie marker for his eye. Flowers: Sunburst and Glitter Red. Stick: Chestnut Brown. Dragonflies: Paint two using True Blue and Stargazer and two using Moss Green and Iridescent green. Leaves: Moss Green and Sunburst.
- Glue the finished embellishments to the pages. (If using polymer clay embellishments, use a strong glue like E-6000® or The Ultimate Glue®.

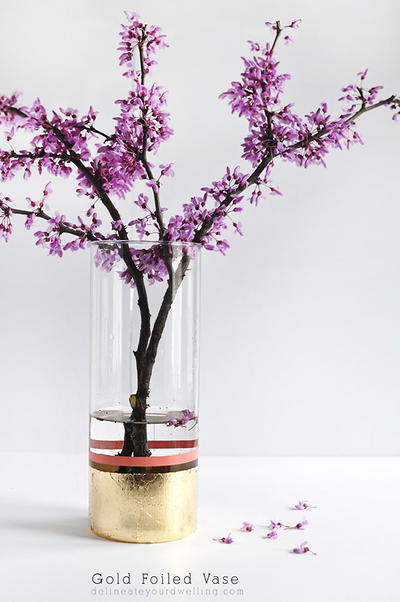
Read NextDIY Gold Foiled Vase