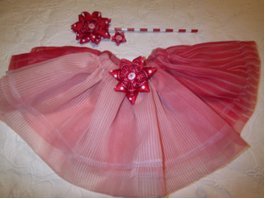
Lovely Tutu
This is a great tutu outfit from Clover USA for any little girl. It makes a great Halloween costume too. The wand and hair clip can be sewn along with the tutu to make it a set.

Materials:
Tutu
- Medium 7-point star Bow Maker
- Large 7-point star Bow Maker
- 11/4 yard ribbon in ¾” – 1” width
- Small 5-point star Bow Maker
- 2 1/2 yards of fabric of choice (organza or tulle recommended)
- Elastic (enough for desired waist size)
- 1 coordinating button of choice
- 1 yard coordinating ribbon in ½” width
- 1 yard coordinating ribbon in 3/8” width
- Needle and thread
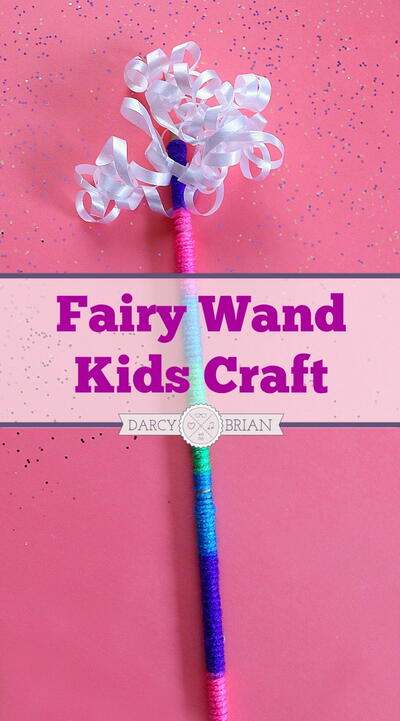
Wand
- 1 ¼ yard ribbon in ¾”-1” width
- Large 7-point star Bow Maker
- Medium 5-point star Bow Maker
- 14” of 5/16” wooden dowel
- 1 yard ½” coordinating ribbon
- Button of choice
- Assorted coordinating paints and a brush
- Needle and thread
- Hot glue gun
Hair Clip
- Button of choice
- Small 5-point star Bow Maker
- 1 yard 3/8” ribbon
- Hair clip holder
- 3/8” wide ribbon to cover hair clip holder
- Hot glue gun
- Needle and thread
Instructions:
Tutu:
-
Sew the two cut ends of your fabric together to form a large circle.
-
Hem the two selvage edges of your fabric if you desire.
-
Now fold your fabric in half, and then into fourths with the seam on the inside (to create multiple layers for your tutu).
-
Sew a casing along the top through the four layers, leaving a small opening.
-
Feed your elastic through the casing to create a full gather.
-
Sew the elastic at desired waist measurement and close the casing.
-
Make a seven- point bow using your 7/8’ -1” ribbon with the large Bow Maker.
-
Next, make a 7-point star using your medium Bow Maker.
- Finally, make a double 5-point star using your small Bow Maker with 3/8” ribbon. Stack the bows on top of each other, largest to smallest. Put a button on top and sew all together. Sew on the stack of bows to your tutu wherever you desire. Make multiple stacks of bows to achieve your desired look!
Wand:
-
Cut your wooden dowel at approximately 14”.
-
Paint the dowel in coordinating colors to your ribbon using masking tape for the stripes.
-
Make two sets of bows using the large 7-point Bow Maker with your ¾”-1” ribbon.
-
Next, make two sets of 5-point stars with your medium Bow Maker using 1/” 2 coordinating ribbon.
-
Attach the large bow with the smaller bow on top using the button of your choice.
-
You should now have two identical sets of bows.
- Using a hot glue gun, glue the backs sides of the large bows together with the wooden dowel in between to create a beautiful wand any princess would adore!
Hair Clip:
-
Create a double 5-point star using your Small Bow Maker.
-
Attach a button to the top with thread.
-
Using your glue gun, wrap a 3/8” piece of ribbon around the hair clip to hide the metal starting on the underneath top side.
-
Wrap the ribbon up and round the clip and ending on the bottom.
-
Glue your bow that you have created to the top of the clip.
- Now place the lovely hairclip in the hair of a beautiful princess!

Read Next10 Minutes Sew Cat Bed
Your Recently Viewed Projects
Thanks for your comment. Don't forget to share!
Crafter 1734381
Sep 02, 2010
My granddaughters would love this but, I don't understand steps 3 and 4. Could someone clarify? I don't see how to make the folds and then sew through all 4 layers to make the casing. Thanks.
Report Inappropriate Comment
Are you sure you would like to report this comment? It will be flagged for our moderators to take action.
Thank you for taking the time to improve the content on our site.