This project was submitted by one of our readers, just like you.
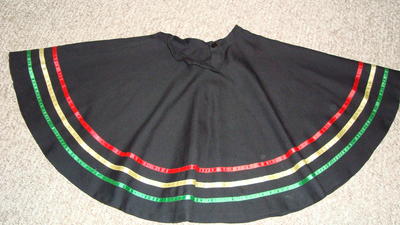
How to Make a Circle Skirt

How to Make a Circle Skirt
In the Designer's Words: "These instructions are for a custom-made circle skirt. In this case, for a ballet character skirt with coloured ribbons. I made a few of these for students in my daughter's ballet class, and after getting into the “groove”, each skirt took about 3 uninterrupted hours to make. And because each skirt was custom-made using Math – woohoo! – they fit each individual quite nicely! Included are a couple of suggestions along the way and the Math formula. Hopefully, this will be helpful; using Math for the custom fit certainly worked for me!"
Project TypeMake a Project
Time to CompleteWeekend project
Sewn byBoth Hand and Machine

Materials List
- About 1.5 m black gabardine fabric (or total length for cutting skirt) x 2
- Black serger thread (optional)
- Black sewing thread
- 1 black 5/8" button
- 1/2" or 5/8" ribbon, 3 different colours
- Thread to match coloured ribbons
- Calculator for the math
Instructions
-
Measure waist circumference (a bit loosely for growth and comfort), then measure from waist to 3” below knee (if growth is anticipated), or according to preference of the ballet teacher. Fold fabric once each way to make a square. Arrange fabric so folded sides are nearest to you. The measurements are marked from the corner point of the two folded sides toward the edges of the fabric. ***NOTE: All Measurements are marked before cutting begins.
-
Waist: Take waist measurement (“C”), divide by 6.28 (which is 2 x pi), then subtract .625 (the 5/8” seam allowance). Measure this length, starting at the folded point (which is the pivot point or centre of the large circle), from one folded edge to the other, using the measuring tape like a compass and mark the quarter circle on the fabric. e.g. r = ( C ÷ 6.28 ) - .625 For waist 21” r = 2 ¾” 21 ½” r = 2 ¾ “ 22” r = 2 7/8” Length For desired length, use the measurement taken from waist to where the bottom edge is to be. Total length from folded point: TL = r + .625 + desired length + 1 ¼” for hem. Using measuring tape, again from folded point, mark the total length on fabric. Cut out waist circle. Cut bottom circle of skirt. Do not unfold fabric yet.
-
Placket: (opening at waistband) On side of fabric where there are 2 folds meeting (one on top of the other), measure 6” from edge of waist. Cut along one fold to the 6” mark. Unfold fabric. Staystitch waist circle. Using a leftover piece of fabric, cut out a rectangle along the grain: L = 13” W = 3 ¼ “ Staystitch one long side 3/8”, one long side 5/8”. Fold over the 5/8” edge and iron. Trim to ¼”. With right side of placket to wrong side of skirt, attach placket to opening on skirt, using 3/8” staystitching as a guide, centering placket. Sew along the 3/8” seam allowance. Fold over other edge to sewn edge and topstitch close to edge. Fold left side of placket into skirt waist and staystitch along top edge.
-
Waistband: Using a leftover piece of fabric, cut out a rectangle along the grain: L = waist + 1” (placket) + 1 ¼” (seam allowance) W = 3 ½” ***NOTE: Instead, the L could be 1” longer & sewn on to extend the right side to be able to move the button if needed. Plus, it is overlapped by the left side that lines up with the placket edge. Staystitch one long side ¼”, one long side 5/8”. Pin the waistband onto the waist of the skirt using the 5/8” staystitched edge. Sew. Trim edges. Iron on a 1” square of stabilizer (interfacing) to wrong side of fabric where the button and button hole will go at each end. Iron the ¼” edge toward wrong side. Fold right sides of waistband together. Sew along short edges and trim. Turn waistband to right sides showing. Pin folded edge to sewn waist and topstitch waistband into place. Sew buttonhole on left side (to overlap) and button on the right. If using seam binding for placket, be sure to still add on at least 1” to the waistband to accommodate the overlap needed for closure. Be sure the extension on the waistband is the section that is overlapped.
-
Hem Serger: Serge along bottom edge of skirt, cutting ¼” with gathering setting. Conventional: Zig-zag ¼” in from edge, trim off excess. Pin the 1” hem allowance and sew hem by machine.
-
Ribbons: ½” (12mm) ribbon works well. If not available, then use 5/8” (15mm). Choose 3 different or co-ordinating colours with matching thread for the top (ribbon side) and black on the bottom. Starting at the back of skirt, sew first ribbon (hem side first), 2 ½” from the bottom hem of the skirt, measuring as you sew. Tuck end of ribbon under before joining the circle of ribbon. Be sure to sew along the other (upper) edge of the ribbon. Sew the other two ribbons 1 ½” apart from the previous ribbon in the same manner. Calculating length of ribbons: Colour #1 (total length of skirt – 7 cm) x 6.28 = length of Colour #1 Colour #2 (total length of skirt – 12 cm) x 6.28 = length of Colour #2 Colour #3 (total length of skirt – 17 cm) x 6.28 = length of Colour #3

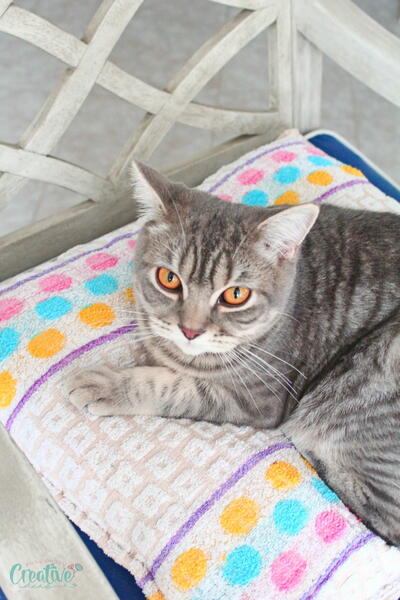
Read Next10 Minutes Sew Cat Bed