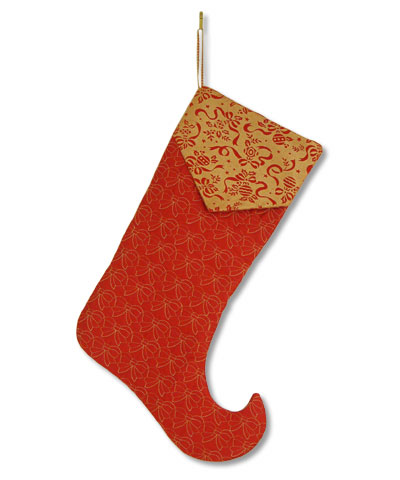
Embroidered Christmas Stocking
Create a beautiful Christmas stocking in two coordinating fabrics embroidered with gold bows. This embroidered Christmas stocking would make a perfect Christmas gift. Follow the free Christmas stocking sewing pattern to make your own.
Materials:
- Brother ULT2003D version 4.00 or any Brother ULT upgraded to version 4.00
- Brother Border Frame kit
- Brother Embroidery thread #999
- All-purpose red sewing thread
- Vogue pattern #7815 (or any other stocking pattern)
- 1 yard of red satin fabric
- 1/4 yard of contrasting fabric for cuff
- 1 yard of warm and natural batting
- Tear away stabilizer
- Chalk marker
- 8" trim for stocking hanger
- Spray Adhesive
Instructions:
- Trim excess tissue from around selected stocking pattern.
- Trace around stocking pattern approximately 1" larger than pattern.
- Set up the Brother ULT sewing/embroidery machine for embroidery.
- Select "Embroidery Edit" and then press BORDER. Insert the floppy with the border designs into the machine and select the bow border pattern.
- After selecting the pattern press SET. From the embroidery edit screen select REPEAT. This feature repeats the design selected and can be repeated to the maximum to fill the embroidery area. Select MAX REPEAT. Press CLOSE.
- Select Size and increase the size to as large as the design will go. Note the complete size of the combined designs is 17.8cm x 3.1cm. Select the thread marking feature and select the bottom right hand marking, the center bottom and the left bottom.
- Stitch the design out on scrap fabric to get a better idea of size. Measure the width of the design with a ruler in inches if needed. Mark the fabric by drawing lines 1 1/4" apart across the fabric where the stocking will be cut out.
- Spray warm and natural with spray adhesive and place red satin on top.
- Hoop a piece of tear away stabilizer then spray the stabilizer with spray adhesive while it is in the hoop.
- Place the red satin with the warm and natural in the hoop. Position the first marked line in the hoop slightly to the right of center. (The space between two lines should be in the center.)
- Use the grid for the border hoop to make sure the fabric is straight in the hoop. Move the design using the directional arrows to the line on the right. Make sure the needle will drop directly on the marked line.
- Touch the trial key to check that this is exactly where you need to stitch the design. Stitch the first row of bows.
- Move the design to the left using the directional arrows. Make sure the needle will drop directly on the marked line. Touch the trial key to check that this is exactly where you Holiday Stocking Be sure to center the space between the two marked lines. need to stitch the design. Stitch the second row of bows.
- Rehoop the fabric with stabilizer lining up the same two rows to extend the design. Move the embroidered lines up in the hoop. Line up the marked lines using the grid again to make sure the lines are straight. Make sure the needle drops on the center thread mark as the design is continued. Stitch the rows only long enough to cover the fabric that is needed to make the stocking.
- Hoop another piece of stabilizer and spray with spray adhesive. Hoop the next set of lines marked on the fabric.
- Use the grid again to make sure the lines are straight in the hoop. Move the design to the lines on the right making sure the needle will drop directly on the marked line. Touch the trial key again to check that this is where you need to stitch the design. Stitch the design. Move the design to the left and stitch the left row.
- Continue stitching rows of the bow border design until the entire area where the stocking will be cut out is full of the design rows.
- Place the pattern on top of the embroidered fabric and cut out.
- Turn the pattern piece over and cut out the back of the stocking on a piece of plain red satin.
- Construct the Christmas stocking according to the directions in the pattern.
For other similar craft ideas, check out this FREE "The Sewn Christmas Gifts Guide" eBook on our sister site, AllFreeSewing.com
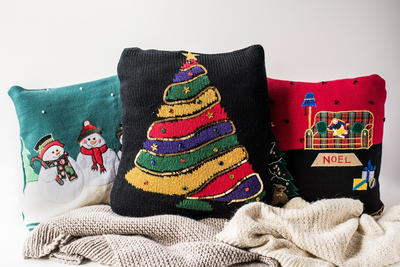
Read NextUgly Christmas Sweater Pillow Covers
Your Recently Viewed Projects

Thanks for your comment. Don't forget to share!
Digitizing
May 21, 2012
Embroidering fabric with stabilizer lining up the same two lines to give the style. Move the padded collections up in the ring. Line up the noticeable collections using the lines again to create sure the collections are straight. Ensure that the hook falls on the center line mark as the style is ongoing. Sewn the lines only long enough to cover the material that is needed to create the storing.Digitizing companies
Report Inappropriate Comment
Are you sure you would like to report this comment? It will be flagged for our moderators to take action.
Thank you for taking the time to improve the content on our site.