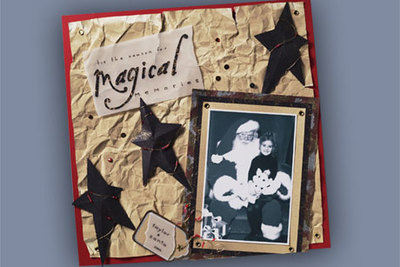
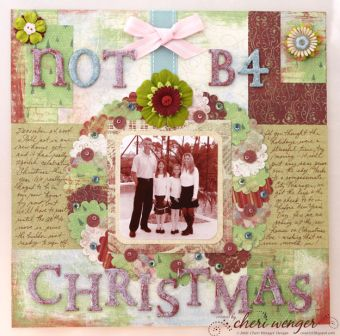
Christmas Wreath Scrapbook Page
Add a fun paper wreath made from a circle scallop punch and your favorite holiday papers. Embellish with paper berries and rhinestones. Layering flowers and ribbons is super easy with Glue Arts adhesives. Be sure to check out the “sugared letters” instructions to add a touch of frostiness to your chipboard elements.
Materials:
- Adhesive: Glue Arts® Ribbon Adhesive; Glue Ring Permanent Adhesive; Crop & Glue™ Permanent Adhesive Squares and Glue Glider® Pro Permanent Adhesive; (Stampin’ Up!®) Crystal Effects™ or (Judi Kins) Diamond Glaze™. Optional: Crop & Glue™ Micro Adhesive Squares
- Cardstock: (Karen Foster Design) Happy Holidays Sentiments, Merry Christmas Sentiments & Happy Anniversary Sentiments Dbl. Sided Cardstock; (K&Company) Classic K McKenna Designer Mat Pad
- Cutters: (Fiskars) Paper Trimmer
- Chipboard: (Crate Paper) Red Engine Crateboard Alphabet/Zoom Collection
- Punches: (Stampin’ Up!®) Scallop Circle, ½” circle and Corner Rounder Punch
- Other: (Prima) Essentials 2 Flowers; (Darice) Finishing Accents Assorted Rhinestones; (Joanns) Self Adhesive Pink Rhinestones; (Stampin’ Up!®) Button Bouquet, Baja Breeze 1” Dbl. Stitched Grosgrain Ribbon & Pink Pirouette 5/8” striped Grosgrain Ribbon
Steps:
- Punch scalloped circles from assorted patterned papers or cardstock. I used Karen Foster Design’s Happy Holiday Sentiments as my 12 x 12 background along with double-sided sheets of Merry Christmas Sentiments and Anniversary Sentiments to create the wreath. If you choose to use alternate papers, refer to paper 1 and 2 in the following instructions for making substitutions.
- When finished punching, arrange scalloped circles loosely in a wreath shape positioned near the bottom center of your 12 x 12 page, allowing room for a title, bow & ribbon to be added.
- Using Classic K McKenna Designer Mat Pad, trim sheet of sage in half and place behind 2 sides of wreath (to later be used for journaling).
- Working along bottom area of McKenna berry paper, create 8-10 paper berries to place on wreath using a ½” circle punch held upside down. Set these aside and use remaining portion of sheet, flipped over and trimmed to 4-3/4” x 4-1/4” to make photo matt.
- Trim beige sheet from paper pack to 4-1/16” x 4-1/4”, round corners and mount on top of patterned paper matt using Glue Glider® Pro Permanent Adhesive.
- MONOCHROME PHOTO TINTING: Using Photoshop or other photo editing software, desaturate color photo. (Image>Adjust>Desaturate). Select Image>Adjust>Hue/Saturation and click colorize button. Use sliders to achieve color to complement your papers. Crop photo to 3-3/4” x 3-7/8”. Create new 4” x 6” file at 300dpi. Drag & center mono-colored photo onto to the new file. Save file and print.
If you want to print to a device that only recognizes 72dpi jpeg files, follow these instructions for printing photo. Change image size to 72dpi, but make sure the resample button is NOT checked or this will decrease image quality. Your photo dimensions should now be larger than 4” x 6”. Save as a jpeg, place on card and print.
- Trim out printed photo, round corners and mount onto layered photo matt using Glue Glider® Pro Permanent Adhesive. Place on top of wreath for position, BUT DO NOT MOUNT YET!
- Arrange Prima flowers in layers of assorted petals & color complementary to your paper choices. Once satisfied, glue together using cut pieces of Crop & Glue™ Permanent Adhesive Squares. Attach decorative buttons to the center.
- Cut 3” Strip of 1” Dbl. Stitch Grosgrain ribbon and approx. 14” strip of 5/8” striped grosgrain ribbon. Tie smaller ribbon into a bow, trim points and place these in position on layout w/o attaching. Place a straight object along side of the ribbon to preserve position. (I used a bone folder tool). Attach large ribbon to layout using one strip of Glue Arts® Ribbon Adhesive across top of the backside. Place two long strips down the sides of the ribbon. Rub back side of carrier and pull off carrier to expose adhesive. Attach ribbon, wrapping top 1/8” over top of layout.
- Select title from chipboard letters and roughly place this and flowers onto layout.
- Cut (2) 1-3/4” strips of Paper #1 (Merry Christmas CS). Trim this into 4 pieces measuring 4-1/4”, 3-1/8”, 3” and 2-3/4” in length. Position on layout as shown and mount with Glue Glider® Pro Permanent Adhesive.
- Take pictures of layout using digital camera to remember placement of elements for gluing.
- Remove bottom Chipboard, large flower, matted photo and berries. Starting at the top center, use 2 strips of Glue Glider® Pro Permanent Adhesive on the backside of each scalloped circle and permanently attach to layout slightly overlapping each piece to form a wreath shape.
- Attach photo on top of completed wreath using Glue Glider® Pro Permanent Adhesive. Add large flower to top of wreath by placing two pieces of ribbon adhesive on top of ribbon & wreath in the position you want to place flower. Rub carrier sheets to transfer adhesive to layout, then press flower into position.
- Glue burgundy berries onto wreath using Glue Glider® Pro Permanent Adhesive. Decorate berries and wreath with assorted rhinestones. (Tip: If rhinestones are not self-adhesive, use glue ring adhesive or micro adhesive squares to attach.)
- “SUGARED LETTERS” DIRECTIONS: Created a frosty effect to colored chipboard by using liquid dimensional adhesive such as Stampin’ Up!®’s Crystal Effects™ or Judi Kins Diamond Glaze™ and Dazzling Diamonds glitter. Squeeze glaze onto letters and use finger or brush to spread evenly over each letter. Sprinkle a pile of glitter onto a scrap sheet of paper and place glazed letter face down into pile. Dust off with finger to just lightly coat with glitter. Attach letters to layout using Glue Ring Permanent Adhesive on the back of each.
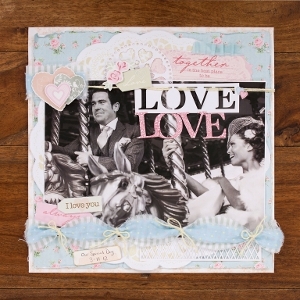
Read NextLove You Forever Layout