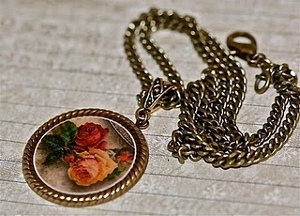
Glass Tile Pendant
Pederson gives instructions on how to make glass tile pendants with pre-made digital printed images from her digital collage sheets.
Materials:
- Square glass tiles (size varies depending on what you prefer)
- Square paper punch (the size of your glass tiles)
- Glue stick and Mod Podge
- Paint brush for the mod podge
- Diamond Glaze
- Aanraku bails
- Chain or corded necklace
- HP Advanced Soft-gloss Photo Paper
- Digital Collage Sheet containing the same size square image tiles as your glass tile
- Crazy glue or super glue
- Popsicle stick
Instructions:
-
Make sure your tile is clean and dry. Then print out your image at 300 dpi on the HP Advanced Soft-gloss Photo Paper or any type of water resistant paper. Next cut out your image with the paper punch. You can find several different size square paper punches available on Etsy that make cutting out your images quick and precise. Of coarse you can always use scissors or an exacto knife but I find that if you are making several necklaces at once it goes much quicker with the paper punch.
-
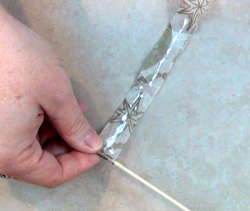
Once your image is printed and cut you can move on to gluing. You will see that the glass tile has a side that is rougher, that is the side you want to glue your image to. Make sure you apply the glue to the front of the image so it will show through the glass tile. I find that a glue stick or mod podge works great for gluing the images to the tiles. With the glass tiles you will want to gently smooth the paper on to the tile with your finger or a popsicle stick, just be careful not to press to hard or you can tear your paper. Once everything is dry I also like to apply a thin coat of mod podge to the back of the image to give it a nice seal.
-
When everything has completely dried its time to apply Diamond Glaze or epoxy to the back of the image for that professional look. If you get bubbles you can pop them by gently taping the surface with an old paint brush. Let your tile dry for the amount of time your product specifies. I personally use the Diamond Glaze because I don't have to do any mixing but I know there are many people who prefer to use epoxy so make sure you follow the instructions to your brand of epoxy if that is what you are going to use.
-
Now you are ready to glue on your bail. Put a dab of super glue or crazy glue on the back of your bail and adhere to the back side of your tile. Again read the directions for the glue that you are using for the amount of time it will take to dry. I also strongly suggest that you read the labels of your products, I found a certain brand of glue stating that the product contained a chemical know to cause cancer. As far as I know super glue and crazy glue seem to be the safest.
- Lastly string on your tile pendant to a necklace of your choosing and enjoy! There are many types of necklaces you can use such as chains, leather, ribbon, experiment and have fun.
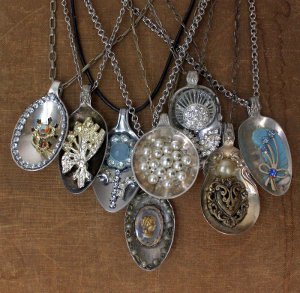
Read NextVintage Spoon Pendants
Your Recently Viewed Projects
Thanks for your comment. Don't forget to share!
app5qpuaun3oi2qucq 6ull1fb5f380cfac96 3c0e753f55ae382eb5 2 6756190
Aug 23, 2013
I might like the project but would probably not go buy all the necessary materials without a photo of the finished project.
stonyruby152 08528 90
Aug 23, 2013
Pictures??? I am very curious how these are supposed to turn out.
carolnm 6479865
Jan 28, 2013
I need pictures to follow. Plus all of the other comments are good ones. Can you please redo this for us. Thanx.
Grannyofthree
Feb 13, 2010
Excellent instructions, however, I would have liked to see a picture of the finished product.
Report Inappropriate Comment
Are you sure you would like to report this comment? It will be flagged for our moderators to take action.
Thank you for taking the time to improve the content on our site.