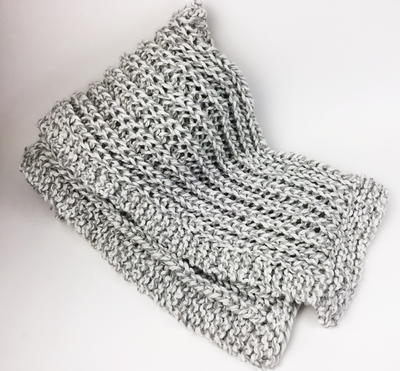
Textured Throw Pillow
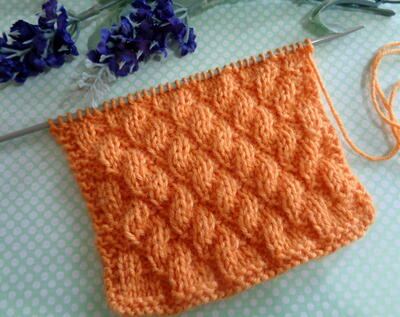
 This Textured Throw Pillow is a great way to add a classy touch to your living room, bedroom, or den. The pattern changes textures 6 times to ensure these pillows are unique and beautiful. While you can easily use whatever color yarn you'd like, these pillows look particularly stunning when you use a smooth cream-colored yarn.
You can find this project, as well as many others, in our new eBook, Welcome to Our Home: Knit and Crochet Ideas from Red Heart. Download your own free copy today!

Materials:
- 2 skeins Red Heart® Boutique Changes® yarn in Cream
- 2 skeins Red Heart® Boutique Changes® yarn in Granite
- 5.5 mm [US 9] Susan Bates® Knitting Needles
- Yarn needle
- 16" (40.5 cm) x 12" (30.5 cm) pillow form
- 16" (40.5 cm) square pillow form
- Five 1¼" (3 cm) buttons
Gauge: 15 sts = 4" (10 cm); 23 rows = 4" (10 cm) in Stockinette Stitch. CHECK YOUR GAUGE. Use any size needles to obtain the gauge.
Instructions:
Rectangle: 16" (40.5 cm) wide x 12" (30.5 cm) long
Square: 16" (40.5 cm) square
Rectangle Pillow
Front
- Cast on 60 sts.
- Row 1 (Right side): Knit across.
- Row 2: Purl across.
- Row 3: Knit across.
- Row 4: Purl across.
- Rows 5-10: Knit across.
- Repeat Rows 1-10 for pattern until Front measures approximately 12" (30.5 cm) from cast on edge, ending by working Row 4.
- Bind off all sts loosely in knit, leaving a long end for sewing.
Back
First Section
- Cast on 45 sts.
- Row 1 (Right side): Knit across
- Row 2: Purl across.
- Repeat Rows 1 and 2 for pattern until First Section measures approximately 7½" (19 cm) from cast on edge, ending by working a right side row.
- Decrease Row: Knit across decreasing 3 sts evenly across: 42 sts.
Button Band
- Row 1 (Right side): Knit across.
- Repeat Row 1 for pattern until First Section measures approximately 8½" (21.5 cm) from cast on edge.
- Bind off all sts loosely in knit, leaving a long end for sewing.
Second Section
- Follow instructions for First Section through Decrease Row: 42 sts.
Buttonhole Band
- Row 1 (Right side): Knit across.
- Row 2: Knit across.
- Row 3 (Buttonhole Row): K11, bind off 2 sts, k16, bind off 2 sts, knit across: 38 sts.
- Row 4: K11, cast on 2 sts, k16, cast on 2 sts, knit across: 42 sts.
- Rows 5-7: Knit across.
- Bind off all sts loosely in knit, leaving a long end for sewing.
Finishing
- Place right sides of Front and Back together with the Button Band of the Back First Section and the Buttonhole Band of the Back Second Section overlapping. Threading yarn needle with long ends, sew seams and turn piece right side out.
- Thread yarn needle with a length of yarn. Using photo as a guide, sew buttons to right side of Button Band opposite buttonholes.
- Insert 16" wide (40.5 cm) x 12" (30.5 cm) pillow form and button to close.
Square Pillow
Front Square (Make 4)
- Cast on 31 sts.
- Row 1 (Right side): Knit across.
- Row 2: Purl across.
- Repeat Rows 1 and 2 for pattern until Front Square measures approximately 8" (20.5 cm) from cast on edge, ending by working a wrong side row.
- Bind off all sts loosely in knit, leaving a long end for sewing.
Back
First Section
- Cast on 60 sts.
- Row 1 (Right side): Knit across
- Row 2: Purl across.
- Repeat Rows 1 and 2 for pattern until First Section measures approximately 7½" (19 cm) from cast on edge, ending by working a right side row.
- Decrease Row: Knit across decreasing 4 sts evenly across: 56 sts.
Button Band
- Row 1 (Right side): Knit across.
- Repeat Row 1 for pattern until First Section measures approximately 8½" (21.5 cm) from cast on edge.
- Bind off all sts loosely in knit, leaving a long end for sewing.
Second Section
- Follow instructions for First Section through Decrease Row: 56 sts.
Buttonhole Band
- Row 1 (Right side): Knit across.
- Row 2: Knit across.
- Row 3 (Buttonhole Row): K8, bind off 2 sts, (k17, bind off 2 sts) twice, knit across: 50 sts.
- Row 4: K 8, cast on 2 sts, (k17, cast on 2 sts) twice, knit across: 56 sts.
- Rows 5-7: Knit across.
- Bind off all sts loosely in knit, leaving a long end for sewing.
Finishing
- Thread yarn needle with Front Square long end. Using photo as a guide, and with right sides together, sew ends of rows of one Front Square to bind off edge of a second Front Square together to form a Front Square Block. Repeat for last two Front Squares. Using photo as a guide, and with right sides together, sew two Front Square Blocks together so that ends of rows of one Front Square Block are sewn to bind off or cast on edge off second Front Square Block to form complete Front piece.
- Place right sides of Front and Back together with the Button Band of the Back First Section and the Buttonhole Band of the Back Second Section overlapping. Threading yarn needle with long ends sew seams and turn piece right side out.
- Thread yarn needle with a length of yarn. Using photo as a guide, sew buttons to right side of Button Band opposite buttonholes.
- Insert 16" (40.5 cm) square pillow form and button to close.
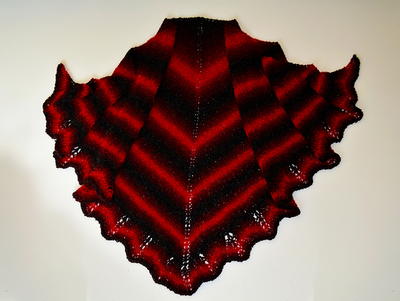
Read NextBlood Bat Shawl Knit Pattern