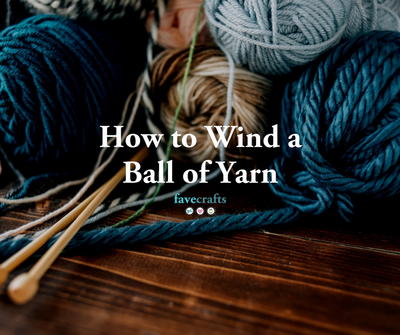
How to Wind Yarn Into a Ball
It can be tedious, but winding your own balls of yarn is often your only choice! And don't worry, it's super easy.

Knowing how to wind a ball of yarn from a hank is an essential skill for any knitter or crocheter. The vast majority of yarns will come in the form of a skein, a ball, or a cake, which are perfectly fine to knit from, but when you get yarn that's in a hank, you may need to open it and wind it into a ball yourself. It can be a little tedious, but you'll thank yourself later.
If you aren't sure what bundle type you have, check out this handy guide to yarn bundle types from our friends at AllFreeKnitting.
Hanks are long, twisted loops of yarn that are often used by manufacturers because they are easier to ship in boxes. While it is technically possible to knit or crochet directly from a hank of yarn, it's very difficult, and there are often tangles in the yarn in this stage that you won't want to have to deal with when you're working.
Most yarn stores are more than happy to wind your hanks into a ball of yarn for you with the ball winder and yarn swift that they have in-store, but this isn't always an option. If you order yarn online, it will also often come in a hank form, and if you don't have the tools on hand to quickly wind it into a ball, knowing how to do it by hand can be a lifesaver!
Step 1: Open your hank of yarn
If you've never done this before, it can seem sort of tricky because of the shape of the hank, but it's much easier than it seems. Here's how you do it:
- Remove the tag or label. This is often attached to the hank with a piece of yarn. Simply untie the yarn to remove it.
- Find the end of the hank with the twist that's holding the hank in place, and undo the twist to open the hank.
- Lay the yarn out so that it is in one big loop.
- Locate the knots of yarn around the loop that are holding the yarn in place. There are usually 2-4 of these on most hanks.
- Untie the knots and remove these pieces of yarn.
Note: there is sometimes one knot on the hank that actually acts as the beginning of the yarn. - Find the beginning of the yarn and pull it away from the rest of the loop of yarn so it's easy to find.
Step 2: Place the yarn around the back of a chair
Typically a yarn swift (or umbrella swift) would be used for holding the loop of yarn in place while you knit; you can buy a yarn swift from most yarn or craft supply store, but if you don't have one, you can simply use the back of a chair.
Note: This step is optional; you can also wind the ball by just lying the loop of yarn flat on a table. The benefit, however, of having the yarn pulled tightly around a yarn swift or a chair helps working out knots and twists much easier.
Step 3: Grab the tail of your yarn with your forefinger and thumb
Once you've found one end of the yarn, pinch the tail between your forefinger and thumb. Wind the yarn clockwise over your thumb and forefinger about 10 times.
Note: Be sure to wrap the yarn tightly enough that it will stay in place but not so tightly that you can't remove your fingers from the center.
Step 4: Remove your forefinger with the end of yarn
For an outside-pull ball of yarn:
Remove both of your fingers and begin winding the yarn perpendicularly to the direction that you were previously winding. This will help secure the yarn and form the center of your ball.
For a center-pull ball of yarn:
Remove your forefinger from the inside so that the yarn is sitting loosely on your thumb. To create a center-pull ball of yarn, pull the end of the yarn so that it sticks out of the yarn that is already wound. As you continue to wind the yarn, make sure that the end of yarn is sticking out.
Step 5: Continue winding the yarn into a ball
For an outside-pull ball of yarn:
If you are winding an outside-pull ball of yarn, simply remove your thumb and forefinger and continue to wind the ball, alternating directions every 10 rounds or so until you've worked through all of the yarn.
For a center-pull ball of yarn:
In order to continue winding a center-pull ball of yarn, you will need a nostepinne or something that you can use as a nostepinne, like a rolling pin. Use the nostepinne to replace your thumb in the center of the yarn and wind the yarn. Change the direction every few rounds to create a secure center-pull ball.
Step 6: Work out the twists and knots as you go
As you work through winding the yarn from the loop, you'll probably find a few knots or twists in the yarn. It's best to solve these and undo them as soon as you see them, that way your ball of yarn won't have to work them out when you're knitting.
Step 7: Secure the end of the yarn
Once you've reached the end of your yarn, you want to make sure that it won't start unraveling before you get it on your needles and hooks. To do this, simply take the tail of the yarn and tuck it underneath another strand of yarn that's going around the ball in a different direction.
When you're ready to start working with the yarn, simply remove the tail and get started!
Your Recently Viewed Projects
Thanks for your comment. Don't forget to share!
Mistress of All Ev il
Apr 13, 2018
This is such a great resource. I didn't know you could use the back of a chair for this. Winding yarn is going to be soooo much easier now. Thank you!
Report Inappropriate Comment
Are you sure you would like to report this comment? It will be flagged for our moderators to take action.
Thank you for taking the time to improve the content on our site.