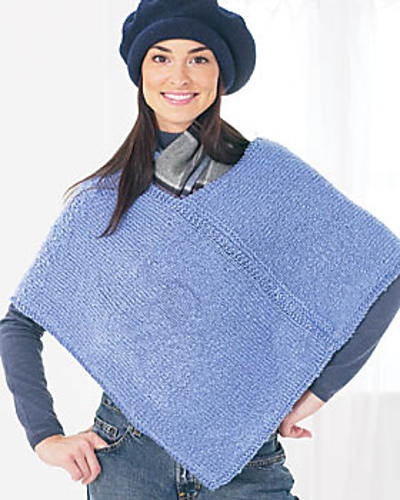
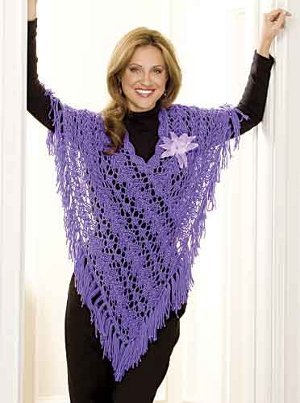
Jazzy Poncho
If you're looking for a lightweight, fun, frilly, knitted poncho pattern, you'll find it in this Jazzy Poncho from Caron! This poncho is easy to make and can be worn with almost anything. Dress it down during the day and jazz it up at night!

Materials:
- Caron International's Simply Soft Brites: 4 ply, Worsted Weight (100% acrylic; 6 oz/170g): 2 skeins # 9610 Grape
- Size US #13 or #15 knitting needles
- Size J crochet hook
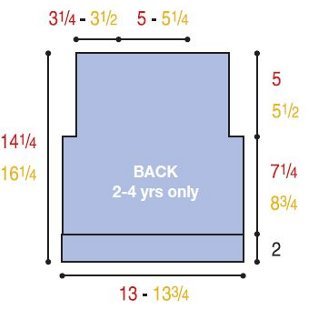
- Diagram
Instructions:
- CO 33 (43) sts. Purl 1 row.
- Pattern (numbers 2-5): R1: K1, *K1-YO-K3-Sl 1-K2tog-PSSO-K3-YO* end K2.
- Rows 2-4-6: Purl.
- R3: K1* K2-YO-K2-Sl 1-K2tog-PSSO-K2-YO-K1* end K3 instead of K1.
- R5: K1-K2tog* YO-K1-YO-K1-Sl1-K2tog-PSSO-K1-YO-K1-YO-Sl 1-K2tog-PSSO* end YO-K1-YO- K2tog-K1. Added clarification for Row 5: rep from *, ending last rep [k1, yo] twice, k2tog, k1.
- The last time you repeat from the * instead of doing the sl 1, k2tog, psso after the [k1, yo] twice, you end with k2tog, k1. Therefore the last time through the repeat you only work 5 sts instead of 10 and then work the 5 ending stitches. This works out to 43 sts. For the last 10-st repeat of the pattern, there is no compensating increase (yo) after the double decrease (sl 1, k2tog, PSSO), so instead of working 'sl 1, k2tog, psso' (a double decrease, using 3 sts) you work 'k2tog' (a single decrease, using 2 sts), then knit the last st (which is actually an edge st throughout the Stitch pattern). This will keep the stitch count consistent on Row 5.
- Repeat rows 1-6 for 30”. Bind off loosely.
- Make 2 pieces.
FINISHING
- Lay pieces flat. Mark each piece according to diagram.
- Join and pin seams.
NECKLINE
- Using crochet hook, SC in each loop decreasing in each “V” or seam. Join.
- Finish with Backward SC or Shell Stitch.
FRINGE
- Cut 10”-Use 3 strands.
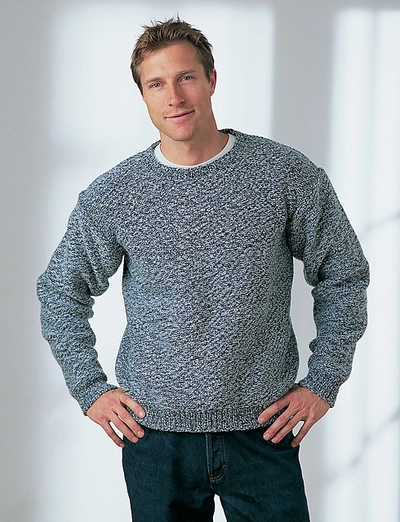
Read NextSimple Men's Knit Sweater Pattern
Your Recently Viewed Projects
Thanks for your comment. Don't forget to share!
aketch
Nov 25, 2016
I like these lacy, see through ponchos. They are elegant and very feminine at the same time. I enjoy pairing them up with various undergarments, making either tone on tone combinations or punchy contrasts. I get many different looks with my lacey poncho.
caligirl90
May 14, 2013
Honestly this pattern could be written much easier. Heck #6 has stuff in there that is wordy and almost made to be confusing. And I've been knitting since I was 9! I understand the pattern....but geez. I think I will file this away for later when I feel like rewriting it for myself to use. I like a pattern I can glance at while watching TV or waiting in line at the store. Not one I have to give myself a headache using.
ScarletDove
Mar 25, 2013
For those of you having trouble with this pattern, I found it by chance when downloading free patterns at Mary Maxim website. It is called "Free Lacy Poncho Knit Pattern" if you need to search for it. Try this link to the pattern: http://www.marymaxim.com/free-lacy-poncho-knit-pattern.html. You may need to login or register to get it. Try this download link once you login/register: http://www.marymaxim.com/downloadable/download/sample/sample_id/267/. You will be able to download a pdf of the pattern and it is complete with assembly diagram. Best of luck ladies, it was a lucky find....
ScarletDove
Mar 25, 2013
I just tried to see if the links would work--the second link took me direct to the pdf and I did not login, so give the second link I listed first.....ScarletDove
I Learned It All I n 4H
Oct 23, 2016
Thanks so much. Just downloaded the instructions. So much simpler.
Dale1952
Mar 19, 2013
I finally got the 2 pieces knit. Now I have no idea how they go together. I made the "L" shape from the two pieces but now what?
kathycam
Sep 19, 2012
Oh how I would love to make this poncho, but I don't understand the R5 amendments and I don't understand the diagram either. If anyone could write this pattern and diagram in a more understandable way, I would love to have it.
amethystlady
Sep 18, 2012
I would really like to make this but the pattern is causing a headache...and for some reason I can't print the translation a nice lady (Rosa)? put in the comments...Please, can someone clean this pattern up for us?
bizibee 0451090
Jun 17, 2012
I'm sooooo disappointed that this is a knitting pattern - such a pretty poncho! Any chance of a very clever person converting this so that I could get my hook into it?
JanRosa
Jun 06, 2012
Regarding the number in question - the numbers 1. 2. 3. 4. 5. etc. are, shall we call them, paragraph #'s. The Row numbers appear as R1: Rows 2, 4, 6: R3: R5: following the paragraph #'s. #1 is CO row - #2 is R1: - #3 is Rows 2, 4, 6: - #4 is R3: - #5 is R5:. NOW - I have a question - Why are there 2 cast on numbers - CO 33 (43) sts. - if this is a 1 size poncho? How many stitches do I cast on?
CarolCandido1
Jun 07, 2012
Thank you JanRosa - that was very helpful. Now for your question -- I am "assuming" the CO for 33 is for size s/m and 43 is for lg. The model I am sure is wearing a CO 33.
amethystlady
Sep 18, 2012
I was really happy with your translation, Jan Rosa, until I tried to decipher "Row 5". Why did this poorly written pattern get published? Talk about a headache! I'm off to look for a very easy poncho pattern and one I can follow much easier!
CarolCandido1
Jun 06, 2012
Did anyone get an answer to the question regarding lines 2 and 3? I am also very confused and would love to make this!
DancingGramma
Nov 26, 2012
Did you ever get a reply to this message? The instructions are really abbreviated for those who have done it before. And as I read through, it was confusing. You will KNIT on rows 2, 3, and 5 in the pattern stated, and just PURL across on Rows 2, 4, and 6. Those combined rows will complete the pattern for one section. Sequences between stars are repeated as instructed after the last *. The problem is the writer changed the pattern and counts after Row 6, but they should have indicated Row 7 instead of "R3", making you think you did Row 3 all wrong. I will have to play with this. I have a feeling they should have been more detailed in their instructions.
Leny
Jun 06, 2012
I sure like this poncho, but Im confused. What is line # 2 saying ? Please help ?
djohn 9576150
Jun 05, 2012
I have tried 3 times to print the directions for this gorgeous poncho....every time it gets to the bottom of the first page, the Desitin ad prints over the #5 row. I find this very annoying as I am not interested in diaper rash!!!! I am an 84 yr. old great grandmother and I do not have to take care of any babies but I do love to knit and crochet.
GreenJeanNorma
Feb 20, 2012
Is this poncho once size fits all? If not, can you tell me what I need to do to make sure it fits the person that wants me to make it?
sounder 3125790
Dec 20, 2011
Love this poncho and I am just starting it. I am confused about the row numbers. Under number 3 it says to purl on rows 2,4 and 6. But when I get to row 2 and 4 it is telling me to do a pattern other than purling.
Sweet Linda
Nov 29, 2011
I think this Jazzy Poncho is simply gorgeous !!! And I was really looking forward to making it but alas it is NOT a crocheted poncho !!! Do you happen to have a conversion-to-crochet pattern for this lovey poncho??? I hope I hope I hope
Report Inappropriate Comment
Are you sure you would like to report this comment? It will be flagged for our moderators to take action.
Thank you for taking the time to improve the content on our site.