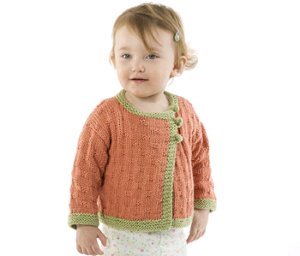
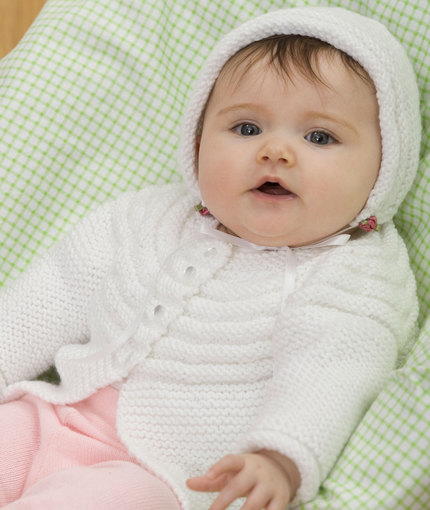
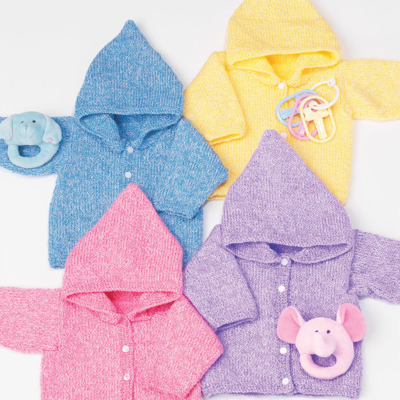
Strawberry Baby Cardigan
The strawberry baby cardigan is a cozy, girly cardigan for your little one. Make one using this free, cute knitting pattern and she'll wear it while you sing "Strawberry fields forever..."


Materials:
- NaturallyCaron.com Spa 75% microdenier acrylic, 25%Bamboo, 3 oz/85 g, 251 yds/230 m ball): 9 (12, 15) oz--Shown in: #0001 Rose Bisque
- One pair size US 7 (4.5 mm), or size to obtain gauge
- One pair size US 6 (4 mm)
- 3 (3, 4) buttons—3/4" diameter
- Yarn needle
- Pattern
Instructions:
SIZES: Toddler’s 2 (3–4, 5–6)
KNITTED MEASUREMENTS:
Chest 24 (26, 28)"/61 (66, 71) cm
Length 13 (15, 17 1/2)"/33 (38, 44.5) cm
GAUGE
In Stockinette stitch, using US size 7 (4.5 mm) needles, 20 sts and 24 rows = 4"/10 cm
STITCHES USED
Garter stitch (Garter st)
Stockinette stitch (St st)
Twist to left (TL): Skip first st, knit in back of second st on left-hand needle, knit in first st and slip both sts to right-hand needle.
Twist to right (TR): Skip first st, knit in front of second st on left-hand needle, knit in first st and slip both sts to right-hand needle.
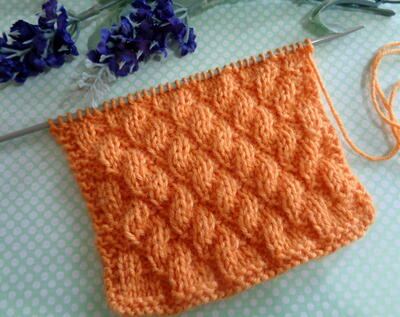
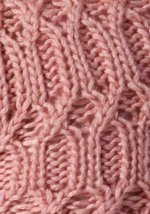
Smock Pattern (multiple of 4 sts plus 2)
Row 1 (RS): K1, *k1, p2, k1; repeat from * across, end with k1.
Row 2 (WS): P1, *p1, k2, p1; repeat from * across, end with p1.
Row 3 (RS): K1, *TL, TR; repeat from * across, end with k1.
Row 4: P1, *k1, p2, k1; repeat from * across, end with p1.
Row 5: K1, p1, *TR, p2; repeat from * across, end with TR, p1, k1.
Row 6: P1, *k1, p2, k1; repeat from * across, end with p1.
Row 7: K1, *TR, TL; repeat from * across, end with p1.
Rows 8, 10, 12 and 14: *P2, k2; repeat from * across, end with p2.
Row 9, 11 and 13: *K2, p2; repeat from * across, end with k2.
Repeat Rows 1-14 for smock pattern
BACK
- Using size 6 needles, cast on 90 (98, 106) sts. Knit 4 rows. Change to size 7 needles. Work even in St st until piece measures 7 1/2 (9, 11)" from beginning, end with a WS and decrease 32 (36, 40) sts evenly across last row—58 (62, 66) sts. Begin smock pattern and work until piece measures 8 1/2 (10, 12)" from beginning, end with a WS row.
- Shape Armholes
- Continuing in smock pattern, bind off 4 (4, 4) sts at beg of next 2 rows—50 (54, 58) sts.
- Work even until armhole measures 4 1/2 (5, 51/2)", end with a WS.
- Bind off loosely.
LEFT FRONT
- Using size 6 needles, cast on 44 (48, 52) sts. Knit 4 rows. Change to size 7 needles. Work even in St stuntil piece measures 7 1/2 (9, 11)" from beginning, end with a WS row and decrease 14 (14, 14) sts evenly across last row— 30 (34, 38) sts. Begin smock pattern and work until piece measures 8 1/2 (10, 12)" from beginning, end with a WS row.
- Shape Armhole
- Continuing in smock pattern, bind off 4 (4, 4) sts at armhole edge once—26 (30, 34) sts.
- Work until armhole measures 2 1/2 (3, 3)" from beginning, end with a RS row.
- Shape Neck
- (WS) Bind off 6 (7, 8) sts, work in pattern to end—20 (23, 26) sts.
- At neck edge, decrease 1 st every other row 5 (5, 5) times—15 (18, 21) sts.
- Work even until armhole measures same as Back to shoulder.
- Bind off loosely.
RIGHT FRONT
Work as for Left Front, reversing all shaping.
SLEEVES
- Using size 6 needles, cast on 34 (34, 36) sts. Knit 4 rows. Change to size 7 needles. Work even in St st until piece measures 2" from beginning, end with WS row. Increase 1 st each side of next RS row, then every 6 rows 4 (5, 6) times—44 (46, 50) sts. Work even until piece measures 7 (9, 11)" from beginning, end with a WS row.
- Shape Cap
- Continuing in St st, bind off 4 (4, 4) sts at beg of next 2 rows—36 (38, 42) sts.
- Decrease 1 st each side of next RS row, then every other row 6 (7, 7) times—22 (22, 26) sts.
- Next row (RS): K1, k2tog across, end with k1—12 (12, 14)
- Purl next row.
- Next row (RS): K2tog across.
- Bind off sts purlwise.
FINISHING
- Block pieces to measurements. Sew shoulder seams. Set in Sleeves; sew sleeve and side seams.
- Button Band
- With RS facing, using smaller needles, pick up and k 58 (66, 74) sts along Left Front edge.
- Knit 3 rows.
- Work in k2, p2 rib for 4 rows.
- Knit 3 rows
- Bind off sts knitwise.
- Buttonhole Band
- Place markers for 3 (3, 4) buttonholes on Right Front edge along smocked section, with first one 1/2" from neck edge. Work first 5 rows as for Button Band.
- Next row: *Work in pattern to marker, k2tog, yo; repeat from * for remaining buttonholes, work in pattern to end.
- Work remainder of band as for Button Band.
- Sew buttons to Button Band opposite buttonholes.
- Collar
- With RS facing, using size 6 needles, pick up and k 52 (56, 60) sts around neck edge.
- Row 1: Knit
- Row 2: K3, purl across to last 3 sts, k3.
- Repeat Rows 1 and 2 a total of 3 (4, 5) times.
- Next row: Knit, increasing 10 (10 12) sts evenly across row.
- With size 7 needles, bind off sts knitwise.
- Using yarn needle, weave in ends.
Your Recently Viewed Projects

Thanks for your comment. Don't forget to share!
Ms Sue
Apr 11, 2015
Yes, I agree. I started a second time with size 4 5 needles and DK yarn and the back is about 18" wide. Way too big for my grandbaby. This is the second pattern from FaveCrafts that is off on the pattern. Hmmm.
quanahs 5032097
Mar 02, 2016
Hi Ms. Sue, did you knit a swatch first to determine if your gauge is the same as the one listed? GAUGE In Stockinette stitch, using US size 7 (4.5 mm) needles, 20 sts and 24 rows = 4"/10 cm The easiest way to adjust for knitting differences is to adjust your needle size up or down until the gauge is a close match. Even though it can be a pain, a test swatch helps prevent frogging frustration.
quanahs 5032097
May 05, 2016
That is very big, my only suggestion is knitting the size 2 sweater to see it that will make for a better fit. I see that the back is slightly gathered into the smocked area, perhaps that is why it seems so large. At 98 stitches cast on for the size 3-4 you are knitting right on gauge, the knit should tighten up to size when you reach the smocked area. Sorry I am not more help.
dianawarburton 397 3061
Apr 06, 2015
Has anyone made this sweater according to directions? I am making the size 3/4 and it seems that casting on 98 stitches for the back makes a sweater that would fit an adult. Any decision would be appreciated. Thanks!
mammina2 3211190
Dec 23, 2011
Qualcuno potrebbe aiutarmi a mandarli la spiegazione in italiano?? Grazi
editorKS
Dec 27, 2011
Hi, mammina2 3211190. To inquire about an Italian translation for the pattern, you will have to contact the pattern designer directly (specified in the byline). You might also try posting your question on our Facebook page to see if a fellow crafter might be of assistance: www.facebook.com/favecrafts Good luck! --Editors of FaveCrafts
Report Inappropriate Comment
Are you sure you would like to report this comment? It will be flagged for our moderators to take action.
Thank you for taking the time to improve the content on our site.