Animal Adventure Window Cornice
Kids love the zoo, so why not bring the safari adventure home? Bright, cheerful fabric and iron-on adhesive help you create this "wild" window in one afternoon.

Materials:
- STYROFOAM™ Brand Foam:
- Sheets, 36" x 12" x 1", two
- Cotton fabrics, 45" wide: animal print, 5/8 yd.; coordinating solid, 1-5/8 yds.
- Quilt batting, crib size or 45" wide, 1-5/8 yds.
- Heavy-duty, iron-on adhesive, 17" x 1/4 yd.
- Large piping, color of choice, two packages
- Floral supplies: t-pins, six; wooden picks with wires removed, 3" long, 30
- Angle brackets with screws, 5", two
- Serrated knife
- Candle stub or paraffin
- Fabric marker
- Fine-line black permanent marker
- Yardstick or ruler
- Scissors
- Straight pins
- Iron and ironing board
- Low-temp glue gun and glue sticks
- Glue: fabric; plastic foam
- Rotary cutter and mat (optional)
- Table saw (optional)
Steps:
- Press fabrics as needed.
- Refer to cutting layout to draw cornice sections onto one foam sheet. Wax serrated knife with candle stub or paraffin. Use knife or table saw to cut sections from foam. Note: Second foam sheet becomes front of cornice.
- Refer to Fig. 1 to join ends to top. Use glue gun to glue three picks into each short end of cornice top, leaving 3/4" pick end protruding from foam. Apply plastic foam glue to foam edge. Use glue gun to apply glue to protruding pick ends. Press upper 5" edges of ends flush with cornice top as shown. Top of cornice should measure 5" x 36".
- Use glue gun to glue remaining picks halfway into front edge of top/ends assembly, spacing picks about 3" apart. Apply plastic foam glue to foam edge around picks. Gently press cornice front onto pick tips. Using glue gun, spot glue foam edges between picks. Quickly and firmly press cornice front flush with cornice top/ends assembly. Let dry completely.
- Cut one 23" x 54" rectangle from batting. Center top front cornice edge on batting. Smooth batting over cornice, allowing excess to overlap bottom and back edges. Pin to secure. Wrap batting smoothly around foam edges to inside, trimming and mitering corners as needed. Pin to secure. Trim excess batting, allowing 1-1/2" overlap inside each edge. Use glue gun to secure batting inside cornice. Let dry completely. Remove pins.
- Cut one 10" x 37" and two 9-1/2" x 10" rectangles from print fabric for center and side panels. Cut following from solid fabric: one 11" x 55" top/upper border strip; one 5" x 55" lower border strip; one 5-1/4" x 55-3/4" top/side lining; one 11-1/4" x 34-1/4" front lining. Use fabric marker to label wrong side of fabric pieces.
- For center front panel, press 1/2" hems in long edges of 10" x 37" fabric piece. Center and pin panel to cornice front, wrapping excess fabric around sides. Use glue gun to secure; remove pins.
- For side panels, press 1/2" hems in both short edges and one long edge. Align and pin long pressed edges to cornice sides, matching hems to corners of front panel. Use glue gun to secure, wrapping raw edges to inside back of cornice. Remove pins.
- Cut two 55" lengths from piping. Center and pin piping over top and bottom hemmed edges of center and side panels; raw piping edge will extend above and below fabric panel. Use fabric glue to secure, wrapping 1-1/2" to inside back of cornice. Remove pins.
- For borders, press 1/2" hem in one long edge of each fabric strip. Center and pin fabric strips to cornice, with hemmed edges covering raw edges of piping. Trim and miter corners. Use glue gun to secure, wrapping 1-1/2" to inside back of cornice. Remove pins.
- For lining, press 1/4" hems in two short edges and one long edge of each fabric strip. Center and glue hemmed edges of longer strip to inside top/sides of cornice, approximately 1" from back, open edge. Press 1/4" hems in all edges of front lining. Center and glue lining to inside front of cornice, covering raw edges of first piece and adjusting hem on end as needed for a good fit.
- Following manufacturer's instructions, apply iron-on adhesive to wrong side of a large scrap of remaining print fabric. Cut out desired animal motifs. Remove paper backing and iron on to cornice, carefully using tip of iron.
- Follow manufacturer's instructions to attach brackets to wall. Place completed cornice on brackets.
®™ Trademark of The Dow Chemical Company ("Dow") or an affiliated company of Dow. For more project ideas, please see styrofoamstyle.com.
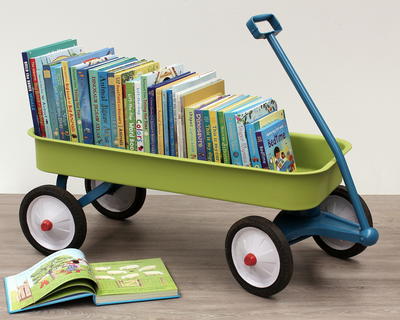
Read NextRadio Flyer Book Wagon
Your Recently Viewed Projects
Thanks for your comment. Don't forget to share!
Report Inappropriate Comment
Are you sure you would like to report this comment? It will be flagged for our moderators to take action.
Thank you for taking the time to improve the content on our site.