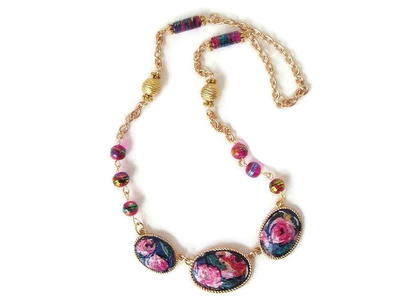
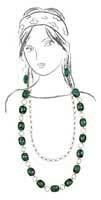
Oriental Turquoise Necklace
A variety of color makes the turquoise appear more natural in this faux turquoise homemade necklace from AMACO.

Materials:
- AMACO Pro Bead Roller in size or shape of choice (this project used set #2)
- AMACO Polyblade
- AMACO Bead Baking Rack
- AMACO Polymer Clay oven
- AMACO Poly Roller
- Polymer clay - Light Blue or Light green (the color of a robin egg), Black
- Acrylic Paint - Black
- Make-up sponges
- Adirondak Ink (alcohol based ink) - Earth tone colors
- 15 large ½" silver jump rings
- Toggle
- 400 grit wet/dry sandpaper. (optional)
- Basic Jewelry tools
- Disposable worksurface or ceramic tile
Instructions:
-
Working on a clay tile, use the Polyblade to slice a single color of clay into random shaped bits and pieces. These should be several sizes of small, medium and large pieces.
-
Gather the clay pieces together. Add a drop or two of paint to the top. Use make-up sponge to cover all the pieces of clay with paint. Allow to dry, usually about 20 minutes. When the paint is dry to the touch, gather these pieces and form a ball. Slice the ball in half with the Polyblade to reveal the texture of the turquoise pattern.
-
To create pillow beads, use more than the amount of clay that is recommended in the oval shape of the bead roller. Lay the ball into the oval section and place the top down onto the bead to "smash" the bead. Next, simply "rock" the bead back and forth. The extra clay inside the section will level out to create a pillow shaped bead. In this case, the bead does not roll over, it rocks! Practice with different amounts of clay.
-
Slice off very thin sections of the turquoise pattern that you just created. The shavings should be random in size and extremely thin. It is okay if you do not get a full slice. Place shavings onto black base bead where desired. Use the poly roller to set the shavings into the bead to give it an inlaid look.
-
Gently poke holes through bead with a toothpick. Place beads onto piercing pins and bake on baking rack for one hour according to the temperature suggested by the manufacturer.
-
Gently sand each bead if desired with 400grit wet/dry sandpaper. This is optional but greatly enhances the look of your bead.
-
Apply a drop of alcohol ink to a make-up sponge and daub onto the turquoise areas in a random pattern. This gives the turquoise a more natural organic appearance and enhances the natural look. Gently buff on a piece of denim for a matte finish.
-
Working off the spool, thread wire through the bead, creating loops at each end. Attach these loops to the large jump rings. Add chain at each end. Add toggle and clasps to end of chain. Measure the desired length of chain for the inside necklace and add to necklace with jump rings.
- Earrings: Add a bead to a loop. Attach loop to earring wire.
Note:
- There are various colors of turquoise. It is not absolutely necessary to be precise in the base color. Some turquoise leans more to the blue side, others more to the green. A variety of color makes the turquoise appear more natural.
Your Recently Viewed Projects
Thanks for your comment. Don't forget to share!
Report Inappropriate Comment
Are you sure you would like to report this comment? It will be flagged for our moderators to take action.
Thank you for taking the time to improve the content on our site.