This project was submitted by one of our readers, just like you.
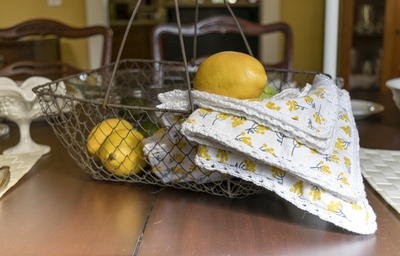
Springtime DIY Napkins

Springtime DIY Napkins
In the Designer's Words: "I am a sucker for nice linens of any sort, but I have true penchant for table linens. This linen love of mine surely is a genetic thing I inherited the gene from my linen-loving, embroidery-embellishing grandma and mom. Ever since I discovered how easy it was to make mitre-edge napkins and add a crochet edge to just about anything, the making of napkins has been in overdrive. The materials indicated are sufficient for 4 15" by 15" napkins."
Project TypeMake a Project
Time to CompleteWeekend project
Sewn byBoth Hand and Machine

Materials List
- 1 yard of 44? wide fabric. I prefer 100% cotton but that’s a personal preference
-
1 skein/ball of DMC Pearl Cotton Size 5
- 1 skein/ball Aunt Lydia’s Crochet Cotton Size 3
- Sewing Machine
- Crochet Hook, size 1
-
Needle
-
Iron
- Ironing Board
- Piece of cardstock with a line drawn across 1/4? down from stop and another 1/2? down from top. See website for illustration.
- Disappearing Ink
Instructions
-
Wash your fabric before you sew, but before you wash it, run a quick stitch with your sewing machine or you will have a unraveled, knotted mess!
-
Wash and dry your fabric
-
Iron down, using spray starch, 1/4" on all sides and then iron down,using spray starch, 1/2" on all sides. I found the easiest way to do this part is to have a a piece of cardstock marked at those increments that I could fold the fabric over and iron.
-
Once you have 1/4" turned over and ironed, and then 1/2" turned over and ironed, it’s time to make your mitred corners. There is a link on my website to a tutorial I did on mitred corners for another project.
-
Once your mitred corners are done, you may be inclined to sew the hem down. I found it best to wait on this. If you sew it down, all your knots from sewing the backstitch will show. If you’ve starched it well, the crease will remain while you sew in the backstitch and you can sew the hem afterwards.
-
I made marks every 1 cm around the perimeter of the fabric with the disappearing ink, threaded my needle with the pearl cotton and sewed the backstitch at the edge.
-
If you aren’t familiar with the back stitch, it’s very simple. There is an illustrated image on my site showing how to do the backstitch.
-
Once you’ve sewn the backstitch around your napkin, you can get started with putting the crochet edge on. Work 3 single crochets into each back stitch segment. There is a youtube video on my site from another project that will show you how to pick up stitches within each backstitch segment (But remember you’re only putting 3 stitches into each segment, the video indicates 4). You’ll repeat this for each backstitch segment all around your napkin. At your corners, add two extra chain stitches as your turn the corner. In other words, when you get to the last segment before the corner, after you’ve done your 3rd stitch, do two chains before you start the 1st single crochet in the first segment on the next side. Make sense?
-
Once you’ve gone all the way around, it’s time to start the second row. Essentially what we’re doing on this row is doing a single crochet stitch in the middle of each of the three stitches you just did and then chaining 2 and repeating these three stitches for the entire row. See illustrated instructions on my site.
-
When you get to each corner chain stitch 3-4 to give the edging the ease it needs.
-
I have produced a wee video giving a glimpse of how I created the eyelet. I am a firm believer in a picture (or in this case…video) is worth a thousand words. It's on my site and I hope it helps.
-
To finish it, use your sewing machine to sew down the hem that you had ironed and starched earlier.

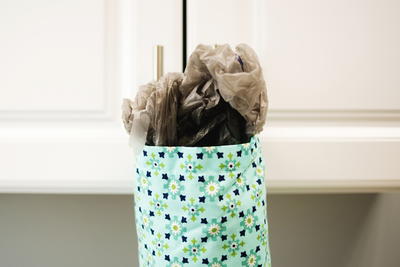
Read NextFat Quarter Plastic Bag Dispenser