Spooktacular Ink Pen Centerpiece
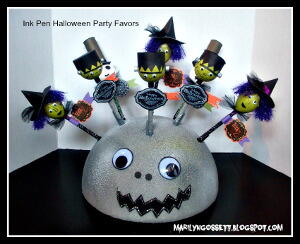
Planning a Halloween party? This Spooktacular Ink Pen Centerpiece doubles as decor and a fun party favor holder. Create both the centerpiece base and the party favors with foam and Krylon spray paint for a spooktastic Halloween!
Primary TechniquePainting

Materials:
- 1 Smoothfoam half Ball (12")
- 5 Smoothfoam Balls (2")
- 3 Smoothfoam Eggs (3")
- 2 Sheets of cardstock: 12" Black
- 1 Sheet each of Cardstock in Purple, Dark Brown, Orange,
- 1 Set of rubber stamps (Halloween Themed)
- Miscellaneous embellishments: Adhesive, Wiggle Eyes, black netting, Stickles glitter glue, 1/4" wood plugs; 6
- 8 Bic Pens with clear or black lids
- 3 spools of Washi Tape; black dot, black with green numbers, silver
- Pair of Fiskars Craft Scissors
- 1 Can of Krylon ColorMaster Spray Paint - White Gloss
- 1 Can of Krylon ColorMaster Spray Paint - Classic Gray
- 1 Can of Krylon ColorMaster Spray Paint - Ivy Leaf
Instructions:
- Follow Manufacturer Instructions and spray paint the 12" half sphere Classic Gray. Place each Smoothfoam Ball and the Smoothfoam eggs on a wooden skewer. Grip the skewer with one hand and spray paint the Smoothfoam with the other. Paint three 2" balls Ivy Leaf, three 3" eggs Ivy Leaf, two 2" balls White Gloss. Let dry completely. Centerpiece: Invert the Smoothfoam sphere with rounded side facing up. Adhere 1-3/4" Wiggle eyes to one side. Adhere two 1/2" Black circles for the nose and a jagged 1-1/2" x 6" mouth.
- Pen Top Characters: Poke a hole in the bottom of one "head". (I used a wooden chopstick for this step.) Insert the top of one pen into the hole. Remove the pen and wrap it with Washi tape, leaving the cap on. Repeat for each character's head and each ink pen.
- For the Witch: (green egg head) Hair: Wrap purple sparkle yarn around one hand 20 times. Remove from hand, cut one end of the loop. Tie an extra piece of yarn around the middle of the yarn and tie in a tight knot to secure. Glue to the top of the Witch's head. (Wide end of the egg.) Glue wiggle eyes to the face. Punch a 1/2" circle. Cut in half. Glue one half to the face for the mouth. Draw on a nose with a Black marker. Hat: Die-cut a 3" circle & a 3-1/2" circle from Black cardstock. Cut the 3-1/2" circle in two. Shape one half into a cone. Adhere to the center of the 3" circle. Adhere to the top of the witches head. Embellish with a little piece of black tulle. Repeat for each witch.
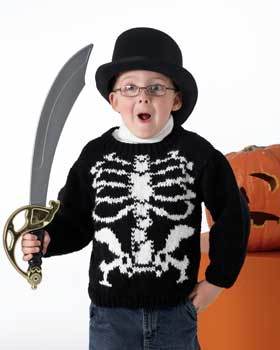
- For the Skeleton: (white face) Cover a pen with the green Washi Tape. Top Hat: Die-cut a 2-1/2" circle and a 1-1/4" circle from Dark Brown cardstock. Cut a 2-3/4" x 6" rectangle. Roll the rectangle into a 1" tube. Glue one end to the middle of the larger circle. Glue the smaller circle to the top of the tube. Face: Punch two 1/2" circles for the eys and cut a 1" jagged mouth. Adhere to the face. Adhere the top hat to the top of the head. Embellish hat with adhesive sparkle tape or Stickles and adhere a tulle bow under the chin. Repeat for each skeleton pen.
- For the Frankenstein: (Green face) Cover a pen with silver Washi Tape. Cut a 1-1/4" x 8" strip and a 2" circle of black paper. Hair: Cut a jagged edge along one long side of the rectangle by cutting small V's into the paper. Wrap around the top of the head, trip excess length, overlap and adhere ends. Make sure the jagged edge is pointing down. Adhere a wooden button plug to each side of the head. Adhere wiggle eyes and draw mouth and nose with a black marker. Paint the wooden plugs Silver. (Or remember to spray paint them using the Classic Gray.) Embellish with adhesive sparkle tape or Stickles. To finish: Make tags from the Halloween themed rubber stamps and adhere one to each character.
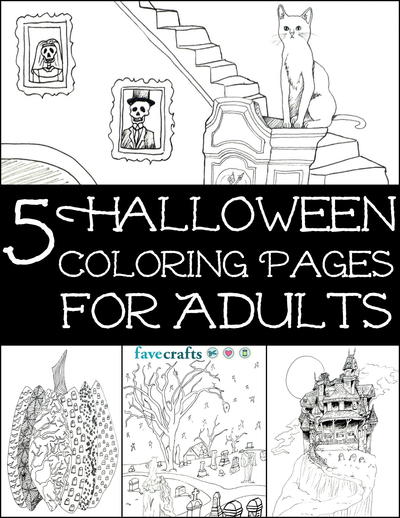
Read NextCute Polly Pumpkin