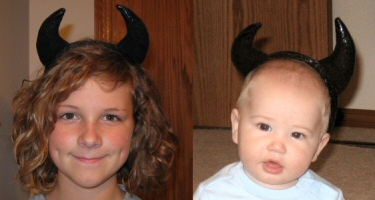
Easy Halloween Horns Tutorial
This step-by-step photo tutorial, from Stacy Schlyer of Stacy Sews, walks you through how to sew a Halloween horns headband to complete a devil or black cat costume. You can use whatever fabric matches the Halloween costume.
Materials:
- Smooth Headband (Without Teeth)
- Scraps of Fabric
- Polyester fiberfill
- Matching Thread
- Hand sewing needle
Optional:
Hot glue gun
Instructions:
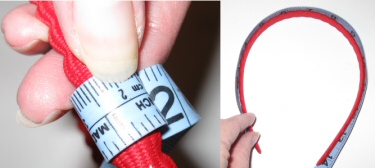
- To determine what size to cut your material for your headband you'll need to take a few measurements. First, measure the headband width (if the headband is wider at one point, use this measurement). Add 3/4" to width size. Additionally, measure the headband length, adding 1" to measurement. Use these measurements to make a headband covering piece and cut from your material. Additionally, cut 4 horn or ear sections from material.
- On longest edges of Headband Covering Piece fold under 1/4" to wrong side. Press in place.
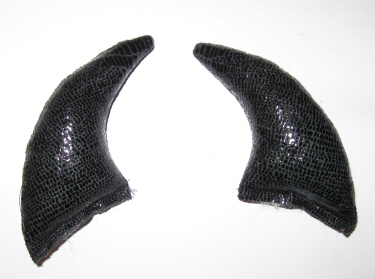
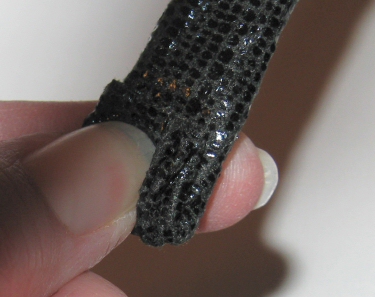
- Make the horn or ear pieces by sewing 2 sections, right sides together. Clip curves and turn right side out. Stuff firmlywith fiberfill leaving 1/4" of the bottom edge free. Baste raw edges together. Repeat for second ear or horn.
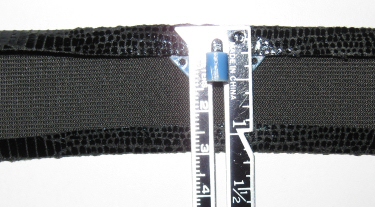
- Fold long edges of Headband Covering piece so that finished edges are even. Press in place. Next, determine the center of the headband - crease this measurement by pressing with iron. Open up Headband Covering piece so that wrong side is up. From the center crease measure down 1 1/2". Place edge of horn section next to this measurement so that basting is even with the creased edge and pin in place. Repeat this step for the second side. (Note: These measurements can be adjusted so that the ears or horns are closer together or further apart depending on your liking). Again, fold up finished edges of Headband Covering so that finished edges are even - however this time, pin them in place.
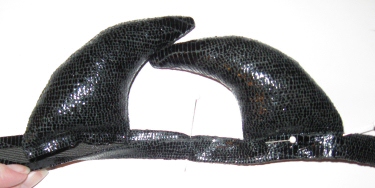
- Sew close to finished edges and across earshorns. It may be helpful to switch your machine foot to a zipper foot when sewing across the ear or horns. Slide your finished Headband Covering across purchased headband until hornsears are centered. (Note: Stitching and horns should be centered across the top of the headband.)
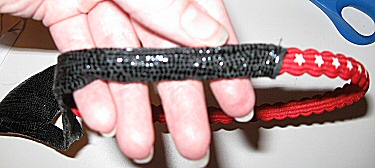
- Fold under raw edges of headband ends (short ends) to wrong side of headband. Hand sew or hot glue in place.
Read NextCute Polly Pumpkin