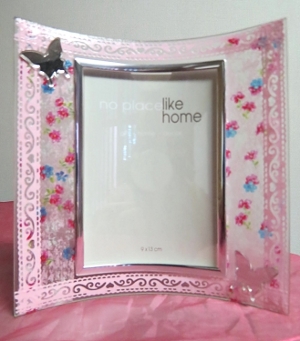
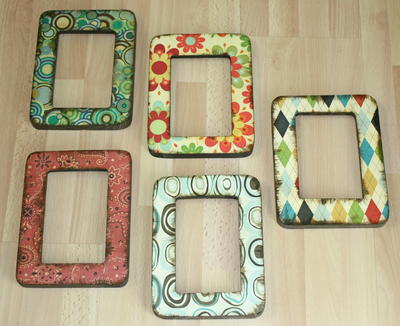
Curvy Girl Power Frame
Show off a photo of you and your BFF with this adorable Curvy Girl Power Frame. Great for showcasing all kinds of photos, this is a fun and thrifty way to upcycle an old thrift store find. Adding a personalized touch to an old frame is a fun way to bring a new life to an old frame, and it makes a fun and thrifty gift idea for girls of all ages. Frame your favorite photo in this cute DIY frame and let the compliments start rolling in!

Materials:
- Curved glass photo frame – for this project, the curved glass frame that was used had a silver metallic frame around the photo area
- Napkin with small floral print
- Pink self-adhesive bud silk stationery lace sticker
- Heritage Satin Mod Podge
- Heritage gloss water-based varnish
- Two small silver mirror butterflies
- Clear drying craft glue
- 10/32” paint brush
- Hairdryer
- Pair of standard scissors
- Few sheets of old newspapers to protect the working area
- Old cloth
Instructions:
- For the left and right sides, measure the size of the frame from the edge of the glass to the edge of the metallic frame, and cut strips from the napkin that would fit.
- Use these strips to add borders to the left and to the right of the frame. Remove the bottom layers from all the napkin strips. Paint a thin layer of Modge Podge to the left of the frame. Put the first strip of napkin in position on the frame, and press down lightly so that it will stick to the frame. Be careful not to tear the napkin. Paint Modge Podge over the strip of napkin. It is best to start painting from the middle of the strip towards the sides, working in small triangles.

- Use your index finger to gently rub out any air bubbles from the back of the strip. Rub from the inside towards the outside and be careful not to tear the napkin. Use the old cloth to gently wipe away any Modge Podge from the metallic frame.
- Repeat with the other strip until the napkin borders on the left and right has been completed, and use the hairdryer to dry the napkin borders of the frame. Do not use the highest heat setting on the hairdryer, as the frame might become too hot to handle.
- Use the pink self-adhesive bud silk stationery lace sticker to add a lace border all around the frame. Add Modge Podge to the edge of the frame and glue a strip of lace sticker in place. Neatly cut off any protruding edges. Paint Modge Podge over the top of the strip of lace sticker to ensure that it will remain in place. Continue until the whole frame has a lace border.
- Use the hairdryer to dry the lace border thoroughly.
- Paint a layer of Modge Podge over the frame, from the edge of the glass to the edge of the metallic frame. The Modge Podge will protect the pictures and give the product a smoother finish. Dry the frame thoroughly with the hairdryer.
- Repeat step 7 you need to apply at least 3 coats of Modge Podge, but remember that with every layer, the direction in which the Modge Podge is applied, must be changed from horizontal to vertical to horizontal, etc. Also, remember that after every layer of Modge Podge, the frame must first be dried thoroughly with the hairdryer.
- To protect the frame from wear and tear, apply one coat of the Heritage gloss water-based varnish and use the hairdryer to dry it thoroughly.
- Glue the butterflies in place in the top left and bottom right corners of the frame.
Read NextDollar Store Frame Makeovers