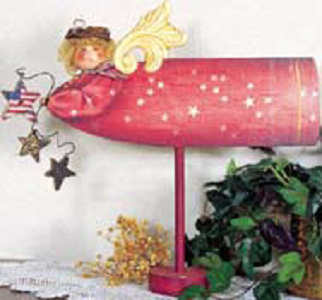
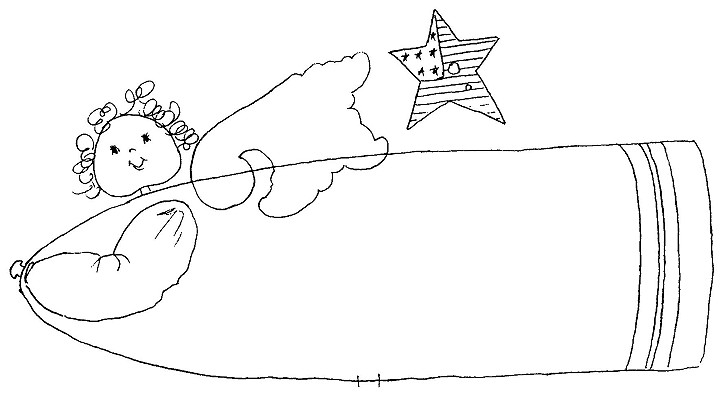
Patriotic Flying Angel
With simple wooden shapes, you can create an Americana home accent piece. This flying angel holds a patriotic star.

Materials:
DecoArt Products Required
Americana Acrylics
- DA101 - Dioxazine Purple (transparent)
- DA102 - Medium Flesh
- DA162 - Antique Mauve
- DA164 - Light Buttermilk
- DA166 - Deep Midnight Blue
- DA170 - Santa Red
- DA179 - Alizarin Crimson
Dazzling Metallics
- DA148 - Emperor's Gold
Brush-On Sealers
- DS14 - Americana Matte Varnish
Americana Multi-Purpose Sealer
- DS17 - Multi-Purpose Sealer
Americana Drying Time Extender
- DAS1 - Brush 'n Blend Extender
Supplies
- Brushes - Flat Brushes 4, 6, 10, 12; Deerfoot Stippler 1/4"; Liner 10/0; Sponge brush
- Misc - Palette; Sandpaper; Tack cloth; 1 1/2" X-mini vine wreath; 1/3 yd. 1/8" ribbon (for bow); Mini Curly Hair; Tiny brass star (optional); 10" 19 gauge steel wire (from craft or hardware store); Tacky Glue or Sobo; Fabric (Classic Cotton Brand is used on this project)
- For Fabric on Wood: Fabric (with small print) slightly larger than surface; Brayer or rolling pin; X-Acto knife or single edge razor blade; Sanding discs extra fine and medium grit
- Wooden Cut-out, Crab apple, Birdhouse and two 1" primitive stars (available from Plum Fun Wood) or Paintin Cottage, Mobile, Alabama.
- Wooden "wing" is a decorative wood carving from Bendix Moulding, Inc., available at building materials stores.
- Pattern
Instructions:
- Cut wood, sand, wipe off dust and seal with Multi-purpose Sealer. Sand again and wipe off dust.
- Basecoat head and dowel "hands" with two coats of Medium Flesh. Let paint dry and sand lightly between coats. Basecoat wing with Lt. Buttermilk. Basecoat edges and back of angel and dowel stand with Santa Red + Antique Mauve + a tiny amount of Alizarin Crimson. Basecoat the stars with Deep Midnight Blue. Basecoat the birdhouse, front and back, with Lt. Buttermilk and edges with Emperor's Gold. While waiting for the basecoats to dry, prepare the fabric (see instructions on how to apply fabric to wood or papier mache surface). When fabric has adhered to the top of the dowel stand and the dress, let dry and transfer pattern. Basecoat face with Medium Flesh.
- With Burnt Sienna, shade behind eyes, under lower lip and at corners of the mouth.
- Tint cheeks by stippling Cadmium Red + a speck of Alizarin Crimson.
- Indicate nose and mouth with a line of Burnt Sienna + a speck of Cadmium Red (thin paint to a light value for this).
- Deepen the shading: Burnt Sienna + a speck of Dioxazine Purple.
- Paint the eyes: Iris: Williamsburg Blue. Whites of eyes: White + a speck of Medium Flesh. Pupils: Burnt Sienna + a small amount of Deep Midnight Blue. Highlight in eyes: White. Lightly brush an indication of eyebrows with a tiny amount of Yellow Ochre + Raw Sienna.
- Highlight the outer cheeks underneath the eyes, smile creases to the outside of mouth, nose and lower lip with a tiny amount of Titanium White.
- Shade the sides and back of head (under where hair will be) with Burnt Sienna + a small amount of Dioxazine Purple. ***In steps 1, 2, 3, 5, 7 and 8, lightly moisten surface with water or Brush 'n Blend extender prior to applying paint. This will aid in blending paint. Dry the surface after each step with a hair dryer on low setting, then moisten lightly again before continuing. Do not moisten surface prior to painting eyes or indicating nose and mouth.
- Paint the dress trim with Emperor's Gold. Let dry.
- Shade sides of dress, folds of sleeve as well as well as behind sleeve with Santa Red + Antique Mauve (equal amounts) + a speck of Alizarin Crimson. Deepen shading with Alizarin Crimson + Lamp Black (2 to 1 ratio).
- Let shading dry, then lightly moisten dress with water or extender and lightly brush highlights of Titanium White on the skirt and sleeves. (Take care not to overdo this.)
FINISH THE ACCESSORIES
- Moisten wing with extender, then brush Emperor's Gold over the entire wing. Use a soft cloth to wipe away the excess gold, leaving more in the crevices. Let dry.
- Paint strips on birdhouse with mixture used to basecoat edges of the angel. Paint a blue ground of Deep Midnight Blue. Let dry, then paint tiny stars of Titanium White. Use a permanent ink pen with brown or black ink to add "stitches" to the edges of the star.
- Sponge or spatter Emperor's Gold on the surface of the 1" stars. Brush Emperor's Gold on the edges of the stars. Let dry.
Finishing Instructions
ASSEMBLY
- Varnish all painted and fabric-covered pieces of the project. Let dry.
- Glue the wing onto the angel. Refer to pattern for placement.
- Add a drop of glue to each piece and insert the hands dowel, the head and the support dowel. Let dry.
- Cover the sides and back of the head with the Tacky glue and attach the hair. Let dry.
- Secure the 19 gauge wire to the hands dowel then thread the stars onto the wire. Note: You may wrap the wire around a brush handle to make some of the curls you see in the wire.
- Attach the bow at the angel's neck.
- Secure the halo to her head with the glue. Optional: Add a tiny brass star to her halo.
For more great free angel craft projects, check out our angel crafts eBook.
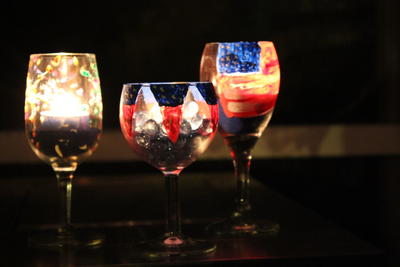
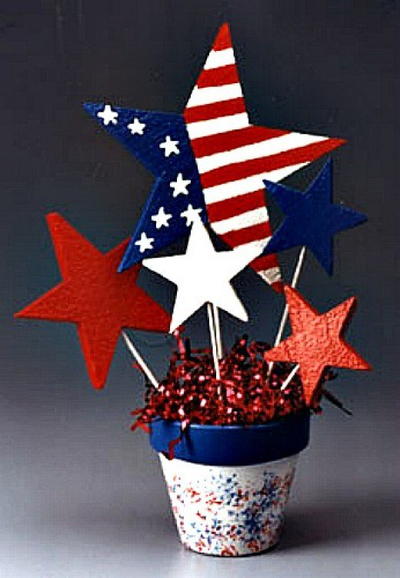
Read NextJuly 4th Ambient Lighting Crafts


