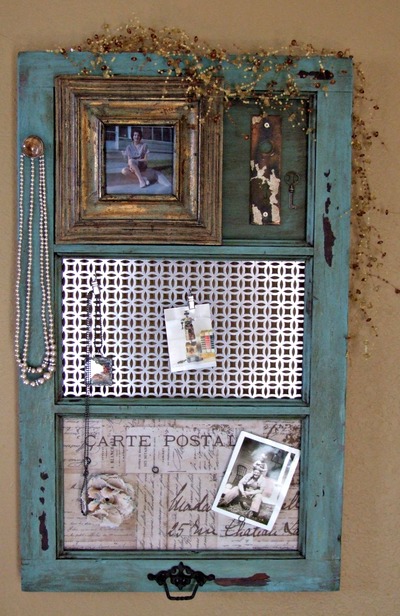
DIY Inspiration Board
This great project for a padded fabric and ribbon inspiration board comes to us from Allison of the ever-inspiring Petit Elefant. Using fabric which matches your decor, create one for the kitchen or the crafting corner in your home.
I decided 2009 was the year for me to have an inspiration board. I’ve seen them all over the place, I love them and I’ve wanted one of my own for a long time now. I’m a fairly crafty person, so I thought I’d just throw some materials together and see what I came up with. I’m really pleased with the result.
Materials:
- Piece of fiberboard
- Heavy-duty home decorating fabric
- Ribbon
- Quilt Batting
- Staple Gun staples
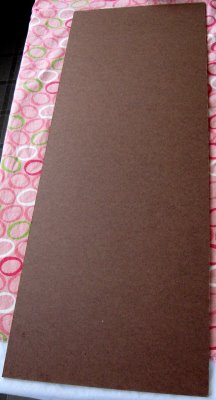
First I bought a piece of fiberboard from Home Depot for around $3.50 and had it cut to the size specifications I needed, I measured the wall next to my desk beforehand so I knew exactly how much space I had to work with. I believe the board was 4’ x 6’ so I have plenty leftover to do a board for my daughter’s room.
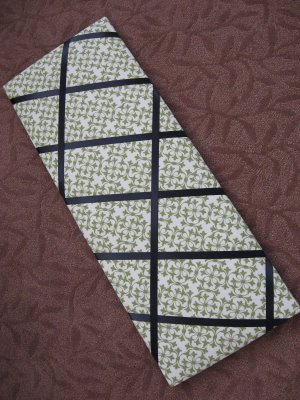
Next I went to my local fabric store and selected some beautiful fabric. I’ve seen Inspiration Boards with plain backgrounds, but I wanted mine a little sussied up so I went with a really pretty home décor fabric in a color that I love green. I think I got maybe ½ yard, and it was on sale so it cost me about $4. I bought some ribbon in the same fabric store so I could see how the colors looked together great, if I may say so and I was off.
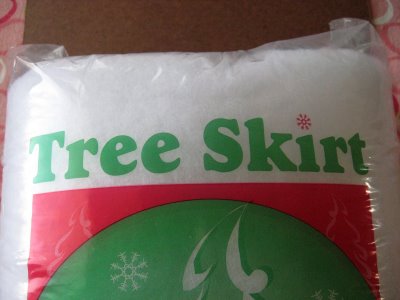
I think the ribbon was around $2. I also picked up some batting meant for a Christmas tree skirt; it was on clearance for something like .20 cents but any quilt batting will do. So all in all I was out less than $10 for the whole project. And it’s custom made so I love it. Easy peasy.
Steps:
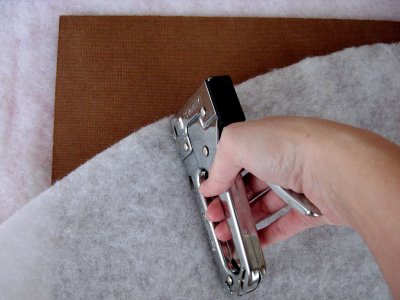
- Lay the fiberboard on a flat surface. You’re going to be doing some fabric stretching and stapling so you want it to be a sturdy flat surface.
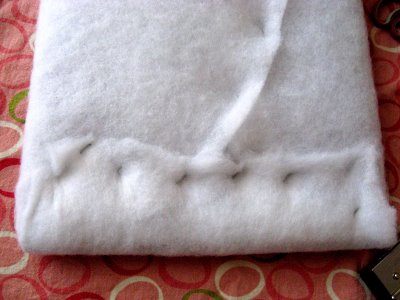
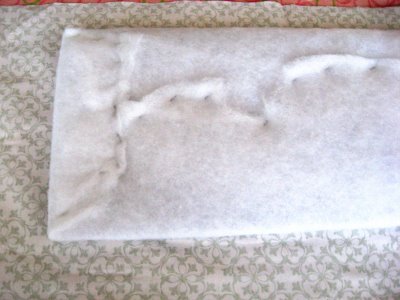
- Wrap a layer of batting around the board. Stretch it really tight across the board and start stapling away!
- I wrapped two layers of batting around the board because I wanted mine to have a little dimension but you can do anything you’d like. It’s your inspiration board after all.
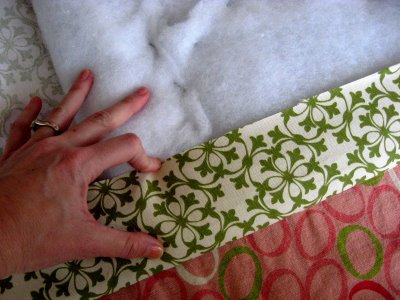
- Now that the board is fully batting-ed, lay it down in the center of the fabric. Play with the positioning a little, to make sure you have enough fabric to go all the way around the board.
- Pull the fabric around the back of the board until it’s really taut and start stapling. I stapled all over the back about every half-inch or so because I wanted the fabric to really stay put.
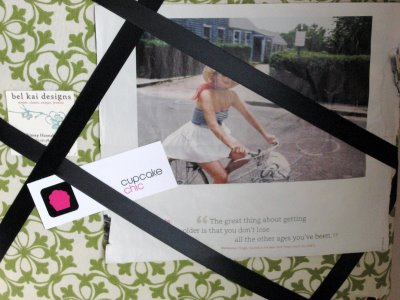
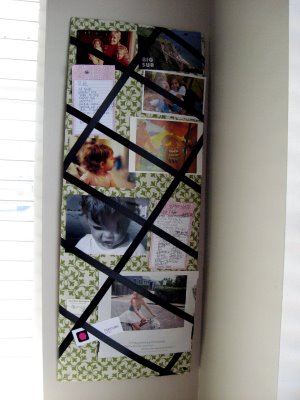
- Now that you’ve got the fabric on, pull out your pretty ribbon. This is where the creative license really comes in. You’re going to want experiment a little with laying the ribbon across the board before you do any cutting. Just to see what kind of pattern you want. You can do a grid of squares, or do slanted rectangles like I did. It doesn’t really matter, just as long as you have intersections where the ribbon meets so you can tuck in all your photos & inspirations.
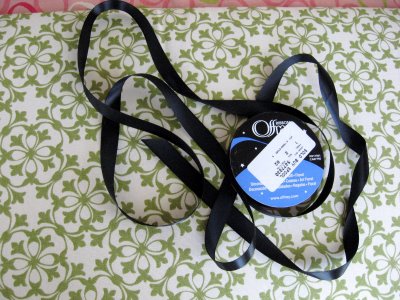
- Once you have your ribbon laid out the way you want, cut it into pieces to be stapled. Make sure the pieces of ribbon are long enough to go around the back of the board at least a few inches. If you want, you can dab hot glue where the ribbon meets the back of the board before you staple. I’d still use a staple though because the ribbon needs to be able to hold up all your little mementos and you don’t want it falling down on the job. Pull it really taut before stapling. Also, depending how you’re going to be hanging your board, you might want to save a length of ribbon to use as your hanger. Make your pattern of ribbon and voila! You’re done. Unless of course you’re going to hang your board with a piece of ribbon. In which case you need to create a “hanger” out of ribbon. Just attach it the same way you did with the other ribbon, with glue and staples.
Now you’re really done.
Now hang it on the wall somewhere you can see it every day, and tuck in your happy little mementos. Enjoy!
Your Recently Viewed Projects
Thanks for your comment. Don't forget to share!
lpalmer59 7490208
Mar 24, 2016
This is the perfect project for the grandkids room, and it is something that each of them can help me create. Of course, I would need to use the staple gun with the little ones, but the older ones would be capable on their own. They can pick out the material they want, oh I love projects I can do with the grandkids, love this!
pammyers59 6857541
Jan 30, 2013
I love this idea. Will be making one to match the curtains in my kitchen. Thanks for a well illustrated and directed craft.
yarnmiss57 2156430
Jan 22, 2013
Again my dollar store came thru. I purchased cork board that was in the shape of puzzle pieces so I could make my wall board as large as I wanted. I placed them together, glued them so they would hold firm, cover them with a pretty material and some criss cross rick rack and hung them in both of the kids rooms. A smaller one in the kitchen and one in my craft room. The push pins are perfect and don't go thru the board. You can also reinforce the back by gluing on a large card board or bristol board to help keep the larger ones stable.
susiehochyoung 967 2989
Dec 24, 2012
I think this is a Wonderful Idea. Would it be alright to use cardboard to cut cost ?
driftawayangel
Jan 03, 2011
I have made these using Prestretched painters canvas. Perfect for recycling old paintings at a flea market. Its already cut, the wood is there for your staples and its great if you want to sew buttons on where your ribbons mee for added security holding your pictures in.
Cervin54 9229601
Jan 01, 2011
I have made these using foam poster board purchased at Hobby Lobby. Glue two pieces together for sturdiness, and continue as above. The end result is a much lighter craft. And if you get very ingenious, you can cut out shapes and letters instead of just boring rectangles. : - )
Report Inappropriate Comment
Are you sure you would like to report this comment? It will be flagged for our moderators to take action.
Thank you for taking the time to improve the content on our site.