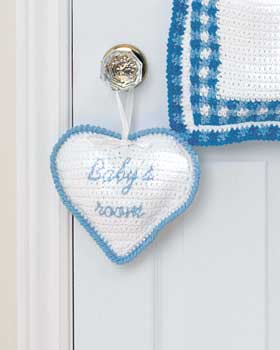
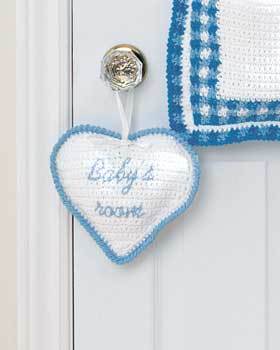
Heart Baby Room Sign
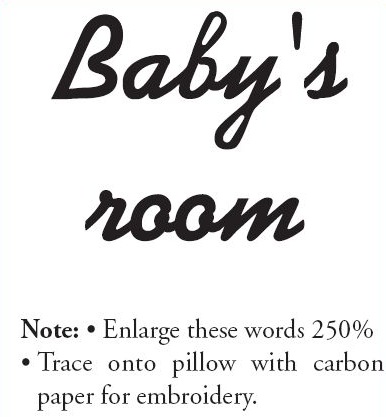
Embroider the words "Baby's Room" on a stuffed heart to hang from the door handle. This baby sign crochet pattern from Lily Sugar n' Cream is a cute way to decorate the nursery.
Materials:
- Yarn: Lily® Sugar ’n Cream (Solids: 70.9 g/2.5 oz/109 m/120 yds) 1 ball each of: White (MC) and Lt Blue (A).
- Crochet Hook: Size 3.5 mm (U.S. E or 4) crochet hook or size needed to obtain gauge
- Stuffing
- 1 yd [95 cm] of ribbon¼ inch [0.5 cm] wide.
Gauge: 16 sc and 20 rows = 4 ins [10 cm]
Instructions:
FRONT AND BACK (make alike)
With MC, ch 2.
1st row: (RS). 2 sc in 2nd ch from hook. Turn. 2 sc.
2nd row: Ch 1. 2 sc in first sc. 2 sc in next sc. Turn. 4 sc.
3rd to 13th rows: Ch 1.2 sc in first sc. 1 sc in each sc to last sc. 2 sc in last sc. Turn.
14th row: Ch 1. 1 sc in each sc to end of row. Turn. 26 sc.
15th row: As 3rd row. 28 sc.
16th to 22nd rows: As 14th row.
23rd row: (RS). Ch 1. Draw up a loop in each of next 2 sc. Yoh and draw through all 3 loops on hook - Sc2tog made. 1 sc in each of next 11 sc. Turn. Leave rem sts unworked.
24th row: Ch 1. 1 sc in each sc to last 2 sts. Sc2tog over last 2 sts. Turn.
25th row: Ch 1. Sc2tog over first 2 sts. 1 sc in each sc to last 2 sts. Sc2tog over last 2 sts. Turn.
26th row: Ch 1. Sc2tog over first 2 sts. 1 sc in each sc to last 2 sts. Fasten off. With RS of work facing, miss 2 sc of 22nd row. Join MC with sl st to next sc. Ch 1. 1 sc in same sp as last sl st. 1 sc in each sc to last 2 sc. Sc2tog over last 2 sc. Turn.
Next row: Ch 1.Sc2tog over first 2 sts. 1 sc in each sc to end of row. Turn.
Next row: Ch 1. Sc2tog over first 2 sts. 1 sc in each sc to last 2 sts. Sc2tog over last 2 sts. Turn.
Next row: Sl st in each of first 2 sts. Ch 1. 1 sc in each sc to last 2 sts. Sc2tog over last 2 sts. Fasten off.
With A, embroider phrase “Baby’s Room” on Front of pillow with stem st.
Note: When joining Front and Back, place stuffing inside.
Joining Back and Front: Place WS of Front and Back tog. With RS of Front facing you, join MC with sl st to first ch of foundation ch, working through both thicknesses, Ch 1. 1 sc in same sp as last sl st. 1 sc in each sp around.
Join A with sl st to first sc. Work 1 sc in each sc around, working 3 sc at bottom point. Join with sl st to first sc.
Next rnd: Ch 1. Working from left to right instead of from right to left, as usual, work 1 reverse sc in each sc around. Join with sl st to first sc. Fasten off.
Make a loop and bow with ribbon and sew on Pillow as shown in picture.
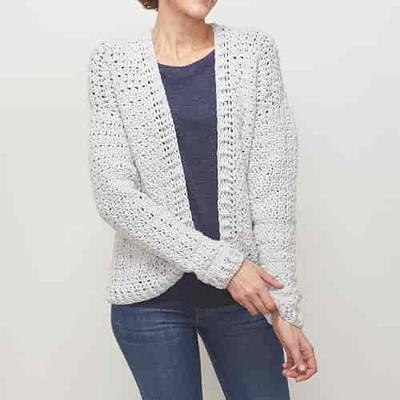
Read NextEasy Wear Crochet Cardigan Pattern
Your Recently Viewed Projects
Thanks for your comment. Don't forget to share!
noelani54 1238885
May 26, 2012
I am weighing in on the question posed on a recent email, on whether crocheting or knitting is better. Crocheting is definitely better for me. I have severe fibromyalgia and my left side is far worse than my right side. I have nerve damage in my left shoulder and my hand is very uncoordinated. I taught myself to crochet. It took a bit of practice to find a way that I could control the yarn in my left hand that worked, but I did it. Holding a knitting needle in my left hand, however, has proven to be impossible. I have tried repeatedly and just can't do it! So, for me, crochet is definitely the best! If I had the choice, though, I would do both!
wedge2
Jun 09, 2011
I love this heart pattern. I would also like to have the blanket pattern that is shown in the picture. Is it available?
susybee
May 02, 2010
This is a brilliant pattern I have used it for babies, teenagers, aunties many friends Sue Bradshaw
Report Inappropriate Comment
Are you sure you would like to report this comment? It will be flagged for our moderators to take action.
Thank you for taking the time to improve the content on our site.


