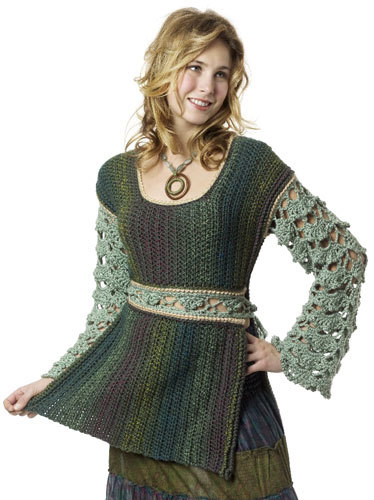
Fabulous Tunic
This tunic is a fun crochet pattern from Caron International Yarns you will love putting together. The edging on the skirt is cute and you'll have fun in it. It can be worn during the day or night.

Materials:
-
Caron International's Glimmer (85% acrylic, 15% polyester; 1.76 oz/50 g, 49 yds/45 m ball):
- #0020 Black, 16 (17, 19, 21) balls
- One pair size US10 (6 mm), knitting needles or size to obtain gauge
- One size K-10.5 (6.5 mm) crochet hook, or size needed to obtain gauge.
- Stitch Holder
- Yarn needle
Guage:
In Stockinette stitch, 10.5 sts and 22 rows = 4"/10 cm
In single crochet, 9.5 sts and 11 rows = 4”/10 cm
Stitches:
Stockinette stitch (St st)
Chain (ch)
Double crochet (dc)
Single crochet (sc)
Treble crochet (tr)
Notes:
- Upper bodice and upper sleeves are worked in Stockinette st.
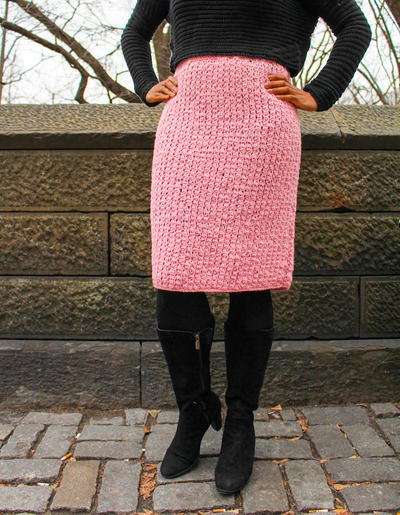
- Lower sleeves and skirt are crocheted in Lace pattern.
- Upper edge of Sleeves becomes shoulder edge at neckline and armhole.
- Back neck is shaped while working neckband.
Back Bodice
Beginning at lower edge of Bodice, cast on 44 (50, 54, 60) sts.
(RS) Begin St st; work even until piece measures 4 1/2" from beginning, end with a WS row.
Shape Armholes
(RS) Beginning this row, dec 1 st each side every row 6 times—32 (38, 42, 48) sts remain.
Continuing in St st, work even until piece measures 9 3/4 (9 3/4, 10 1/4, 10 3/4)"from beginning.
Bind off all sts.
Front Bodice
Beginning at lower edge of Bodice, cast on 44 (50, 54, 60) sts.
(RS) Begin St st; work even until piece measures 4 1/2" from beginning, end with a WS row.
Shape Armholes
(RS) Beginning this row, dec 1 st each side every row 6 times.
Work even until piece measures 6 1/2 (6 1/2, 7, 7 1/2)" from beginning; place a marker each side of center 16 (18, 18, 24) sts for neck—32 (38, 42, 48) sts remain when armhole shaping is completed.
Shape Neck
(RS) Work across to first marker; join a second ball of yarn and bind off center sts; work to end—8 (10, 12, 12) sts remain each side.
Working both sides at same time, at each neck edge, dec 1 st every other row 6 times, every row 0 (2, 4, 4) times—2 sts remain.
Continuing in St st, work even until piece measures 9 3/4 (9 3/4, 10 1/4, 10 3/4)" from beginning.
Bind off all sts.
Upper Sleeves
Cast on 36 (36, 40, 42) sts.
(RS) Begin St st; work even until piece measures 4 1/2" from beginning, end with a WS row.
Shape Cap
(RS) BO 3 sts at beginning of next 2 rows—30 (30, 34, 36) sts.
(RS) Dec 1 st each side every row 8 times—14 (14, 18, 20) sts remain, end with a RS row.
Work even three rows, end with a WS row.
(RS) Dec 1 st each side this row—12 (12, 16, 18) sts remain.
Continuing in St st, work even until piece measures 9 3/4 (9 3/4, 10 1/4, 10 3/4)" from beginning.
Bind off all sts.
Skirt (Back and Front – both alike)
With RS facing, using crochet hook, join yarn at cast on edge.
Row 1: Ch 1, sc in each st of cast on edge across, turn—44 (50, 54, 60) sc.
Row 2: Ch 1, work 2 (1, 1, 1) sc in first sc, sc in each st across to last st, work 2 (1, 1, 1) sc in last st, turn—46 (50, 54, 60) sc.
Row 3: Ch 1, sc in first st, work 2 (1, 1, 1) sc in next sc, sc in each st across to last 2 sts, work 2 (1, 1, 1) sc in next st, sc in last st, turn—48 (50, 54, 60) sc.
Row 4: Ch 3, dc in first 0 (1, 3, 0) sts, dc3tog over next 3 sts, * ch 1, [tr, ch 1] twice, [tr, ch 1, tr] in next st, [ch 1, tr] twice, ch 1, dc7tog over next 7 sts; repeat * across, end last repeat dc4tog instead of dc7tog, dc in last 0 (1, 3, 0 ) sts, turn.
Row 5: Ch 3, dc in first 0 (1, 3, 0) sts, sk dc4tog in previous row, dc in ch-1 space, * [dc in tr, dc in ch-1 space) 5 times, dc in next tr, dc2tog by [insert hook in next 2 ch-1 spaces, skipping dc7tog]; repeat from * across, end dc2tog over [last ch-1 space and top of dc3tog, dc to end, turn—0 (1, 3, 0) dc at end of row.
Row 6: Ch 3, dc in first 0 (1, 3, 0) sts, skip dc2tog, work dc3tog over next 3 dc, * ch 1, [tr in dc, ch 1] twice, [tr, ch 1, tr] in next dc, [ch 1, tr in dc] twice, ch 1, dc7tog over next 7 sts; repeat from * across, end dc4tog, dc to end, turn—0 (1, 3, 0) dc at end of row.
Repeat Rows 5 and 6 for pattern.
Work even until piece measures 27 1/2 (27 1/2, 30, 32 1/2)", or desired length from underarm, end with a RS row, turn.
(WS) Ch 1, sc in each st across.
Fasten off.
Lower Sleeve
With RS facing, using crochet hook, join yarn at cast on edge.
Row 1: Ch 1, sc in each st of cast on edge across, turn—36 (36, 40, 42) sc.
Rows 2 and 3: Ch 1, sc in each st across, turn.
Row 4: Ch 1, work 1 (1, 2, 2) sc in first sc, sc across to last sc, work 1 (1, 2, 2) sc in last sc, turn—36 (36, 42, 44) sc.
Row 5: Ch 1, sc in each st across, turn.
Row 6: Ch 3, dc in each of first 0 (0, 3, 4) sts, work dc3tog over next 3 sts, * ch 1, [tr, ch 1] twice, [tr, ch 1, tr] in next st, [ch 1, tr] twice, ch 1, work dc7tog over next 7 sts; repeat from * across, end dc4tog, dc to end, turn—0 (0, 3, 4) dc at end of row, turn.
Row 7: Ch 3, dc in each of first 0 (0, 3, 4) sts, skip dc4tog, dc in ch-1 space, * [dc in tr, dc in ch-1 space] 5 times, dc in next tr, dc2tog by [insert hook in next 2 ch-1 spaces, skipping dc7tog]; repeat from * across, end dc2tog over last ch-1 space and in top of dc3tog, dc to end—0 (0, 3, 4) dc at end of row, turn.
Row 8: Ch 3, dc in each of first 0 (0, 3, 4) sts, skip dc2tog, work dc3tog over next 3 sts, * ch 1, [tr in dc, ch 1] twice, [tr, ch 1, tr] in next dc, [ch 1, tr in dc] twice, ch 1, dc7tog over next 7 sts; repeat from * across, end dc4tog, dc to end, turn—0 (0, 3, 4) dc at end of row.
Repeat Rows 7 and 8 for pattern.
Work even until piece measures 16 (17, 18, 18)" from beginning of underarm shaping, end Row 7 of pattern, turn.
Next Row: Ch 1, sc in each st across.
Fasten off.
Finishing
Sew Sleeve to armhole edge, Front and Back. Note: Upper edge of sleeve will be shoulder edge. Sew sleeve and side seams.
Neck Edging
With RS facing, using crochet hook, join yarn at center Back neck.
Round 1: Ch 1, sc evenly around neck edge; join with a slip st to first st, turn.
Round 2: Ch 1, sc in each st around.
Fasten off.
Back Neckband
With RS facing, join yarn at right Front, at Sleeve/right Front seam.
Row 3: Ch 2 (counts as first dc), *skip sc, dc in next sc; repeat from * across top of Sleeve, along Back neck, and across top of left sleeve to Sleeve/left Front seam, turn.
Row 4: Ch 3 (counts as first dc and ch 1), * skip dc, ch 1, dc in next dc; repeat from * across to last 2 dc at opposite side; ch 3, join with a slip st to top of last dc on Row 3.
Fasten off.
Using yarn needle, weave in all ends.

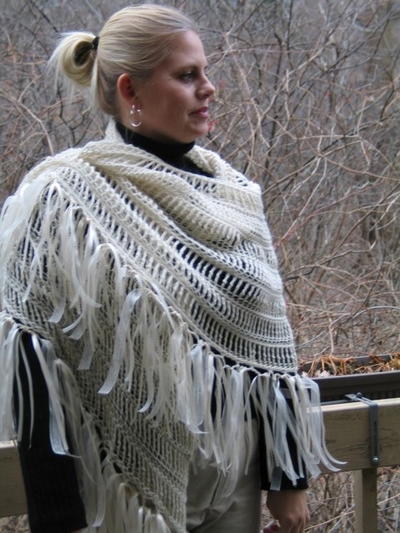
Read NextSidewalk Shawl Crochet Pattern
Your Recently Viewed Projects

Thanks for your comment. Don't forget to share!
Cheryl Y
Oct 30, 2018
This Fabulous Tunic looks so great but one needs to know how to knit and crochet if I'm reading the pattern right. I tried knitting when I was younger and it just wasn't for me. I crochet a lot of cloths and things, but this one isn't for me. I was hoping it was all crocheted.. Thanks anyways.
donnamichellesmith 4794820
Feb 01, 2014
It is very difficult to see the detail of the tunic but the pattern looks interesting. I will give it a try. I love that there isn't a difficulty rate. Alot of times I will avoid attempting a project based on that alone.
maryannbyrne 05962 55
Mar 28, 2013
The link to the pattern on caron.com does not work, so no way to find sizes.
Annie and my artif acts
Sep 19, 2012
Well, I found this pattern on the Caron International website, but, it wouldn't load it. I was hoping to be able to save it without the knitted info... Is this a crochet or a knitted tunic? With knitted and crocheted directions intermingled it is VERY difficult to read.
donnamichellesmith 4794820
Feb 01, 2014
You might find that working it with the Knook may make it less daunting. Knooking is working with a crochet hook that has an attached string, Leisure Arts has many how to videos that show how to create knit and purl stitches with the knook. That is my plan to attempt this pattern. I cannot seem to be able to work with knitting needles, so the Knook is a fantastic alternative. Good luck
Sweet Linda
Feb 17, 2011
When I saw this tunic, I thought, "WOW!!! This is really nice." How disappointing it was to realize that it was not a crocheted tunic but a tunic that is only half crocheted the other half being knitted. It would have been nice to know from the "get go" that it was half knitted.
JustJJ
Jul 20, 2010
You can find the full pattern including sizes at: http://www.caron.com/projects/gl/G1s_tunic.html
nhlulu
Apr 05, 2010
Would be nicer if she not only gave the stitch counts for various sizes but also stipulated the sizes they represent!
Report Inappropriate Comment
Are you sure you would like to report this comment? It will be flagged for our moderators to take action.
Thank you for taking the time to improve the content on our site.