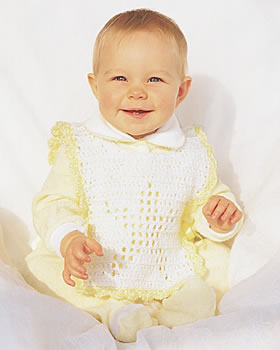
Crochet Star Baby Bib Pattern
Create a cute yellow and white star bib for baby with this baby bib crochet pattern from Bernat Yarns. Because this crochet bib pattern requires following a chart, this pattern is intended for intermediate crocheters. Once you get the hang of using a chart, you can create personalized letters and other shapes in crochet.
Materials:
- Yarn: Bernat Baby Coordinates (160 g/5.6 oz) Main Color (MC) 1 ball, Contrast A 1 ball
- Crochet Hook: Size 4 mm (U.S. G or 6) or size needed to obtain gauge.
- Star chart here
Gauge: 20 dc and 9 rows = 4 ins 10 cm.
Stitch Glossary:
Dc2tog = (YO and draw up a loop in next st. YO and draw through 2 loops on hook) twice. YO and draw through all loops on hook - dc2tog made.
Instructions:
FRONT: With MC, ch 33.
1st row: (RS). 1 dc in 4th ch from hook. 1 dc in each ch to end of ch. 31 dc.
2nd row: Ch 3. Miss first dc. 1 dc in each of next 6 dc. Ch 1. Miss next dc. 1 dc in each of next 15 dc. Ch 1. Miss next dc. 1 dc in each dc to end of row. Rows 1 and 2 of chart are complete.
Beg with row 3, work chart to end of chart reading RS rows from right to left and WS rows from left to right, noting each row ends with ch 3. Turn.
Next 2 rows: Miss first dc. 1 dc in each dc to end of row. Ch 3. Turn.
Shape neck: Next row: (RS). Miss first dc. 1 dc in each of next 6 dc. Dc2tog over next 2 dc. 1 dc in next dc (neck edge). Ch 3. Turn. Leave rem sts unworked.
Next row: Miss first dc. Dc2tog over next 2 dc. 1 dc in each dc to end of row. Ch 3. Turn.
Next row: Miss first dc. 1 dc in each of next 4 dc. Dc2tog over next 2 dc. 1 dc in next dc. Ch 3. Turn. 7 dc.
Work 3 rows even in dc omitting turning ch at end of last row. Fasten off.
With RS of work facing, miss next 11 dc. Join yarn with sl st to next dc. Ch 3.
Next row: Miss first dc. Dc2tog over next 2 dc. 1 dc in each of next 6 dc. 1 dc in next dc. Ch 3. Turn.
Next row: Miss first dc. 1 dc in each dc to last 3 dc. Dc2tog over next 2 dc. 1 dc in last dc. Ch 3. Turn.
Next row: Miss first dc. Dc2tog over next 2 dc. 1 dc in each of next 4 dc. 1 dc in next dc. Ch 3. Turn. 7 dc.
Work 3 rows even in dc omitting turning ch at end of last row. Fasten off.
BACK: Ch 33.
1st row: (RS). 1 dc in 4th ch from hook. 1 dc in each ch to end of ch. 31 dc. Ch 3. Turn.
2nd row: Miss first dc. 1 dc in each dc to end of row. Ch 3. Turn.
Rep last row 14 times more omitting turning ch at end of last row (16 rows total).
Next row: Miss first dc. 1 dc in each of next 14 dc (back opening). Ch 3. Turn. Leave rem sts unworked.
Work 5 more rows in dc omitting turning ch at end of last row. Fasten off. With RS of work facing, miss next dc. Join yarn with sl st to next dc. Ch 3.
Next row: 1 dc in first dc and each dc to end of row. Ch 3. Turn.
Work 5 more rows in dc omitting turning ch at end of last row. Fasten off.
FINISHING: Sew shoulder seams. With RS of work facing, join yarn with sl st at bottom of back opening. Ch 1. Work sc evenly up back opening, around neck and down other side of back opening. Join with sl st to first sc. Fasten off.
Border: 1st rnd: With RS of work facing join A with sl st at center of Back. Ch 1. Work 14 sc to corner. Work 3 sc in corner. Work 87 sc evenly along side. Work 3 sc in next corner. Work 29 sc evenly across lower front edge. Work 3 sc in next corner. Work 87 sc evenly along side. Work 3 sc in next corner. Work 14 sc across to center back. Join with sl st to first sc. 243 sc.
2nd rnd: 1 sc in first st. Miss next st. 5 dc in next st. Miss next st. 1 sc in next st. Rep from to last 3 sc. Miss next st. 5 dc in next st. Miss next st. Join with sl st to first sc. Fasten off.
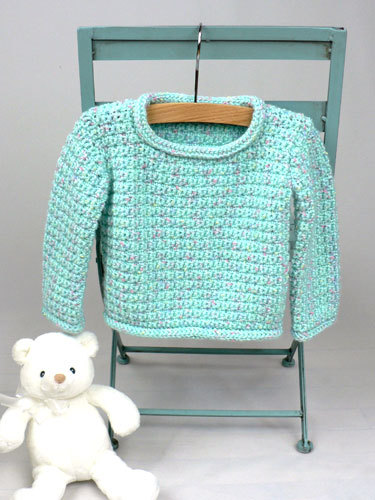
Read NextBaby Pullover Sweater
Your Recently Viewed Projects
Thanks for your comment. Don't forget to share!
tricotinange
Oct 07, 2010
I will make one for my sister and myself. When we go out dining and we have pasta and meals with sauces there's always some spilling on our blouses ... "being oversize" . Love the pattern. Thank you! Tricotinange
mememouse
Mar 16, 2010
I thought maybe the collar came with it but I didn't see directions for it but thats ok. I'll giver er a go anyway. I'm making the star blanket too so I thought I could add this as an extra gift with the blanket. Thanks
Report Inappropriate Comment
Are you sure you would like to report this comment? It will be flagged for our moderators to take action.
Thank you for taking the time to improve the content on our site.