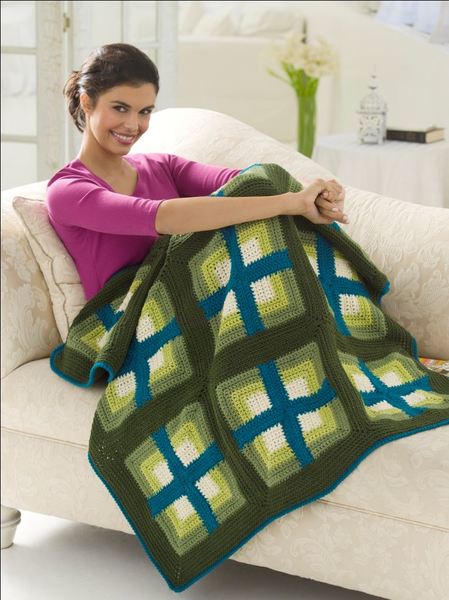
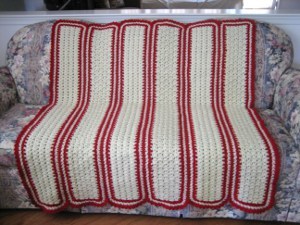
Picturesque Windows Afghan
If it's too cold to sit by the window, curl up with an afghan that looks like a picturesque window scene. This easy crochet afghan is a great place to start for a beginner crocheter. Made using bright and bold colors, this Picturesque Windows Afghan is a great way to add some color to your home, no matter what the season. Use the colors listed here or create your own design by using yarn colors that match your home decor. No matter how you do it, this afghan is sure to add some class and style to any room in your home.

Materials:
- 1 skein Red Heart® Super Saver® yarn in Aran (A)
- 1 skein Red Heart® Super Saver® yarn in Tea Leaf (B)
- 2 skeins Red Heart® Super Saver® yarn in Medium Thyme (C)
- 2 skeins Red Heart® Super Saver® yarn in Dark Sage (D)
- 2 skeins Red Heart® Super Saver® yarn in Real Teal (E)
- 5mm [US H-8] and 3.75mm [US F-5] crochet hooks
- Yarn needle
Gauge: 14 sts = 4"; 14 rows = 4" in sc with larger hook. CHECK YOUR GAUGE. Use any size hook to obtain the gauge.
Instructions:
When changing colors or ending a color, leave a 7" tail for sewing squares together.
Small Square (Make 48)
- Row 1 (Right Side): With larger hook and A ch 7; sc in 2nd ch from hook and in the next 5 ch; turn – 6 sc.
- Rows 2-6: Ch 1, sc in each sc across; turn. Fasten off at end of Row 6.
- Row 7: With right side facing, attach B in first sc; ch 1, sc in first 5 sc, 3 sc in corner st, sc in end of next 5 rows; turn – 13 sc.
- Rows 8-10: Ch 1, sc in each sc to center sc of corner, 3 sc in corner sc, sc in each sc across; turn – 19 sc at end of Row 10. Fasten off at end of Row 10.
- Row 11: With right side facing, attach C in first sc; ch 1, sc in each sc to center sc of corner, 3 sc in corner sc, sc in each sc across; turn – 21 sc.
- Rows 12-14: Repeat Rows 8-10 – 27 sc at end of Row 14. Fasten off at end of Row 14.
- Row 15: With right side facing, attach E in side of first sc of last row; ch 1, sc in same row end as joining, sc in next 12 row ends, 3 sc in corner, sc in next 13 row ends; turn – 29 sc.
- Rows 16-17: Repeat Rows 8 and 9 – 33 sc at end of Row 17. Fasten off.
Assembly
- Make 12 large squares by sewing 4 small squares together with E forming a cross at the center of each large square.
Large Square Edging
- Rnd 1: With right side facing and larger hook, attach D in any corner; ch 1, [3 sc in corner, sc to next corner] 4 times; join with a slip st in first sc; TURN.
- Rnds 2-4: Ch 1, sc in each sc around and 3 sc in center sc of corner 3-sc group; join; turn. Fasten off at end of Row 4.
Finishing
- Sew large squares together in 4 rows of 3 squares.
Border
- Rnd 1: With right side facing and larger hook, attach D in back loop of center sc of any corner; ch 1, [3 sc in corner, sc in back loop of each sc to center sc of next corner] 4 times; join with a slip st in back loop of first sc.
- Rnds 2 and 3: Ch 1, sc in back loop of each sc around and 3 sc in center sc of corner 3-sc group; join. Fasten off at end of Rnd 3.
- Rnd 4: Repeat Rnd 1 with E except join in both loops of first sc at end of rnd.
- Rnd 5: With smaller hook, ch 1, working from left to right and working in both loops, work Reverse Sc in each sc around; join. Fasten off. Weave in ends.


![17 Temperature Blanket Ideas and Alternatives [FREE Patterns]](http://irepo.primecp.com/2022/11/540664/Temperature-Blanket-Ideas_Large400_ID-4977917.png?v=4977917)