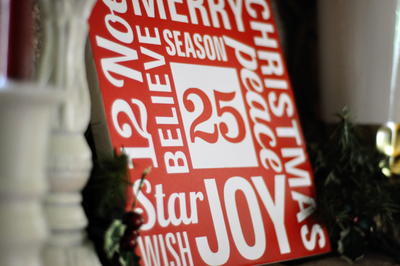
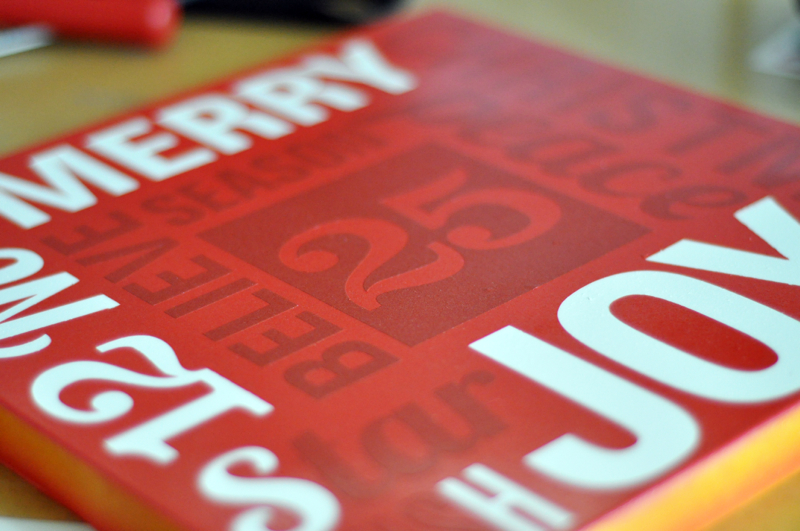
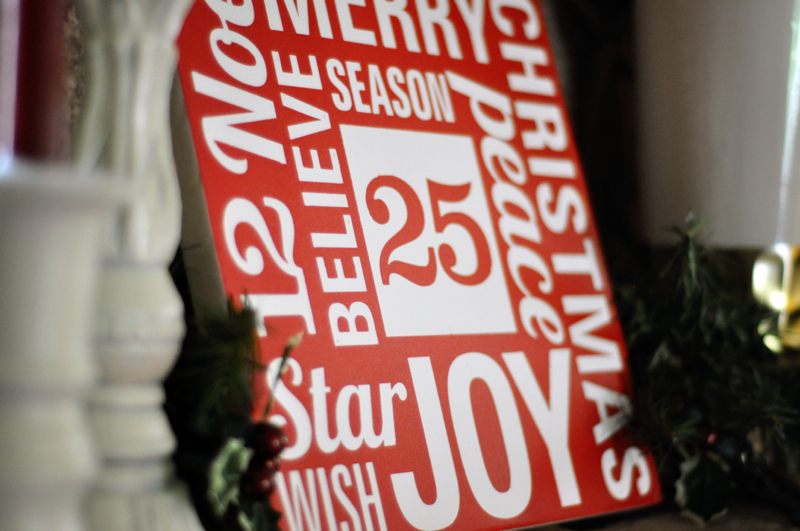
Holiday Subway Wall Art Project

Create a modern and festive piece of wall decor with the Holiday Subway Wall Art Project. Using Krylon spray paint and stickers, you can create your own subway style artwork to bring in the Christmas spirit. This free tutorial will help you learn how to spray paint with ease and you will love the result. Make several of these pieces to give as gifts this year - your friends are sure to love them!
Primary TechniquePainting

SeasonWinter
Materials:
- Krylon® ColorMaster™ Paint + Primer - White
- Krylon® Craft Series Shimmer Metallic - Red Shimmer
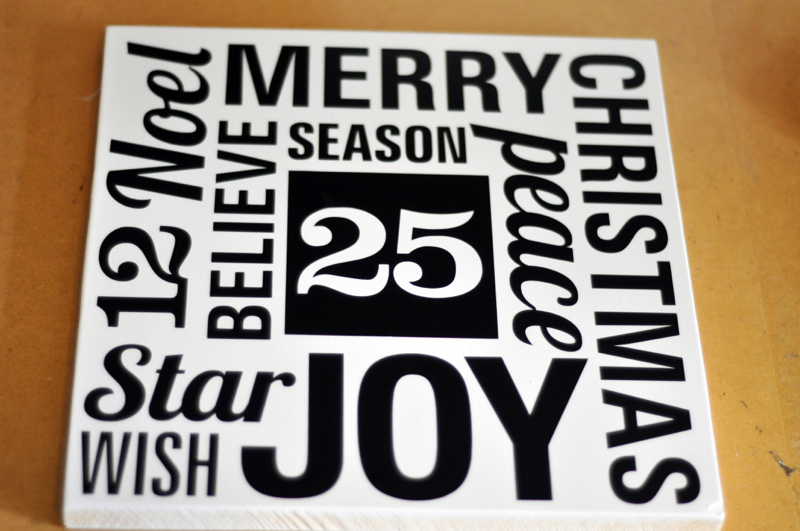
- Unfinished wood board, I used one 11” x 11” and ½” thick
- Self adhesive vinyl and backing paper
- Electronic die cutting machine, I used a Cameo Silhouette. You could also cut your letters free hand or use letter stickers in various sizes and fonts
- Brayer
- Craft knife
- Painter’s tape or washi tape
Instructions:
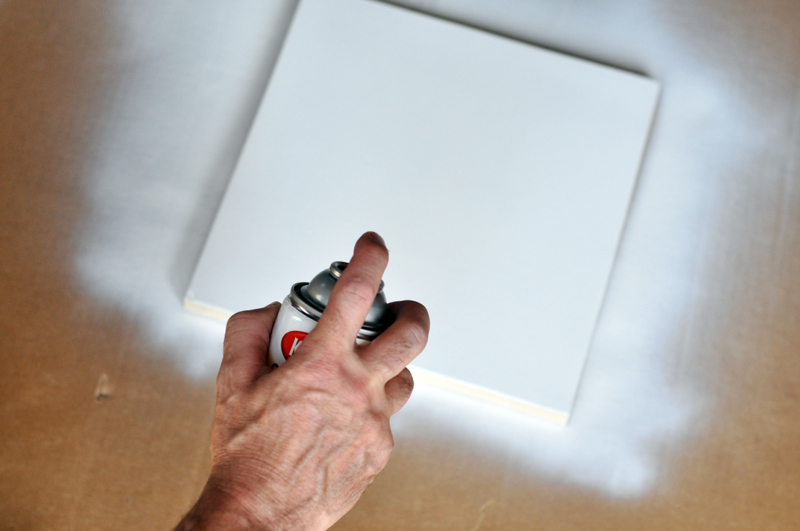
- Decide on a design for your piece, this will help you determine what size to cut your wood board. I decided on a design a little smaller than 11” so I had my piece cut to 11” square. Sand the edges and make sure to wipe down with a sponge or damp cloth before painting so as to remove any particles or dust.
- In a well ventilated area, I used my garage, lay down cardboard or paper and place your board on it. Start with the Krylon Color Master white paint first. Lightly spray back and forth building up layers of color until the desired color has been reached. Because the Color Master paint has a built in primer it covers easily and completely. Don’t forget to spray the sides as well for a finished look to your project. Once you are finished painting, leave your piece to completely dry, I let mine sit overnight as it was humid the day I painted and I wanted to ensure that my surface would be ready for the next step
.
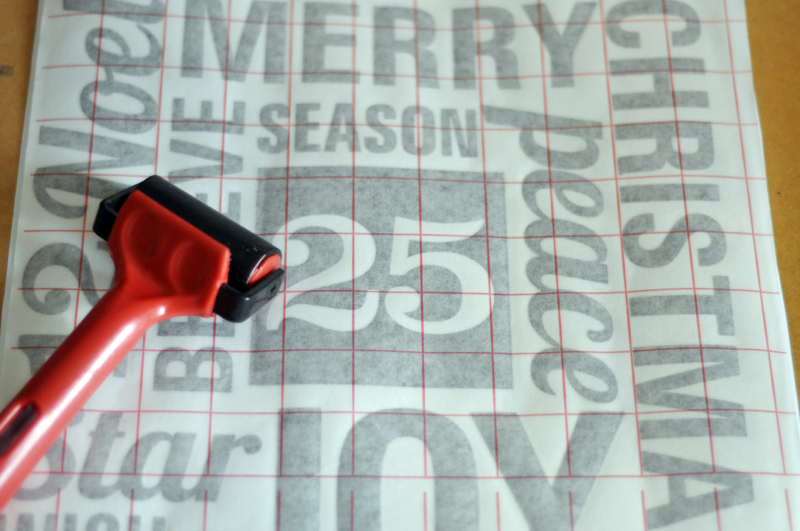
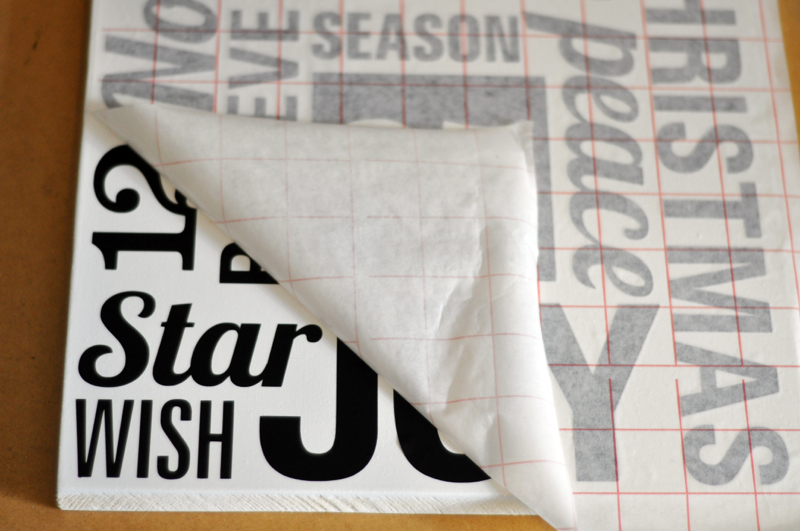
- Using your electronic cutting machine, cut your design onto self adhesive vinyl. If you do not have a Cameo, Cricut etc., you can cut letters by hand from the vinyl of use letter stickers. Once you have cut the design from the vinyl, use backing paper to transfer the design to your painted wood piece. I used a brayer to apply it, you can also use a credit card, popsicle stick or rub firmly with your hands. Pull away the backing paper and discard, you should now have you wood piece with only the vinyl words on it.

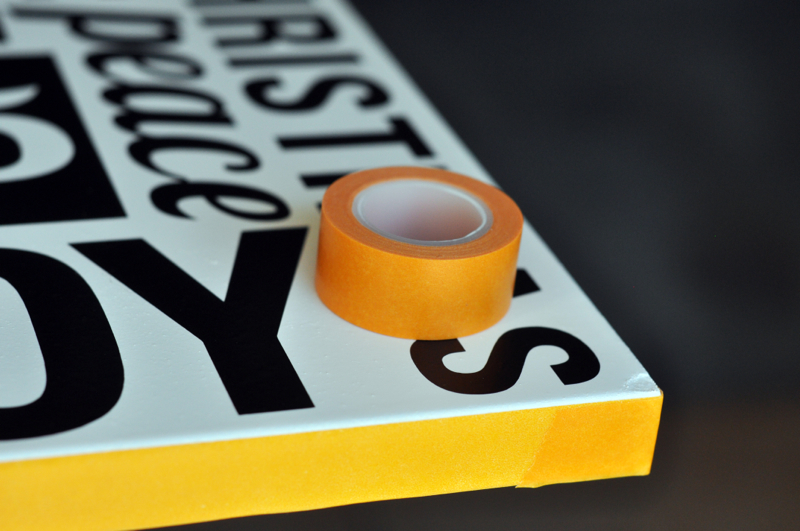
- To ensure I kept clean, white edges, I taped off all the way around the wood on the sides. You can use painter’s tape to do this, I used washi tape because it was what I had on hand!
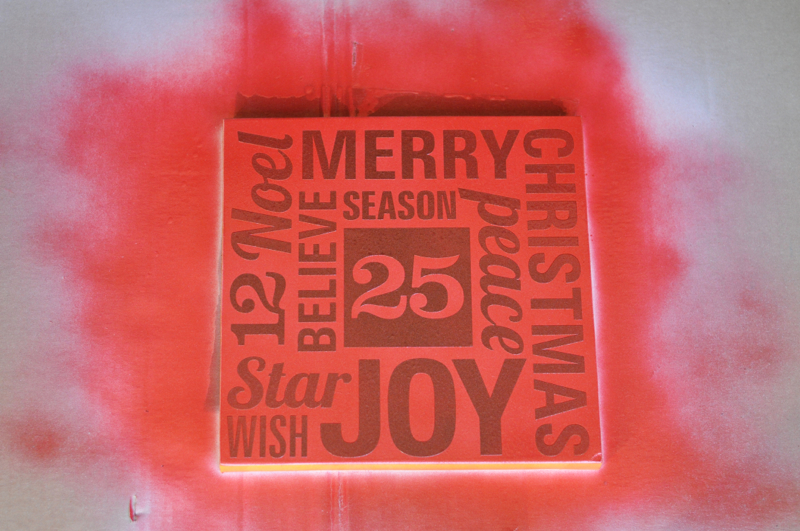
- Return the piece to your well ventilated area and apply Krylon Craft Series paint in your choice of color. Apply in the same manner that the first layer was applied and allow time to completely dry. You will be painting over the vinyl letters in this step.
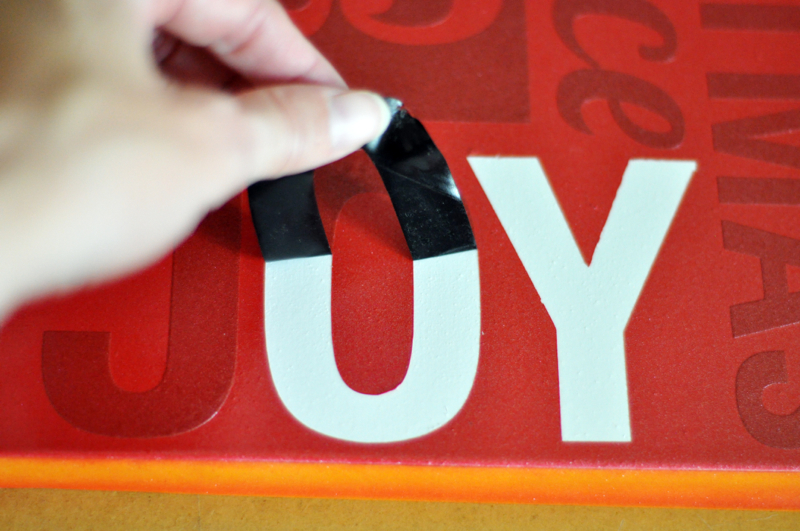
- Once your piece has been allowed to dry completely, you are now ready to remove the vinyl letters. Using a craft knife, carefully and gently pull the edge of the vinyl letters up, peel off and discard. If you start to pull the letters off and paint is coming up as well, you have not let it dry long enough, you should have clean edges where the vinyl is removed. Once all of the vinyl has been removed, remove the tape from the edges and you are done!

You can find this project, as well as many more, in our new eBook, Make it Yours®: How to Spray Paint Furniture, Home Decor Projects, Holiday Crafts and More from Krylon®! Download your own free copy today!
Read NextBottle Cap Christmas Art