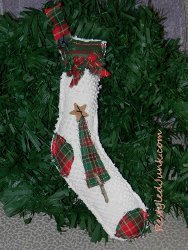
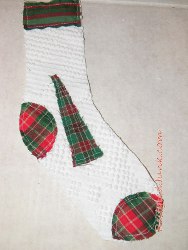
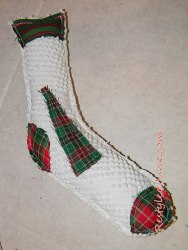
Repurposed Bedspread Stocking
If you want to make Christmas stocking crafts but don't want to spend a ton of money on fabric, consider working with materials you already have. Take an old, torn bedspread and turn it into a Repurposed Bedspread Stocking from Cyndee Kromminga to hang during the holidays.

Materials:
- Women's crew sock
- Card stock
- Pencil
- Scissors
- White chenille bedspread
- Ruler
- Homespun Christmas fabric, 3 different designs
- Straight pins
- Sewing machine
- Stuffing
- Button
- Black embroidery floss
- Drill and small bit
- 1-inch wooden star
- Stick
- Craft glue
Instructions:
-
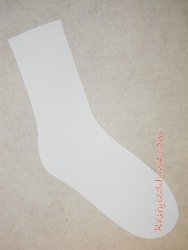
Lay a women's crew sock on card stock and trace around it. Cut out the shape. This is the basic shape for your stocking dangler. Trace the toe and heel shapes on card stock. Mirror the inside edges of the shapes to the outside curves. Cut out the shapes.
-
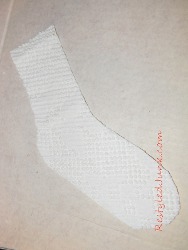
Place the stocking pattern on one layer of a white chenille bedspread. Trace around the shape and cut out. This project was made using three different Christmas homespun fabrics. From the first fabric cut out a heel shape, a toe shape, and rip a 1-inch-wide by 18-inch strip and a 1-inch-wide by 5-inch-long strip. From the second fabric cut a rectangle 1 1/2 inches wide by the width at the top of the stocking. Lastly, from the third fabric cut a 5-inch-tall tree triangle with a 1 1/2-inch base.
-
Place the toe and heel fabric shapes over the toe and heel of the stocking. Lay the rectangle over the stocking on the top edge. Position the triangle tree shape in the center of the stocking. Pin all the fabric pieces to the chenille. Top stitch around the edges of each shape to attach.
-
Place the chenille stocking shape on the chenille bedspread with the appliques facing up. Pin the stocking to the bedspread. Sew the pinned stocking to the bedspread using a 1/4-inch seam allowance. Do not sew the top end of the stocking. Using the top stocking as a guide, cut out the shape from the bottom layer. Do not turn. The raw edges will remain on the outside. Stuff the stocking and sew the top edge closed.
-
Wrap the 18-inch strip around the bottom edge of the cuff. Tie the ends into a bow on the front of the stocking. Fold the 5-inch strip in half, matching the two short ends. Lay the short ends over the top back corner of the stocking. This is the hanging loop. Place a button over the ends. Attach the the button and hanging loop through all layers using black embroidery floss.
-
Drill two small holes in the center of a wooden star to create a button. Attach the star button to the top of the tree using black embroidery floss. Gather a stick from your backyard. Break the stick to 1 1/2 inches long. Apply craft glue to one side of the stick and center vertically over the bottom edge of the tree. Allow the glue to dry.
Read NextScandinavian Knit Stocking Pattern